CADD MicrosystemsDecember 9th, 2016
Sweeps are an interesting entity within Revit. They definitely have their own personality sometimes and while they can be useful, we often only want to see them in particular views. Fortunately, walls are one of the family categories within Revit where users are allowed to create subcategories that can be used to control visibility.
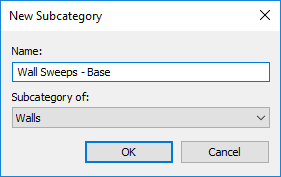
The first thing to do is to create the subcategories that you want. You can add these at any time and assign sweeps to them at any point, so don't worry if you don't know all the subcategories you want the beginning.
Open up Object Styles, and click on the "Walls" category.
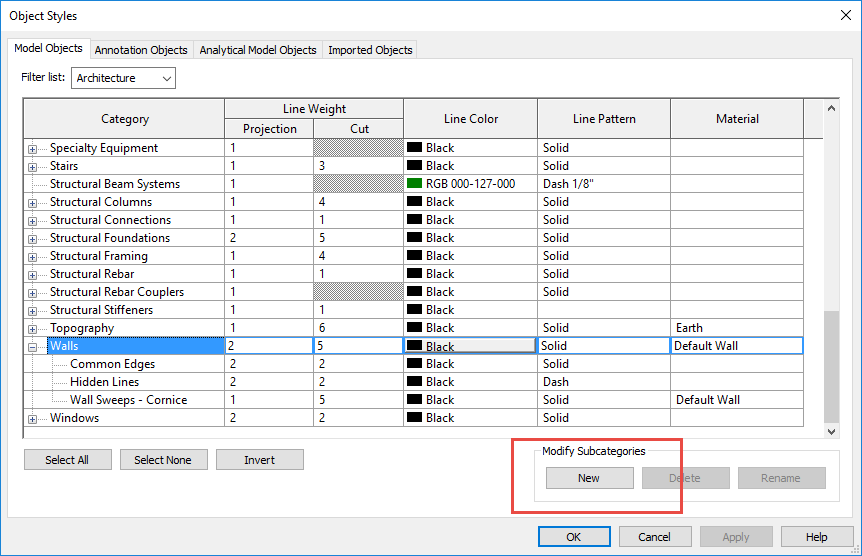
Click the "New" button under "Modify Subcategories" and name your categories. As always, be deliberate with your naming, following your office standards.
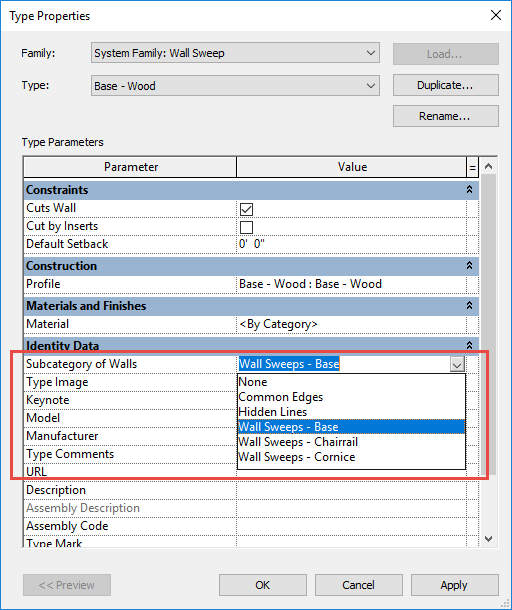
From here, create your new wall sweep types. Under the "Subcategory of Walls" parameter, choose the new subcategory you created that relates to the sweep type (base, cornice, chairrail, etc.).
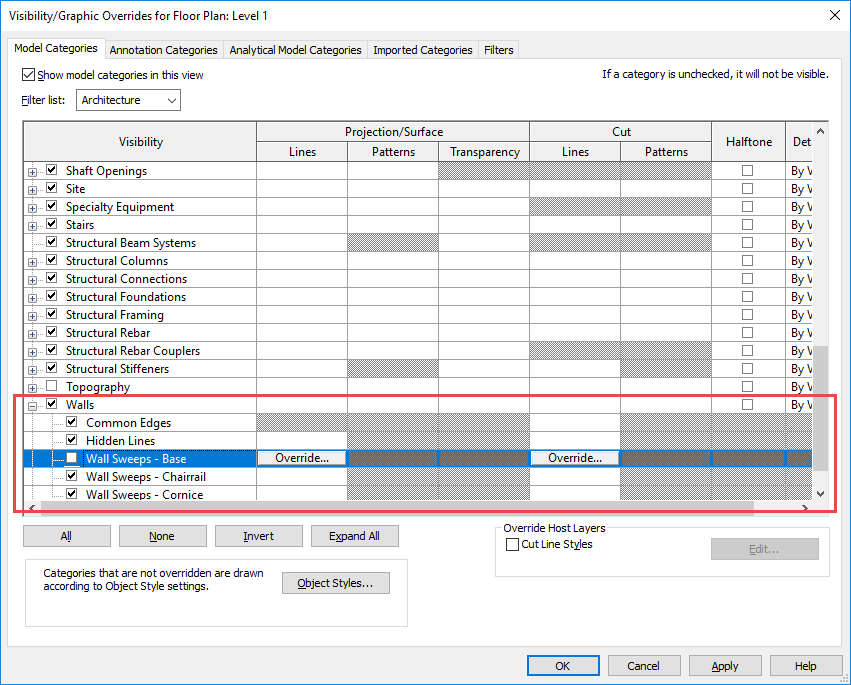
Once you have assigned it to the category you want, now you can use that category to control the visibility through the visibility graphics of each particular view, with filters, and through view templates.
You can, to a certain extent, do this to control other things, but as I've delved into that, I've realized that there are more issues with this, so stay tuned for another blogpost talking about that (once I've figured out why things aren't behaving the way that I expect them to).
Happy Reviteering!