CADD MicrosystemsMay 23rd, 2016
 Reason 1: Autodesk Steel Connections for Revit
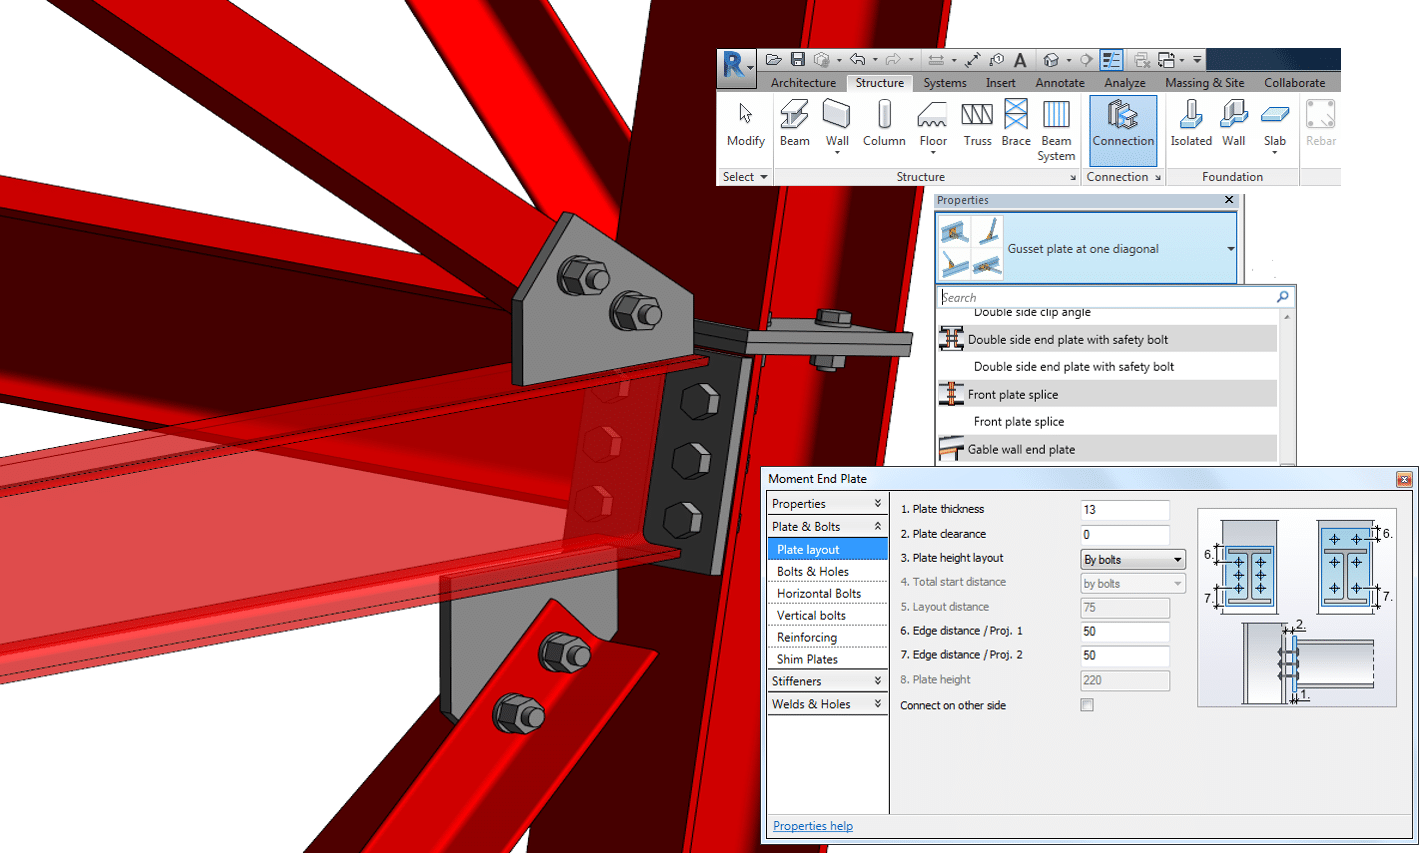
This is one of the best enhancements to come to Revit Structure in several versions: the ability to add highly detailed parametric steel connections easily with just a couple clicks. This is not an add-on or extension. This is a tool incorporated into the Revit 2017 interface. Not only will this tool add plates, angles, and bolts for all sorts of steel connections, it will also extend or cope framing members to the connection. Very detailed and specific properties can be applied to the different types of connections, such as: plate, bolt, and hole sizes and shapes; reinforcing, shim, and stiffener plates; even welding information.
With Autodesk Steel Connections for Revit, design and documentation coordination is improved, with that coordination transforming into collaboration with steel fabricators.
Reason 2: Structural Connectivity
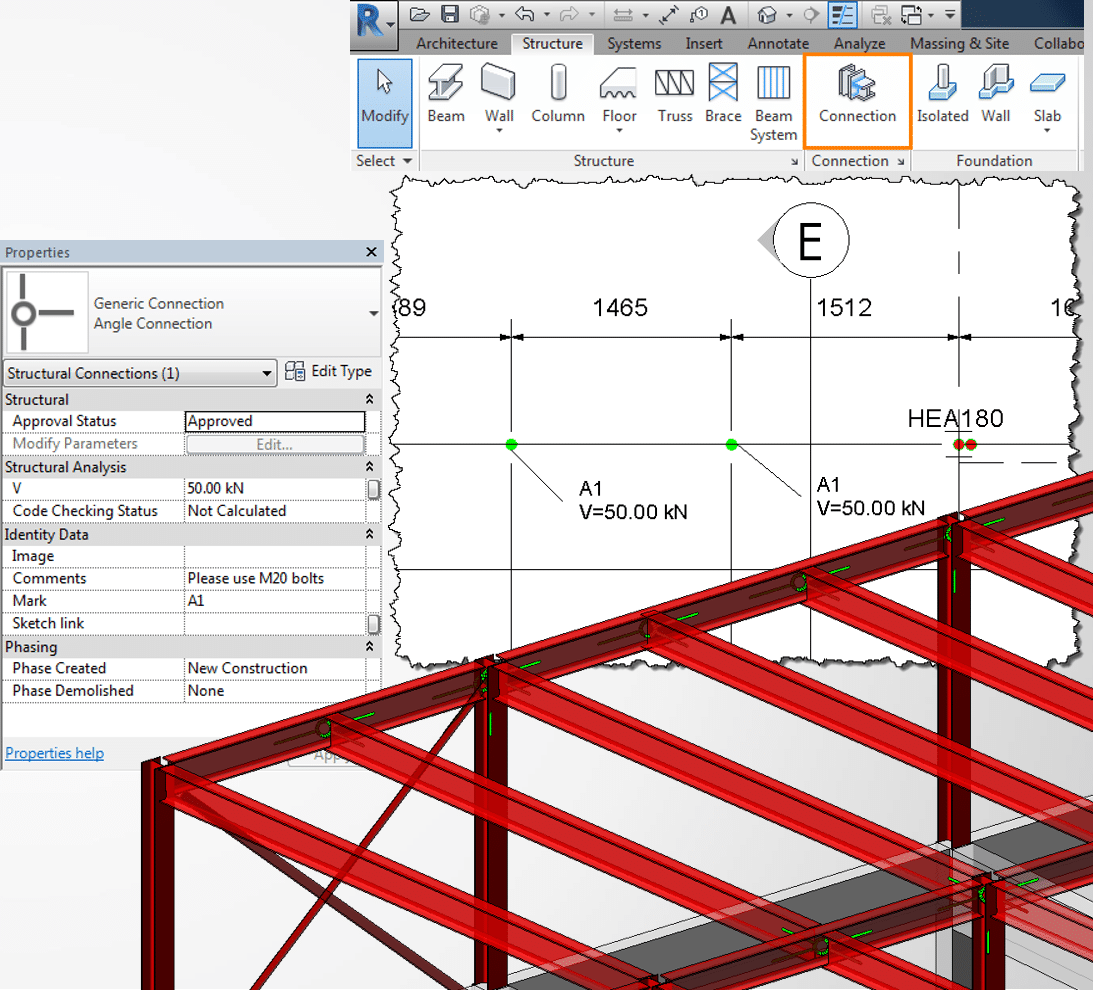
With the introduction of Autodesk Steel Connections for Revit, a new element relationship is also introduced: The Structural Connection. The category “Structural Connection” has always existed, and this category usually includes the component families of plates, bolts, and mounting parts used to model structural connections. But now a new system family element can be applied that creates a relationship between multi-material structural framing elements. Once this relationship is established, it can be utilized in many ways, such as applying a Steel Connection, or supplying information about the connection with several built in parameters for approval and code checking status. Extended data for schedules and tags, even pictures and links to design reports about the particular connections can be stored with the connections. The symbolic connectors can be assigned colors based on these parameters for an easier review and approval process, all of which improves the workflow between design and detailing within the BIM environment.
Reason 3: Continued Improvements to Concrete Reinforcement
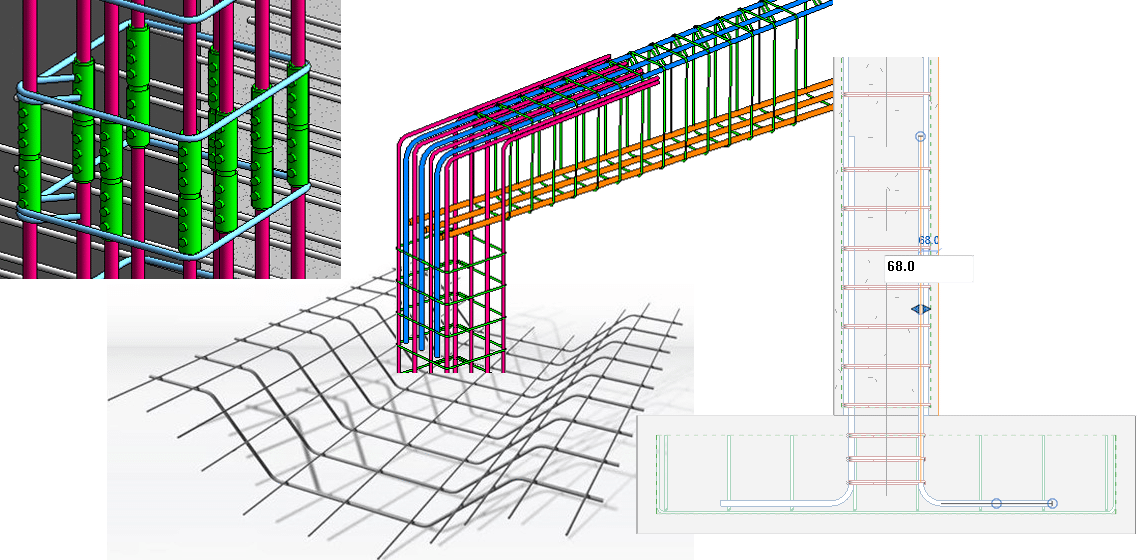
Every new version of Revit has included several improvements to the ways in which concrete reinforcing is modeled and documented, and Revit Structure 2017 is no exception. From new family-based, fully customizable reinforcement connectors, to bent fabric sheets and more flexible variable rebar distribution, placing rebar has never been easier. And one of the biggest advancements is the graphical rebar constraints management. This new in-canvas tool is much easier to use than the dialog box it replaces. Now place standard rebar shapes that snap to adjacent standard rebar or constrain them to host faces. The user interface highlights each rebar segment that can be constrained, along with available targets. The snap constraint maintains its relationship when you place, move, drag, or copy rebar.
All this new and improved functionality helps increase productivity and provides faster model definition completeness, helping to keep designs coordinated and accurate.
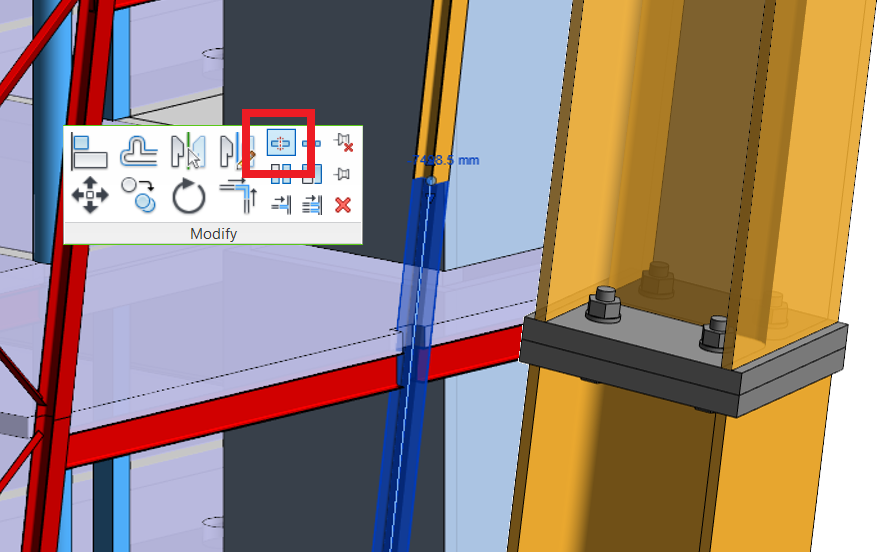
Reason 4: Improved Structural Columns and Foundations

This is one of those simple improvements that just make life easier. Now when a column is selected and the contextual tool “Attach Top/Base” is utilized, Structural Foundations are now included as a category. So if the depth elevation of the footing changes, the column attached to it will automatically adjust its length.
So simple and such an improvement to user productivity that it makes one wonder why it wasn’t there in the first
Reason 5: Split Element Modify Tool Now Works on Structural Columns
The Split Element tool can be used to split Structural Framing, and now it can also be used to split Structural Columns. This ability allows for ease of column placement: place one column from the base level of the project to the top level, then just use the Split Element tool to create the Column splice. No need to add two separate columns, one on top of the other. Just add one and split it.