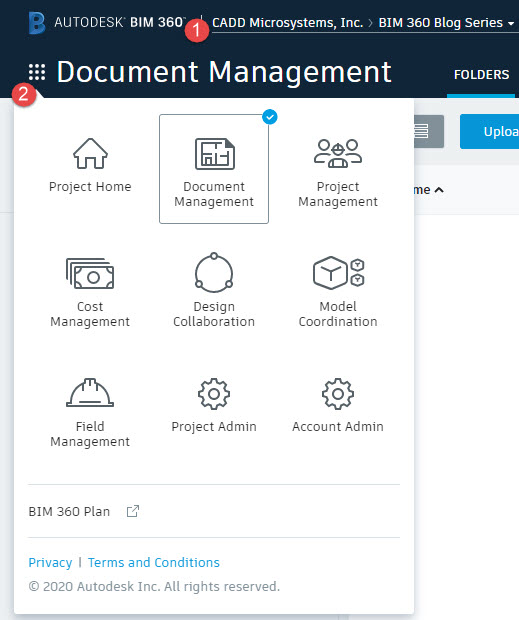
AutodeskBIM 360takes your project and connects it within the cloud, enabling BIM collaboration and coordination, review your documents, connect your project teams from field to the office, and helps streamline the handoff process to owners. A project can live withinBIM 360and have modules activated to manage the project within the cloud in several ways. In the second part of this blog series, we will dive deep into theBIM 360Document Management module.
BIM 360 DOCUMENT MANAGEMENT provides the means to connect your project documents to the cloud. Within this module, you can host a variety of document types including but not limited to Revit Model Files (RVT), AutoCAD Drawing Files (DWG), PDFs, Word Documents, Images, Excel Spreadsheets, and more. Essentially, this allows you to manage your documents in a single cloud-based document management system providing you the ability to share your documents, distribute, and organize in one location. Features include permission settings to control your folder and document structures, PDF data extraction which allows you to upload a PDF and extract data from the PDF to help you organize your documents easily, Revit and AutoCAD file integration which provides a cloud-based means of collaboration with these file types, and more. This module helps you streamline your management process with documents by enabling features to interact with your 2D plans, 3D BIM models, construction documents, project specifications, and so much more.BIM 360Document Management acts as the tree trunk to theBIM 360Cloud; it feeds the other modules and connects them in a single source location.
Interface & Document Options
- Project Picker: Select the appropriate project to manage your Documents
- Module Picker: Select the appropriate module to manage and use
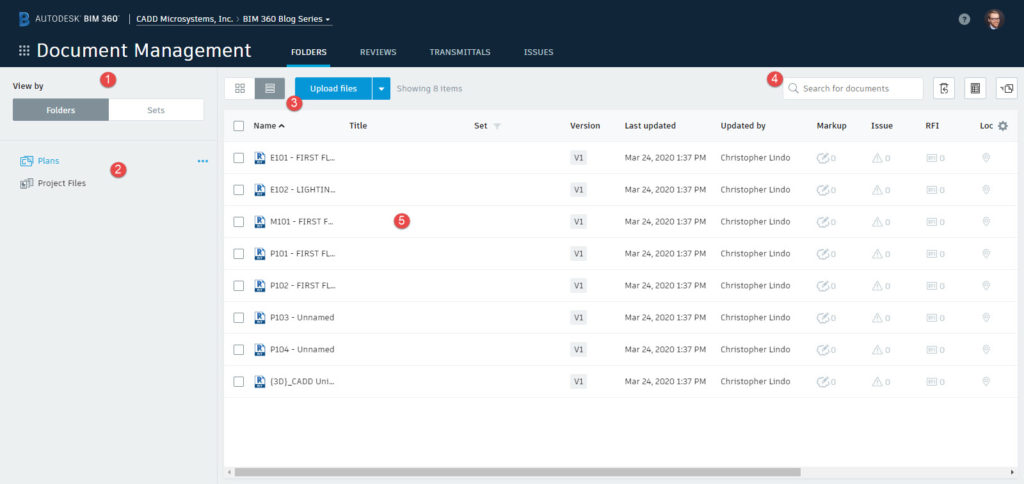
- Folder & Sets: Choose to view your documents by folder or by Set
- Plans and Project Files: This is where your documents and other project files are sorted
- View and Upload: Upload your files to the folder you have selected
- Document Options: Search, remove, and review document change logs
- Document List: Lists your documents and folders in this view
Setup & Adding Documents
In this section, you will be adding users and setting up permissions, adding in documents, and you will gain knowledge on howBIM 360Document Management deals with Revit models and PDFs.
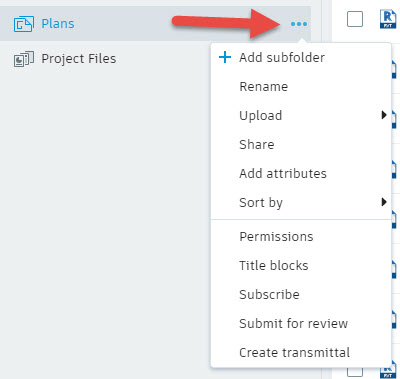
Here, you will be able to add subfolders, upload documents, share, add attributes that provide you more detail of your documents, permissions, title blocks, and other key features to help manage your documents easier
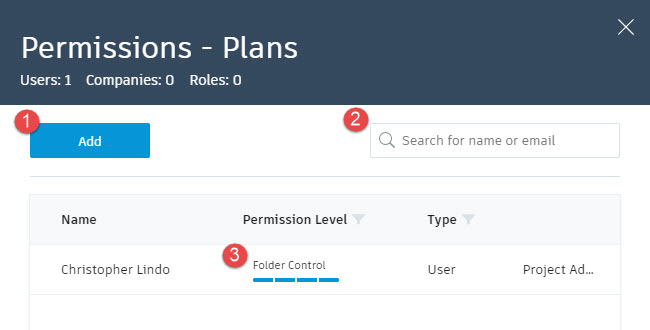
- Add: Add users connected to the project via Project Admin module
- Search: Name or Email to change their permission level
- Permission Level: Shows what level the user has access to for this folder
NOTE: When you update a users permission level at the folder level, this will be their default permission level for all subfolders unless changed at the main folder OR subfolder level.
Uploading a document is very easy. Simply click the "Upload" dropdown in the main interface. However, before you do there are some unique features withinBIM 360Document Management that makes it easier for you to organize and extract information from your files. One way that this could be done is by using Title blocks. In the same location as the permissions selection dropdown is, click "Title blocks". This option provides you the means to select locations on a document that Document Management can pull information from such as the document title, sheet number, location, revision number, submission date, and so much more.
When creating a new title block, the dialog will ask you to upload a document and from there, you can define what the sheet number and sheet name is for your documents.
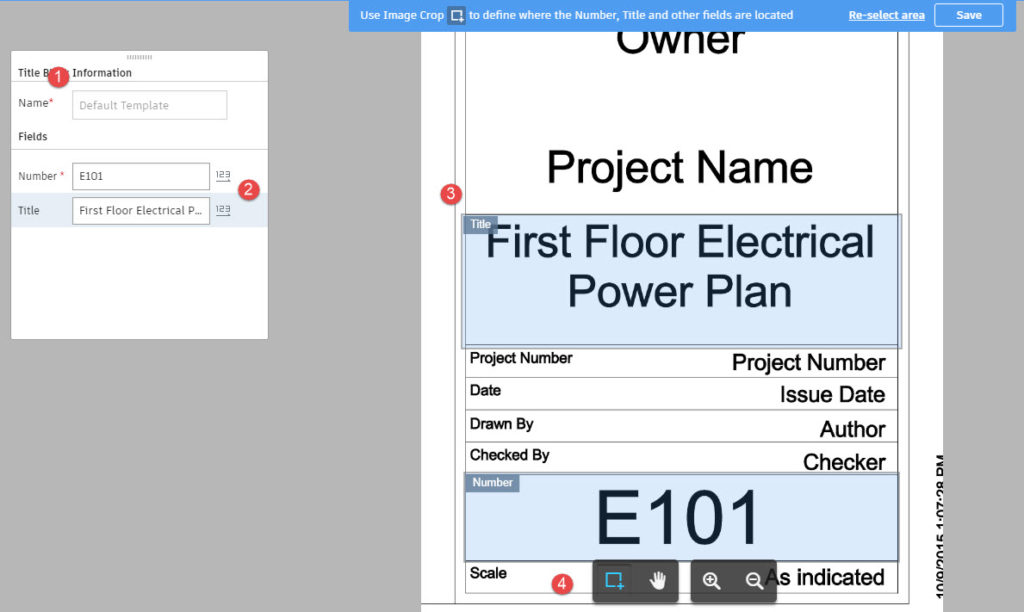
- Title block name: Name the title block to easily identify it when uploading your documents
- Sheet Number & Title: Select the areas where Document Management will find the Number and Title of the document
- Your Title Block selection area: Where you define where to find the above criteria
- View Tools: Change where to find the above criteria on your document
After you've defined your title block, you can use that template for Document Management to find the appropriate information when you upload a PDF.
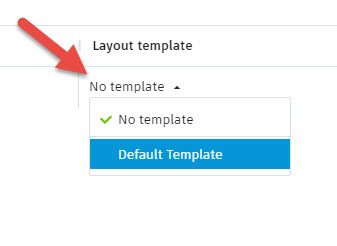
Once a template is applied to the PDF, it will be uploaded with the appropriate information automatically applied. This is how Document Management can help you organize your documents.

NOTE: The Version number is also tracked. Document Management will track each version of this document in the cloud platform
When uploading Revit files, the module will be able to utilize the same template as you used in the PDF to build the sheet name and sheet number. Also, instead of uploading the entire Revit file, it will extract the sheets from the Revit file and build a sheet list within the same interface as your documents.
Once the Revit file is uploaded, you can select the sheet and view it much like a PDF. Within the document, you can perform key actions to help you manage, communicate, and collaborate within Document Management.
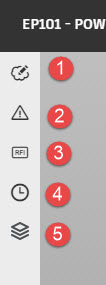
- Markup: Add clouds, text fields, and other markups from the functions on the right and manage them here
- Issues: Apply an issue that needs to be managed and tracked by the project team. When an issue is applied, you can assign it, add comments, add documentation, and other options
- RFI: Add an RFI that can be managed and tracked by the project team. Apply comments, documentation, assign it to a team member, and more!
- History: View the history of this sheet when the Revit file is updated to Document Management
- Levels: View levels if any applied to this view
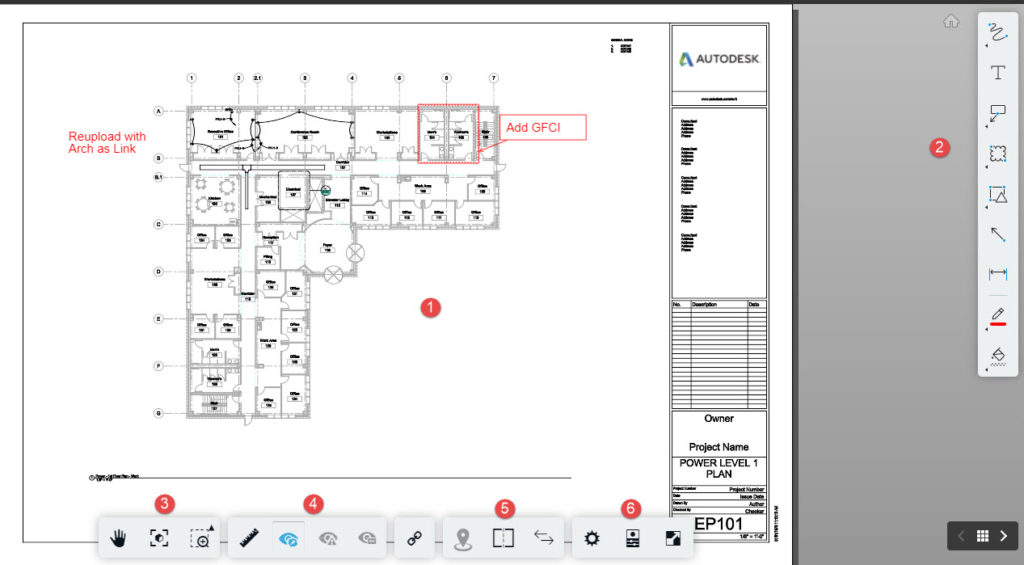
- Document View: This is where you will find the sheet view from the Revit Model and/or PDF
- Markup and Comments Tools: Where you can add markups, comments, and other items to the document
- Navigation Tools: Change how to navigate your view
- Layers: Turn on/off certain kinds of comments and elements within your view
- Document Comparison: Compare versions of your document within the module
- Properties: View properties within the document
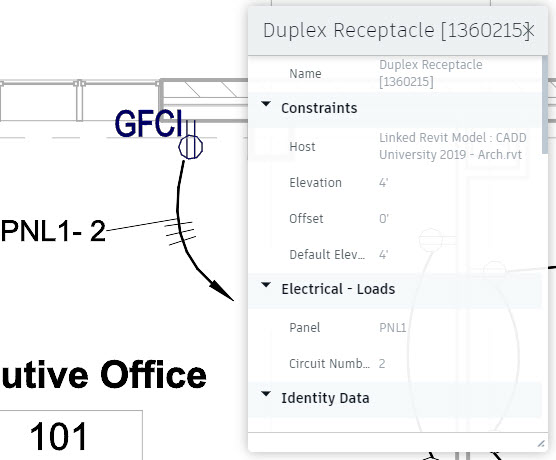
TIP: Did you know that the BIM properties you applied to within Revit can be read within Document Management? The sheets created from Revit and uploaded to Document Management contain elements that can be selected to show BIM properties of that element.
Along with Project Plans, you will also find Project Files.
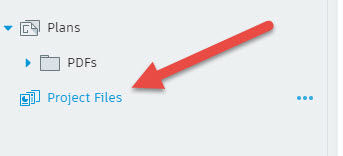
Here, a user can upload an entire Revit project file, AutoCAD DWG, or other files that are related to the project. This area will also tie to the Design Collaboration module which we will go over in the next module.
Keep an eye out for the continuation of this blog series where we dive deeper into each one of theseBIM 360modules. We will describe how to setup a module, key features to understand and utilize for each module, how it connects to other modules, and provide insights and tips of how to best use these modules for your projects moving forward.