The Classification Manager for Revit is a free add-in that helps you add values to specific parameters in your Revit model elements. Out of the gate, the intent was to design an easy to use utility that lets you add multiple classifications to the same elements without having to overwrite the Assembly Code or Omniclass built-in parameters.
But it has truly expanded beyond that. It's still great at making it easy to add classifications for UniFormat, Uniclass, Masterformat, and Omniclass, but the custom database has led to some very clever methods of standardizing parameter values. The tool itself gives you immediate access to IFC, ASTM, and FICM values, but we have seen firms use it for any parameter that they need to standardize the values for.
The New Open Dialog
One of the goals in updating all the BIM Interoperability Tools was to get consistency in the UI for similar functions. One of the first places you see this is in the Open dialog. The same principles apply to all the tools, so let's take a closer look at it here in the Classification Manager.
[caption id="attachment_30847" align="alignnone" width="786"]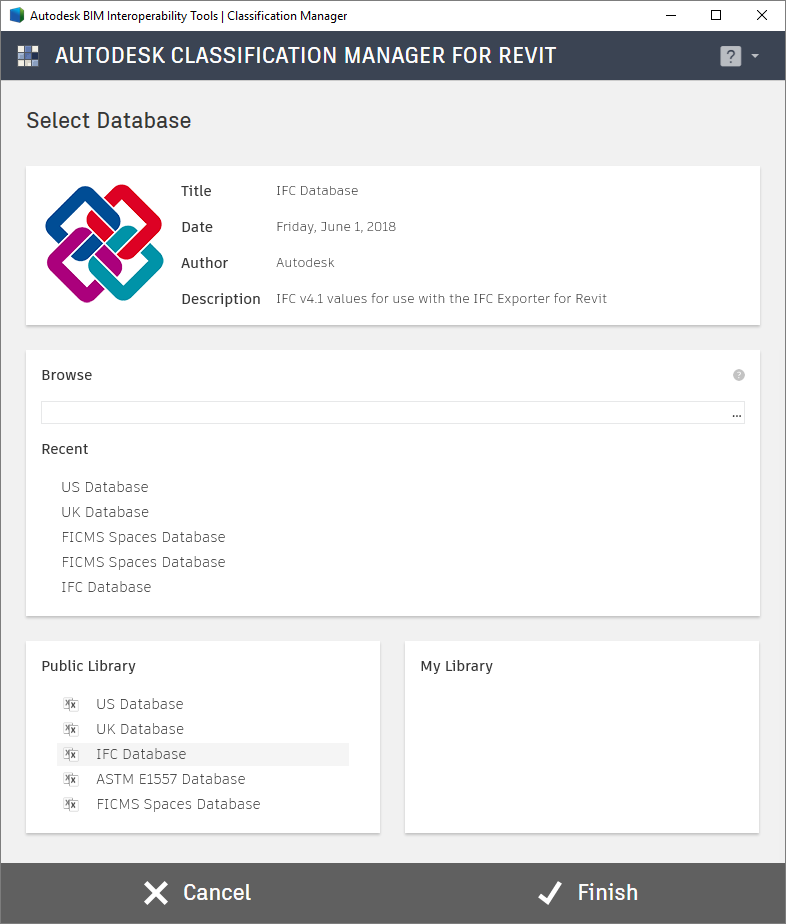 The new open dialog box[/caption]
Starting at the top, you get a preview of the selected classification database. The databases are still Excel files, so depending on where you access the file from is going to get you different levels of data, but we are pulling out as much as we can.
Beneath that is a file browse button to go grab a database from your local network, plus a list of the recently accessed databases.
Next is the "Public Library" and "My Library" portals. Both of these can be turned on and off via an .ini file setting which we will cover in a later post.
The Public Library is reaching out to a web source for what used to be the default databases installed with the Classificaiton Manager. So, first of all you need an Internet connection to access them. But the good news is that when udpates need to happen to the default databases, or new databases are to be added, you no longer need to download and install a whole new version of the software. All the updates are made on the webserver and you will immediately see the new databases here.
My Library is a local network location where you can house your company's default databases. The path to this location can also be updated via an .ini file setting.
Speaking of Databases - No Tab Limit
Have you made a lot of database Excel files for the old Classification Manager? They will all still work. The basic structure of the database hasn't changed at all. But, a much requested addition has been integrated: there are now no limits to the number of "tabs" per classification type you can use.
[caption id="attachment_31717" align="alignnone" width="224"] Not this TAB[/caption]
In the previous version, you could only have a single Excel tab for Contact, Facility, and Space, and you were limited to five tabs for Element tabs. This limit has been removed across the board. We don't want to say "unlimited" tabs, because there is a technical limit that Excel can handle (but we don't know what it is) and more so, there is a PRACTICAL limit to how many tabs make sense to actually use. But we know that being able to assign to multiple systems at once will really speed up some of our Classification Manager power users.
Classification Manager New Features
Once you Setup your database in your Revit model, you keep using the Classification Manager just like before... with one or two great modifications.
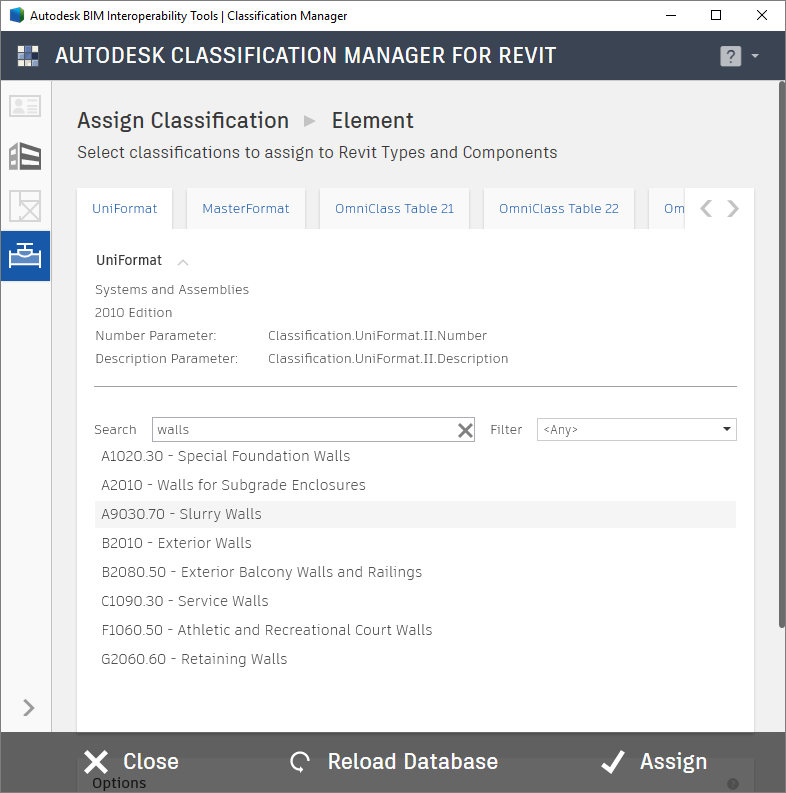
Just like before, you can select an element, and click Assign and you will be greeted with the new Assign Classification interface.
At the top, you now see the number and description parameters that are going to be updated, just to confirm you are working where you want to be working. The classifications are tabs along the top, to help consolidate space, and you can use the expand/collapsed arrow to hide classification system data if you don't need to see it.
As with the previous version, the Revit category will help parse down your results, but you can use the Search bar to bypass that and get your own filtered list. However, unlike before, once you click Assign the window does not close. A major update that has been added is the ability to keep selecting elements in Revit and then assigning classification values to them without having to open the Assign dialog each time. This is a HUGE improvement to the Classification Manager workflow, and we are very excited to be able to offer it.