A question we still get frequently is "How do I create a central model from my project file." This sounds like a simple process, and it is. But if you miss a step, other users will not be able to access anything in the file. In order to create a Central File, you will need to enable Worksets. Depending on the version of Revit, there are minor differences in the process, outlined below.
Process
- Open the project file that needs to be turned into a Central Model. It is recommended that you save an archive of the model prior to enabling worksets.
Determine if you will be using BIM360 Design to store your file, or if you will be storing your file on a local server.
If in Revit 2018 or 2019 you need to click "Collaborate" on the Collaborate Ribbon. If you're working in Revit 2020 or later, click "Collaborate" if you are going to be using BIM360 Design. If not, you can click "Worksets" and skip the next step.
[caption id="attachment_34194" align="aligncenter" width="525"]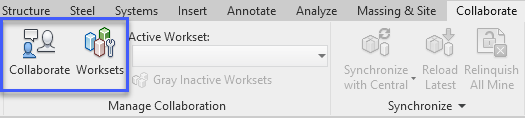 Collaborate Ribbon[/caption]
- If you clicked Collaborate, you will be asked if you would like to collaborate on BIM360 Document Management or within your local network. Select the appropriate response for your situation.
[caption id="attachment_34193" align="aligncenter" width="386"]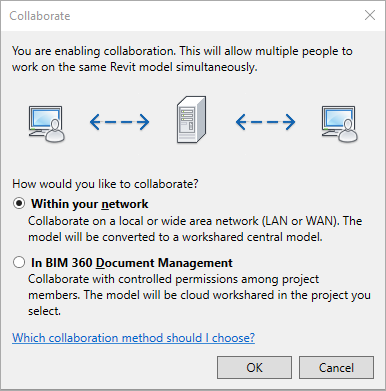 Collaborate Dialog[/caption]
- The standard worksets will have been created. They are "Workset 1" and "Shared Levels and Grids." Any Levels and Grids will have been moved to the "Shared Levels and Grids" Workset and everything else will be on "Workset 1."
Save the file. Because this is the first time you are saving the model as a central model, Revit will prompt you to confirm that you want to proceed. Click "Yes."
Click “Synchronize with Central” on the Collaborate Ribbon. In the Dialog window that opens, make sure you check "User-created Worksets." If you do not complete this step, no one will be able to edit anything in the model. This is the key step that most users forget.
[caption id="attachment_34192" align="aligncenter" width="463"]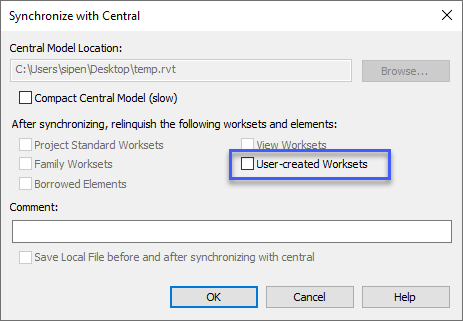 Synchronize with Central Dialog[/caption]
- Close the file. Next time you open the file you will have the "Create New Local" checkbox available, which should be checked by default. Always leave this checked.
Workset Tips
Here are a few tips about working with Central Models.
- Check out the Model Manager Series on our blog. There are several tips about keeping your central model clean and working happy.
- Unless you are doing maintenance on the model, never work in the Central Model. When you are doing maintenance on the Central Model, make sure no other user has a local model open, as they could lose any work they do.
- Avoid copying or moving a Central Model file after it is created. This will result in an error.
Our CADD Care team is here to help with any additional questions. You can email us at helpdesk@caddmicrosystems.com, or call 703.924.5310.