Recently, I was working with a customer who asked about the classic Revit MEP issue of needing to show different graphics for pipe based on its elevation. Over the years, maybe you’ve had the same issue and tried fiddling around with Underlay, maybe used graphic overrides by Workset, or maybe you just gave up and manually selected pipes to set overrides by element.
You may have also tried to create a rule-based Filter and discovered that the only parameter available related to pipe elevation was “Invert Elevation.” They added “Bottom Elevation” and “Top Elevation” starting in Revit 2020, but “Invert Elevation” is really all you need.
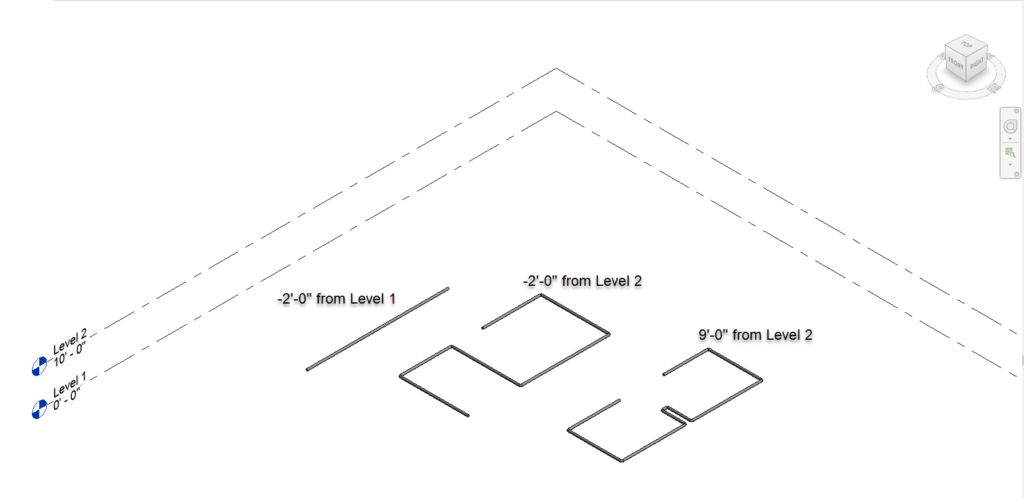
Here I have 3 pipe runs at different elevations. On each floor plan, I want to show the pipes below the floor Level as Hidden, and the pipes above as Continuous.
“Invert Elevation” is relative to the “zero datum” of the Project Base Point’s elevation. So, other than negative elevation values from the Project Base Point’s zero, it doesn’t matter if the pipe is placed from a positive value from the reference Level or from a negative value from the Level above. Positive elevation values for “Invert Elevation“ will always be positive.
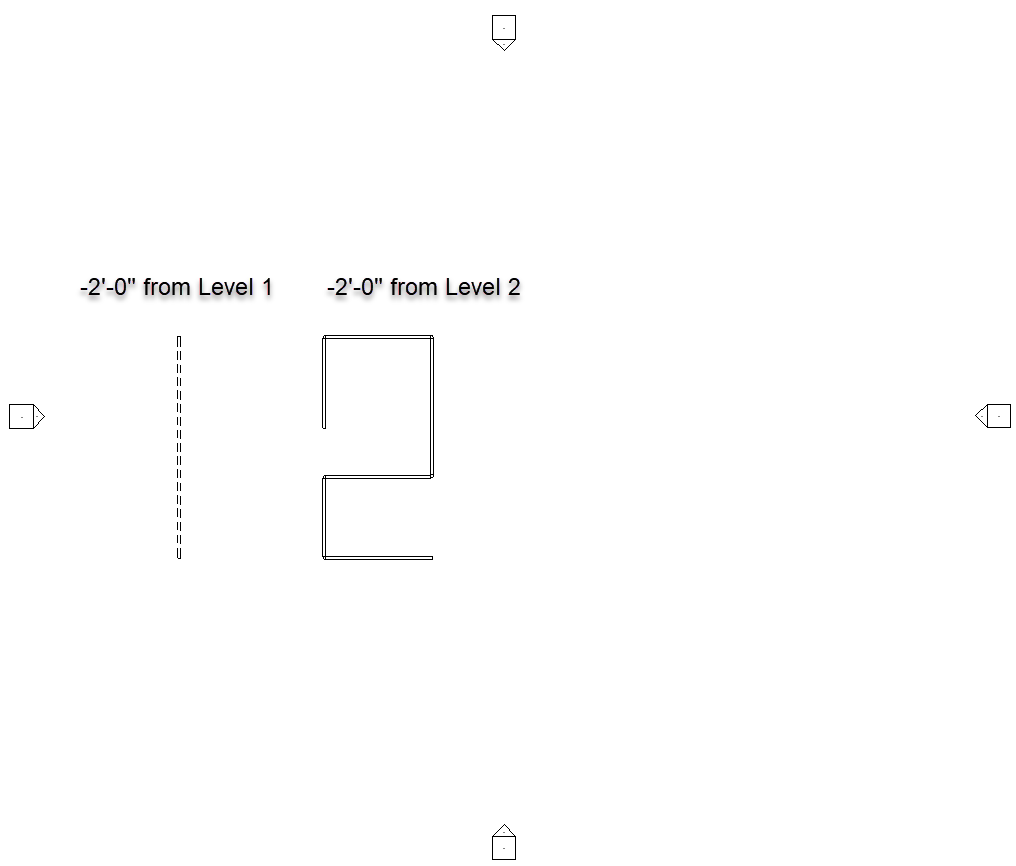
For Level 1, I created a filter called “Pipes Below Level 1.” Any pipe with its “Invert Elevation” less than or equal to 0’-0” is filtered.

This is the result for the floor plan on Level 1 when the Filter override is added to the view.
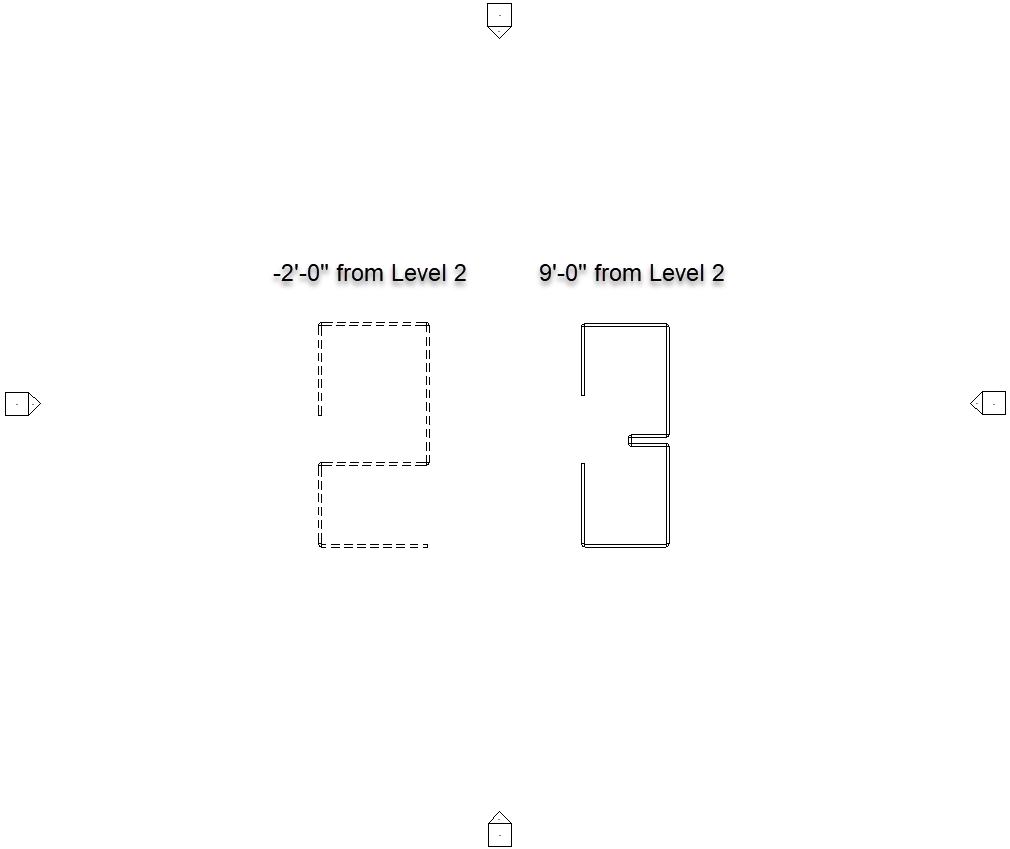
For Level 2, I created a filter called “Pipes Below Level 2” setting “Invert Elevation” to be less than or equal to 10’-0.”

And here’s the floor plan for Level 2 with the Filter override.
So….yeah, there you have it. Sure, each floor may need its own filter, but it does provide an effective way to distinguish pipe graphics based on elevation.