Bluebeam Revu 19 and below will reach end-of-life (EOL) on June 28th, 2023. Bluebeam Studio will no longer work with these products after this date. We recommend converting to Revu 21 before this date, ensuring all your Bluebeam Studio data is saved and accessible. If you choose not to upgrade to Revu 21 by June 28th, 2023, you must export all your Bluebeam Studio data or lose access to it.
To download all Studio data, you have to go into each Studio Project and Session and download them individually. Here's how:
Before starting the system clock of the local machine must be set up correctly so that it is in sync (within 15 minutes) with UTC, otherwise, any attempt to upload or download a file in Studio will result in an error. Update the system clock of the local machine so that it is correct for the time zone specified in its Date and Time settings and try the upload or download again.
Studio Projects
To download a copy of a Project file or folder (including the root Project folder) to a local or network drive, go to the Project tab, right-click it on, and select Download Copy. When downloading a Project folder, all of its files and subfolders are automatically included. Note that the root Project folder is only shown in the left panel of the Project tab, so to download copies of all the files in the Project, right-click the root Project folder there.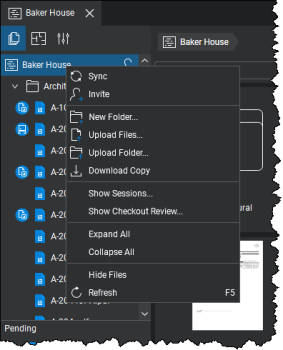
If the Project is very large, you will have to download the Project in pieces by downloading one folder at a time. The article Best Practices For Studio article has a section called What is a Large Project?, that gives you a better understanding of what a large Project looks like. In order to get a better understanding of what a large project looks like, please see the article Best Practices For Studio, under the section What is a Large Project?
Studio Sessions
At this time it's not possible to select multiple Session files for download, it must be completed individually. You can only download Session files by either:- Opening each file individually and selecting File > Save As or clicking Ctrl+Shift+S
- Or by finishing the Session and downloading the files.
- Join the Session and ensure that nobody is in the Session working on any Session documents.
- From the <Session Name & ID menu>, select Finish Session.
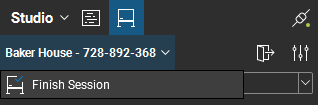
The Finish Session dialog box appears.
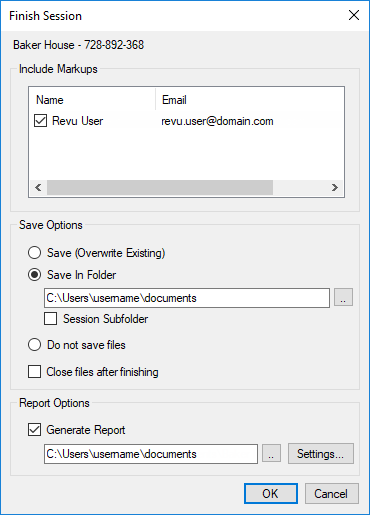
- To include the markups of specific Attendees in the Session documents that you choose to save, select those Attendees in the Include Markups
- Choose one of the Save Options:
- Save (Overwrite Existing) saves the files back to the locations from which they were originally uploaded to the Session and overwrites any files with the same name that is currently there. This essentially replaces the original files with the ones from the Session. Do not choose this option if you need to preserve the original files and have not made backups already.
- Save In Foldersaves the Session documents in a specified folder. To change the default folder location, click and navigate to the desired folder.
- Select Session Folder to create a subfolder with the Session name in the specified location.
- Do not save files that discards the Session documents without saving them.
- Select Close files after finishing to automatically close any Session files that are currently open in Revu when the Session is finished, otherwise, they will stay open.
- Select Generate Report to generate a Session Report before finishing the Session. To specify the Session Report settings, click Settings and the Session Report dialog box will appear. See Session Report for more information about Session Report settings.
- The Session Report is saved in the folder specified in the field below. To change the default folder location, click and navigate to the desired folder.
- Click OK to finish the Session.