We continue our series highlighting some poor overlooked Revit commands that seem doomed to their fate simply because their buttons are so very very small.
Check out Part 1 on the Linework command here.
Selection Box
Let's spend a little more time on the View panel in the Modify ribbon. The Selection Box command only activates when you have some elements selected:

See it? It looks like a very small blue ice cube in an only slightly larger clear ice cube. Here it is blown up:

What the Selection Box Command Does
As mentioned, you can only use this command once you have selected model elements in your model. Once you select elements and then activate the Selection Box command, Revit will take you to your default 3D view, turn on the section box, and shrink the section box down to contain the extents of the selected elements.
[caption id="attachment_31309" align="alignnone" width="300"]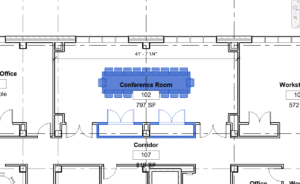 Elements selected in floor plan[/caption]
[caption id="attachment_31310" align="alignnone" width="300"]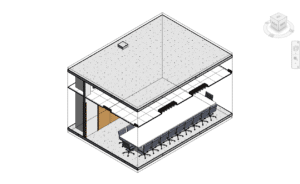 Constrained Section Box in 3D[/caption]
It is a very quick and easy way to get a visual handle on what is going on in a space and to help you isolate what you are working on.
What to Watch Out For
As stated above, this resets your default 3D view (the one with the squiggles {}) so if you want to keep this view, be sure to duplicate it before someone else overrides it with their Selection Box. You can also clean it up by pulling the section box extents and then turning that category off.
We are going to continue highlighting some overlooked Revit commands, so check back soon.