I recently had to help a client fix a Revit model where the levels in the interior design (ID) model did not properly match up with the levels in the base building (BB) model. Usually, if the floor to floor heights aren't the same, you can just adjust them, and everything should be fine. In this case, after much sleuthing, I discovered that the ID model had skipped a level (because it wasn't part of their scope) and then duplicated a level so that the overall ID model would line up with the base building model. What I needed to do was delete the extra level with all the elements on it, move up the three levels in the middle, and then add the missing level datum. MUCH easier said than done.
The challenges I faced
- Many of the elements that were suppose to be associated with a work plane (light fixtures, electrical devices, etc.) were in fact not, so when you move the levels up, these elements were not moving.
- Some elements were associated with the linked BB model instead of the level, so these objects also did not move up (i.e. casework).
- There were A LOT of in-place models and model groups (really just an example of a novice Revit user not knowing what they were doing and not asking questions).
Tasks:
- Associated all the light fixtures with their ceilings.
- Associate all electrical fixtures with something - wall, floor, cabinet, etc. - whatever they needed to be moved with.
- Clean out as many model groups as possible (and within reason) by creating new families with nested content (i.e. cubicle with chair, tables with chairs, etc.) and replace as many model groups as possible with these.
- Remove as many in-place models as possible by replacing with loadable component families.
Issues
- This project is in CA and the issue arose because the contractor wanted to use all the models for coordination. At some point early on, the design team decided to just "deal with" this discrepancy, not really thinking about the future potential uses of the model(s).
- It's very hard to find EVERYTHING that's suppose to be on a level to properly associate it and move it.
Solution
- Created new plans and RCPs from scratch of each level so that nothing is hidden. Worksets aren't used so there weren't any issues with things not being loaded or visible.
- Systematically selected elements and associated them with their proper host, using view filters and V/G overrides to make things easier to see.
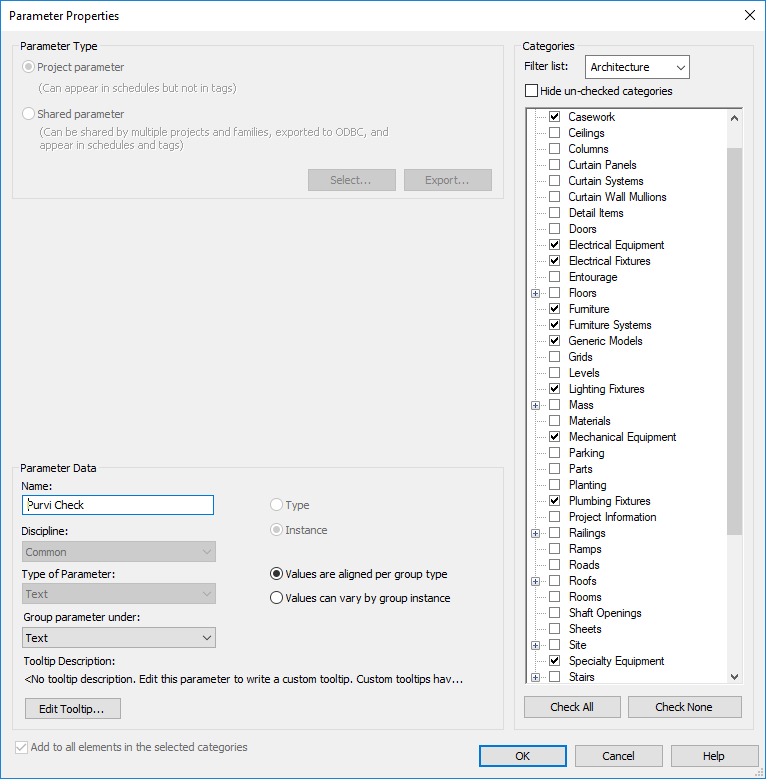
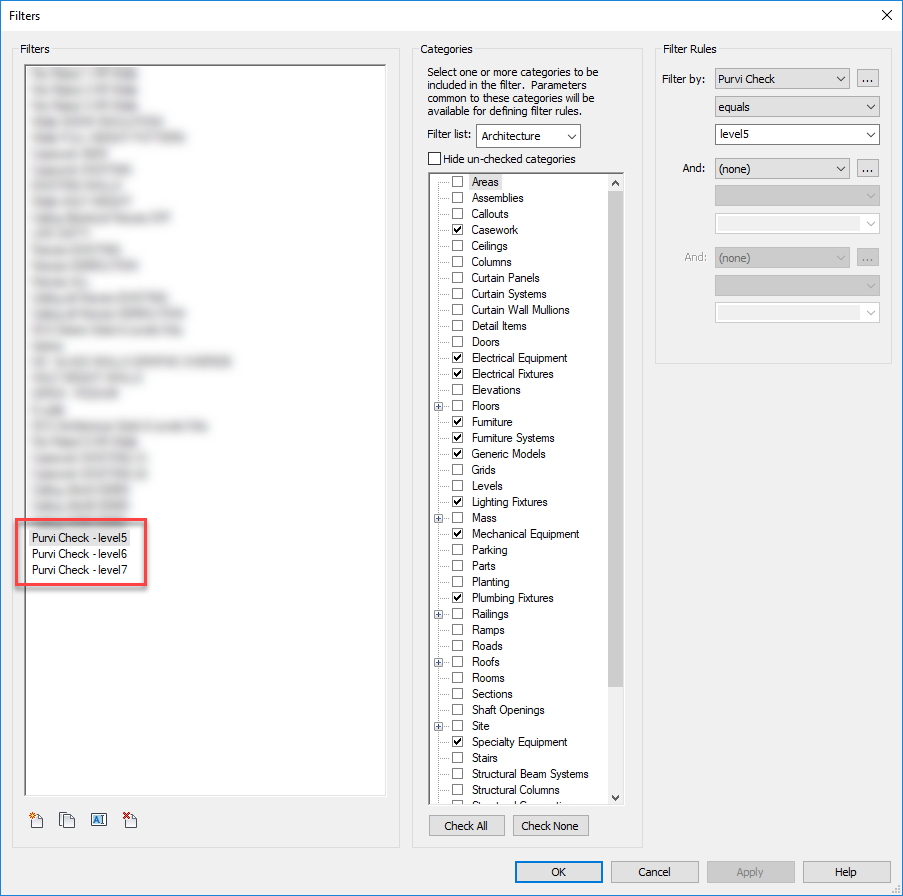
- Created a custom text parameter that I assigned to the categories that were important to this model (casework, electrical fixtures, furniture, furniture systems, generic models, lighting fixtures, plumbing fixtures, specialty equipment). I went to the plan and RCP of each level, isolated those categories, selected them all and assigned a value to it based on the level that they are suppose to be on (level5, level6, level7).
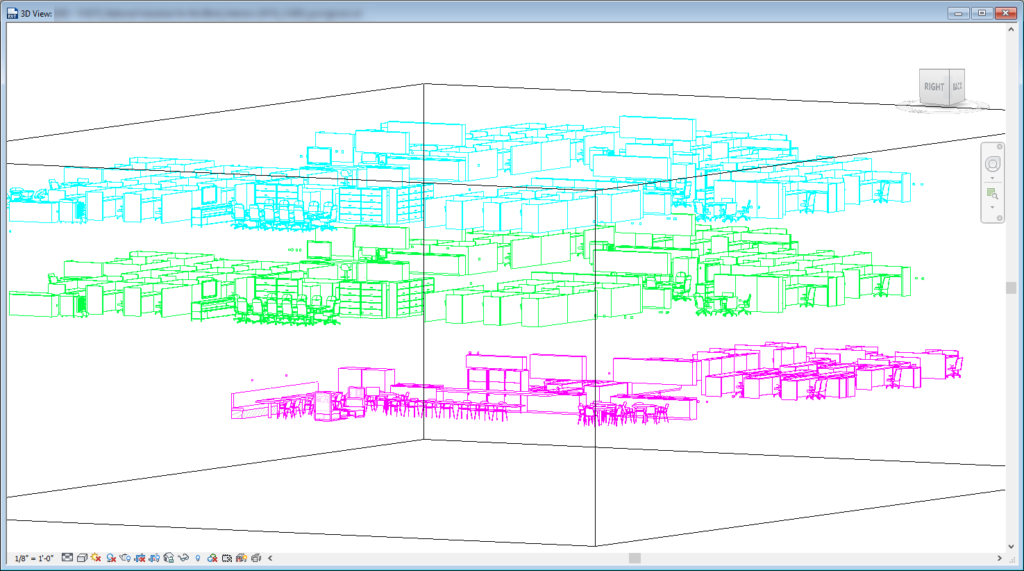
- I then moved the three levels up in an elevation view and applied view filters to the view to make each level a different color. I could now see in elevation, plan/RCP and 3D which elements had not moved and I was able to move them.
- In some instances, I had to copy/paste from one level to another.
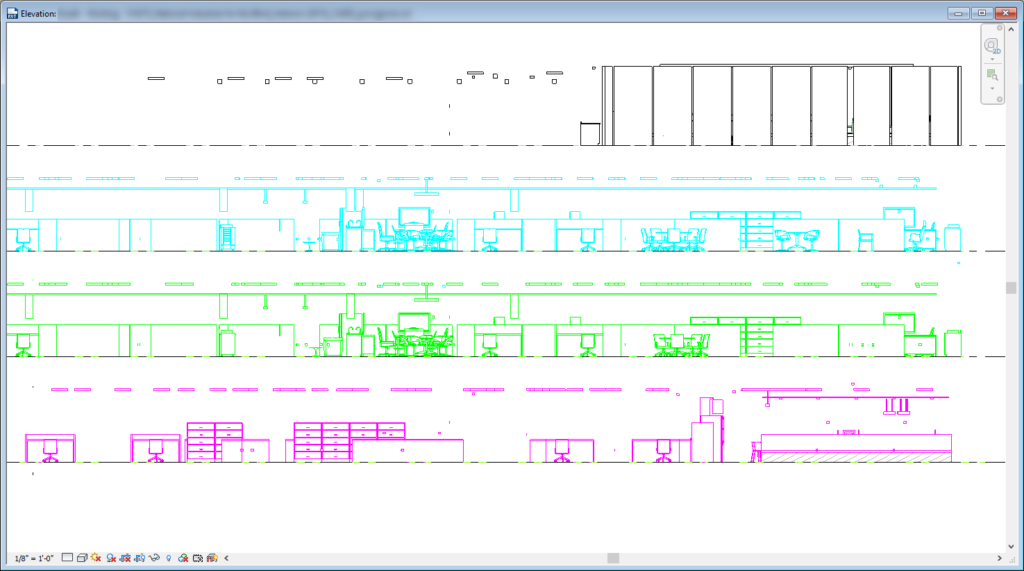
[caption id="attachment_29721" align="alignnone" width="600"]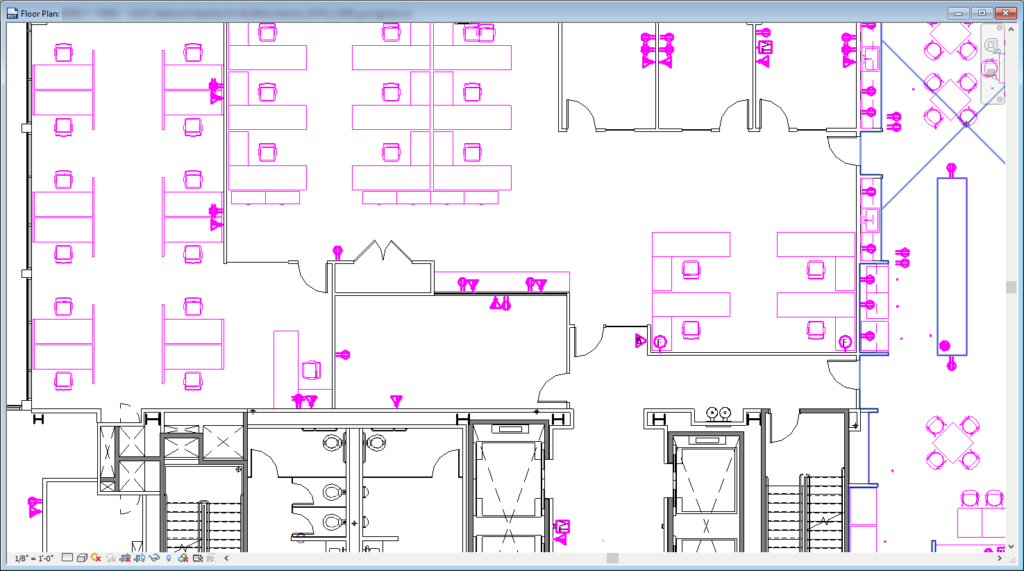 Sample plan view. All the magenta items have the custom value parameter "level5."[/caption]
[caption id="attachment_29722" align="alignnone" width="600"]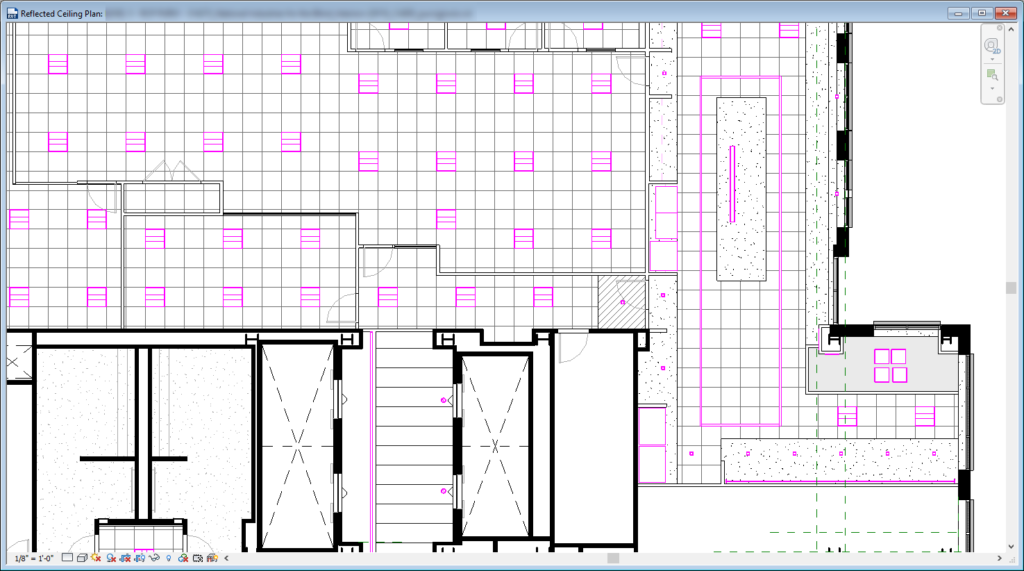 Sample RCP. You can see that we only see magenta fixtures, which means that these items are on the correct level.[/caption]
You can look at it in both elevation and 3D also to help you find elements that might be in the wrong place.
Biggest cons:
- There's no way that I got everything, but I was being very meticulous about the process, so I think that I got 95% of the modeled elements.
- The annotation is a different story. The interior designer on the project will now have to go through and do a document compare of the PDFs from before and after to see what dimensions, tags, etc. were lost and add them back. Luckily this isn't the hugest set, so hopefully, it won't take that long.
Major Takeaways
- View filters are your best friend. They can help you very easily see things that you might not have been able to see otherwise. Make sure to assign their overrides in a view template to make it easier to apply to various views.
- Model things correctly from the beginning. It may take an extra hour to set up your project with all the levels at the beginning (and that's really pushing it) but at least then if things change, the datums are there and objects have been hosted to them properly.
- Make sure that ll of your hosted objects are actually hosted. In past versions, when you deleted an object, all the elements that were hosted to it, such as light fixtures and electrical devices, would disappear. Now, they just become "not associated" objects. (for better or worse - at least they are still there.)