In the third part of this series, we will start getting into the specifics of Revit, and the tools within the software that will aid in a successful project kick-off.
General Project Information – Splash Page
Your Revit template should include a startup page that contains information about the project, project team, and the Revit model. This is intended as a repository that all team members can easily reference. This should be filled out by the Model Manager at the project kickoff, reviewed periodically, and updated as required.I recommend making this a titleblock so that it can be a sheet and information can be populated here that will then automatically be filled out on all your sheets. That includes, but is not limited to, the following:
- Project Name
- Project Address
- Project Number
- Project Issue Date
- Project Status
- Revisions Log
Initial Model Configuration
Properly setting up a model from the beginning is critical to avoid issues later on related to coordination between models and Revit links. All of the tools in this section can be found in the Manage Tab in Revit.
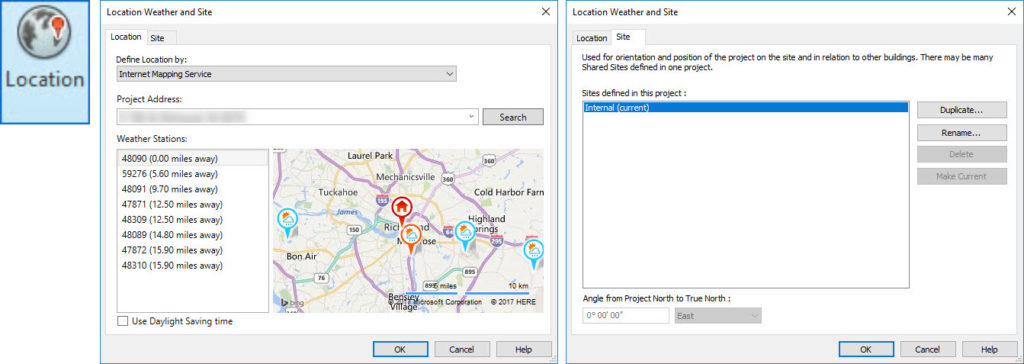
Location & Site
Overview
Locating your building relative to the earth has nothing to do with the shared coordinates. Setting up this information correctly, along with true north, is essential for performing HVAC load calculations, and solar/shading studies.The second tab in the “Location” tool is where you can name your different Shared Coordinates. If you intend to use Shared Coordinates to locate your building at any other position besides the Revit 0,0,0, then rename “internal” to something else.
Project Location
Overview
Every Revit model contains 3 locations that are important to understand.- Revit Origin – the invisible 0,0,0 point in Revit that cannot be moved AND that you also cannot see. The coordinates of other two points are relative to this location. One origin point to rule them all!
- Project Base Point – Measurable location on your building, typically the intersection of two grids, or the exterior corner where two exterior walls meet.
- Survey Point – Measurable location on your site that can be used to align multiple models on a site, typically the corner of line boundary.
Key Points
- Have your coordinate points turned on in your main working views so that as soon as you start a project, you know where they are.
- Place a measurable location on your building at the Revit Origin/Project base point. This can be either the corner of your building, or the intersection of 2 grids. Choose an element that is the least likely to change/move.
Shared Coordinates
Overview
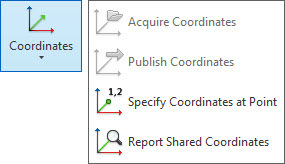
A project’s shared coordinate system is vital to ensuring that all linked models for a single project are located relative to each other. Typically, the architect will set up the coordinates and then the other models will acquire these coordinates. If a model later must be relocated, having these coordinates set up properly will aid in making this a smooth process.Key Points
- If you are the architect, once you have set up your “Project Base Point” and “Survey Point” you will not have to do anything more. Your consultants will use the “Acquire Coordinates” tool to adopt the shared coordinates from the Architecture model.
- If you are a consultant who will be using a link from an architect, before you start drawing anything, link in the Arch model origin to origin and acquire coordinates from that link.
- If you are the architect, once you receive models from your consultants and have confirmed that they have set up their model’s coordinates relative to yours, link them in using “Shared Coordinates” and they will come in at the correct location.
True/Project North
Overview
You need to pick a project north for each building. Most likely this is not the same as true north, but it’s important to set this up from the beginning, along with project location. When you start modeling, DO NOT model to true north (unless it is the same as project north), always model to project north. Once you have determined this, then you can set true north in your model. Each view can be toggled in the properties to go between true and project north.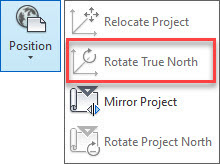
Sorting View Properties
There are two main ways that I sort views in my project browser. This next step is checking that your views have been set to the correct parameters for how you are sorting.Method 1: Custom Project parameters
This is my preferred method. I create the following project parameters and associate them with those categories.- Views: View Group, View Subgroup
- Schedules: ScheduleGroup (only available in version 2018.3 and later)
- Sheets: Sheet Group, Sheet Subgroup
Method 2: View Template
- I still end up using a custom parameter so that I can sort by Working/Printing/Export/Presentation, but under that, you can use the view template to organize your project browser.
Enable Worksharing
In order to have multiple users in the same model, a model must be “worksharing enabled.” You can either do this on your internal network or throughBIM 360Design. The method to be used should have been determined at the project kick-off.Set up Worksets
Worksets are a valuable tool in a workshared Revit file. They can be used to selectively load elements, change the visibility/graphics of a subset of elements, and review elements for basic clash detection.- Have a standard set of worksets that you create for each project. I recommend putting your company name or some other unique identifier as part of them, to make it easy to control them later and for you to tell your consultants which worksets to turn off.
Set up the Project Keynote File
If your company uses keynotes, hopefully, you have a master keynote file that you can use as the base for starting your project specific keynote file. Typically, you will copy this file to your project folder, rename it, and then link it to your Revit file.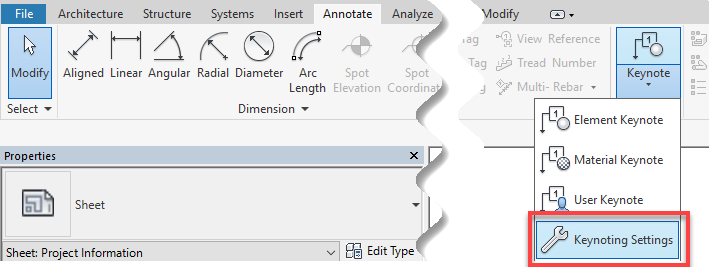
Be on the lookout next week for the next installment of this series, Part 4: Model Maintenance - Weekly Tasks.
Happy Reviteering!