The previous post in the series (Part 4), talks about the Model Manager's weekly maintenance tasks. This post will explain other maintenance tasks that usually happen less frequently but are still important. I would recommend doing these tasks weekly if you can, but if not, at least monthly.
Remove unnecessary links
Frequency: As needed
Time Required: 5-15 minutes
Too many linked CAD and Revit files can affect the performance of your model and should be reviewed and removed periodically. Most CAD files in a Revit project are there for reference and should be removed when they are no longer required. You can find the Manage Links tool in both the Insert and Manage tabs. Remember: NEVER IMPORT A CAD FILE.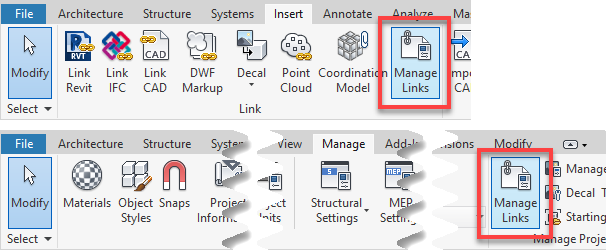
Manage worksets
Frequency: As required by the team
Time Required: 5-15 minutes
As a project evolves, new worksets may be required to better control the visibility of elements in your model or to increase performance by selectively loading certain worksets. You should periodically review the worksets, their global visibility, and if new ones need to be created or old ones deleted/consolidated.Keep the Revit folders clean on the server
Frequency: Weekly/at major milestones
Time Required: 30-60 minutes
Revit automatically creates a series of backup files for every Revit file (families and projects) which can quickly bog up server space. It is good practice to periodically remove these backups and any unused families/files from your network folders. There are processes out there to do this quickly. Talk to your IT Manager who can probably help you out with this if you can't write the batch file code yourself.Review the model for poor or improper modeling techniques
Frequency: Weekly/at major milestones
Time Required: 30-60 minutes
When working in a Revit model, there are certain practices that can affect the performance of the model and cause issues along the way if not corrected early on. Below is a list of practices that should be avoided, why they are problematic, and alternatives that will aid in the creation and maintenance of a happy and healthy model. This is by no means a complete list, but a good place to start. You should keep your own list of practices to check for, based on your team members and your office's workflows.| Revit Practice | Issues | Alternatives | Instance when it’s OK |
| Modeling exterior walls as separate segments between each floor. | When walls are disjointed, they must be joined at each level to remove the line between them in elevation. Excessive use of the join tool can affect model performance. Model wall patterns will also not stay aligned between different segments of wall. | Model exterior walls as continuous from the foundation to the roof. | Usually never, but there may be specific instances when you are using model groups where you need to group an exterior wall with windows on a level. In this case, you should split it up, so that you aren’t grouping windows without their hosting wall. |
| Making a single wall out of lots of different segments in plan, to represent pilasters. | This breaks up your wall excessively and can cause issues with openings. This is also much more difficult to modify later on. | Use a single wall for the main thickness of the wall, and then add architectural columns as pilasters where needed. | NEVER! |
| Excessive use of In-Place Models | Too many In-Place models negatively affect model performance and can bloat the number of unique elements in your model. They cannot be transferred between project easily and you cannot have more a single instance of a model in place in a project. | Create a loadable family. A loaded family is processed as a single object by Revit, unlike an in-place family, which will be processed as each individual part. This loadable family can also then be used on other projects and multiple instances can be placed in your project. | The general rule of thumb for in-place families: only use them for one-off families that are directly related to a specific architectural condition in your project. |
| Model Groups | Often things are grouped together that do not follow best practices as laid out by Autodesk. By not following these guidelines groups can become unstable and cause fatal errors in Revit models.
Group Best Practices (from Autodesk https://knowledge.autodesk.com/support/revit-products/learn-explore/caas/CloudHelp/cloudhelp/2016/ENU/3PP-REV-Wiley/files/GUID-32DA64E7-22FE-445E-B006-A5E7094765AF-htm.html)
| For groups of elements that will always be together, use “super families” of families nested inside other families. This can be used for a table with chairs, a typical kitchen or bathroom layout, or even typical room layouts. These super families can also have parameters built into them to allow for some flexibility after placement. | Ok for elements that are not hosted or associated with hosted elements. Groups of furniture or non-hosted casework is fine. |
| Detail Groups | Detail groups aren’t as bad as Model groups but they are often used in lieu of detail components, which again can bloat a model. | Create detail items for any 2D annotation that needs to be | Ok for special annotation that needs to appear in multiple views and needs to be easy to change. Also ok for some types of linework, i.e. special linework to add emphasis to elevations. |
| Hide in View | Hiding elements in a view can cause confusion and overmodeling, as one team member might not realize that an object already exists in a location because it has been hidden. | Find ways to use visibility graphic overrides, view filters, worksets, view range, etc. to achieve the same effect. | In special instances where Revit automatically creates something that you might not ever want to see, but in this case you might want to create a separate workset for these items and default it as not visible. |
| Linework tool – excessive use | Overusing the linework tool negates the usefulness of view templates and make it much more difficult to have graphic consistency across your drawings. | If you need to consistently revise the linestyle of something, it might be better to revise the object styles or VG within a view template | For small edits, to remove small imperfections with how Revit connects elements. |
| Faking elements that are inherently parametric (tags, detail lines for architecture, etc.) | Faking information that is inherently parametric goes against the basic tenants of Revit and is a QA/QC nightmare. The few minutes you saved not trying to figure out the problem will be negated exponentially by the loss of information updating everywhere automatically. | Use real tags. If something isn’t working properly, ask a question. | NEVER. Model the actual thing and use a real tag.
|
| Importing CAD Files | When you import a CAD file, that file now becomes part of your Revit file. If you update the original CAD file, it won’t update in your Revit file. If you want to find it to delete it, you have to remember which view you put it in, which can be difficult. | Always link CAD files. This way you can remove them from the project from Manage Links. | NEVER, NEVER, NEVER. |
| Exploding CAD files in your Revit project | If you explode a CAD file, every layer becomes a linestyle in your model, every hatch region becomes a fill pattern and filled region type, the text becomes text styles – essentially you're bringing a whole lot of JUNK into your model that is nearly impossible to remove. | If you link a CAD file, you don’t have the option to explode it. | NEVER, NEVER, NEVER, NEVER, NEVER, NEVER, NEVER, NEVER, NEVER, NEVER, NEVER, NEVER, NEVER, NEVER, NEVER
(did I say it enough?) |
Happy Reviteering!