Welcome to Part 4, where I will be explaining the wonderful world of Note Block schedules, and how you can use them to create "dummy" schedules in your projects in a way that's much better than using a key schedule.
Note Block Schedules
Note block schedules are a great way to create a “dummy” schedule because they are not actually dumb. You are scheduling actual objects and you can create an object just for that particular schedule. It is better to create a generic annotation family and schedule that via a note block than create a “dummy” key schedule because of the following:
- Scheduling actual objects (generic annotations) in your model is a good double-check and provides a graphic representation of your scheduled element.
- If you remove/add one of those objects (generic annotations) this is automatically reflected in the schedule. If you use a dummy key schedule, you are just adding/removing lines.
- Can create your own custom parameters that only exist inside the generic annotation object, and those parameters can appear in both the schedule AND the annotation itself. These parameters can be type or instance. With a key schedule, as you make parameters for your schedule, you are adding those to the actual family category you picked for your dummy schedule, which is typically a category that you wouldn’t use in your project, so they are completely unrelated.
- You can have both working and printing versions of the schedule. Key schedules cannot be duplicated.
General Uses
- Material schedule (because the industry is just not there yet with using a material takeoff schedule)
- Door hardware sets
- Demo notes – when you don’t want to use keynotes for some reason
Example – Material Schedule – 2 ways
Material Schedule – Small Symbol
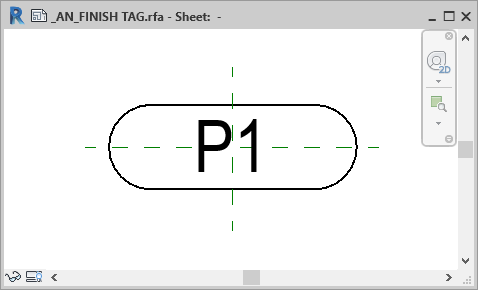
In this method, a generic annotation family is created with parameters for each of the columns that are required in a material schedule.
The family itself is a simple symbol. This symbol can be placed on drawings to show specific finishes if desired, but it is “dumb” in that it is not a tag that is pulling information from the finish but instead a dumb symbol.
.
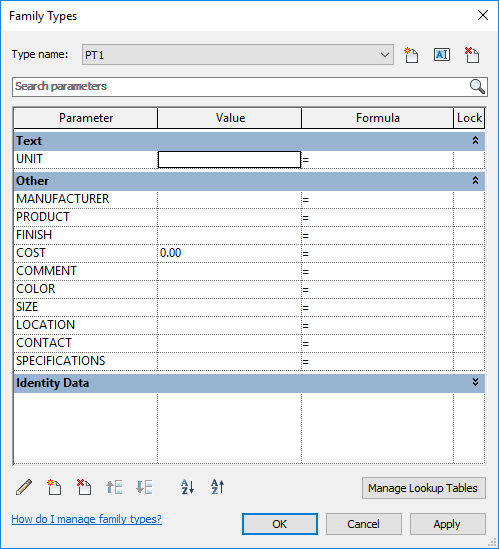
The generic annotation family has custom family parameters for all of the fields desired in the schedule. These are mainly text parameters but can be whatever you desire. Just remember that once you create the parameter, you can’t change its type (text, integer, number, area, etc.)
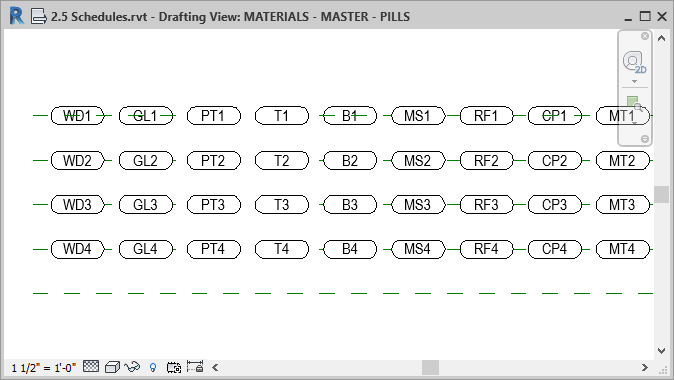
All of these symbols are placed in a working drafting view so that they will appear in the schedule. For this particular method, each finish designation is a different type in the family, so that the symbol can be placed in actual views (typically interior elevations).
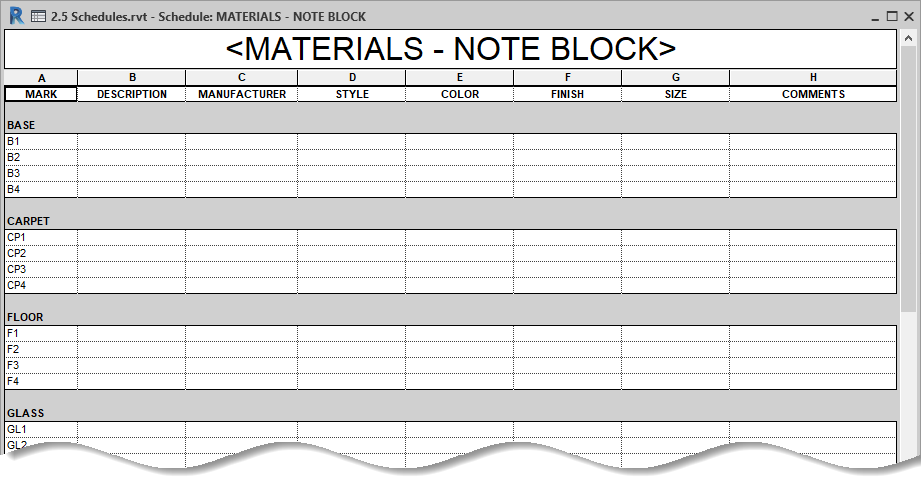
This is the schedule view. You can enter in the information here, or by selecting the generic annotations themselves and editing the type properties.
Material Schedule – Mini schedules
If you would rather have your information vertically underneath each material, instead of using note blocks to create a schedule, you can create a generic annotation family that looks like a mini schedule for each material. The benefit of this is that you can create a note block schedule to quickly edit the information if desired, but put the actual generic annotation symbols on your sheet. It’s another great way of creating graphically what you want without adding a bunch of parameters to a random category in your project that may cause problems down the road.
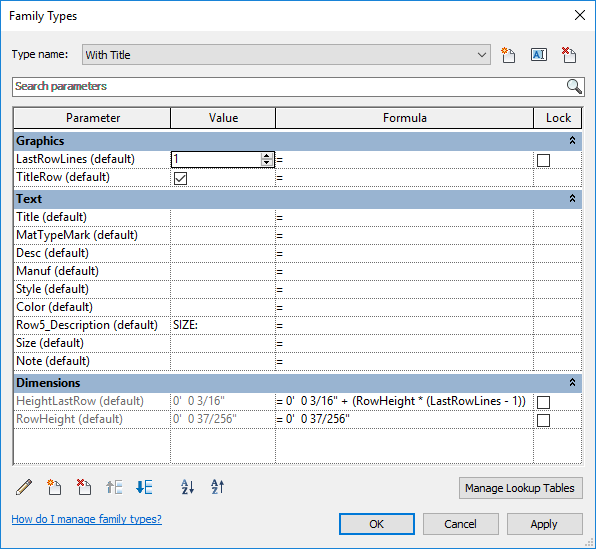
The symbol family is a mixture of label fields and a couple of dimensional parameters, to allow for flexibility in the height of the Note row.
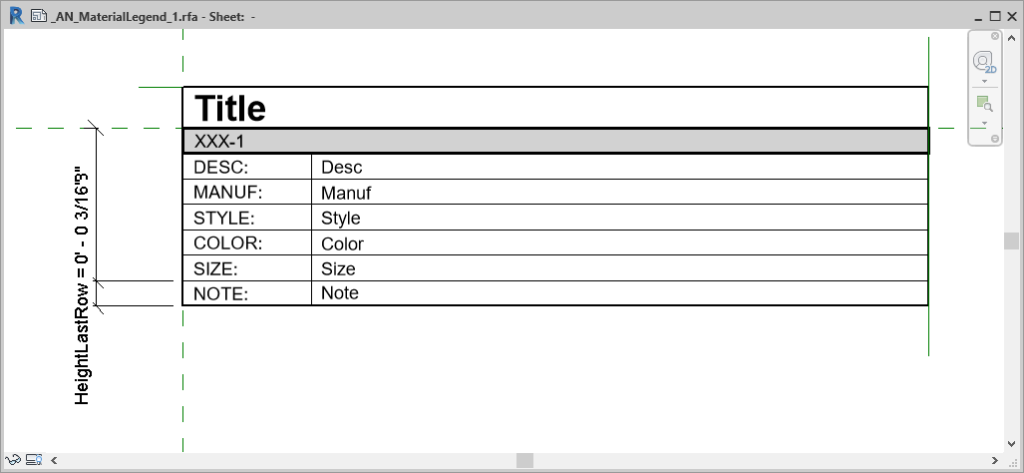
All of the parameters are instance, for maximum flexibility, but you can make some type if that suits your purpose.
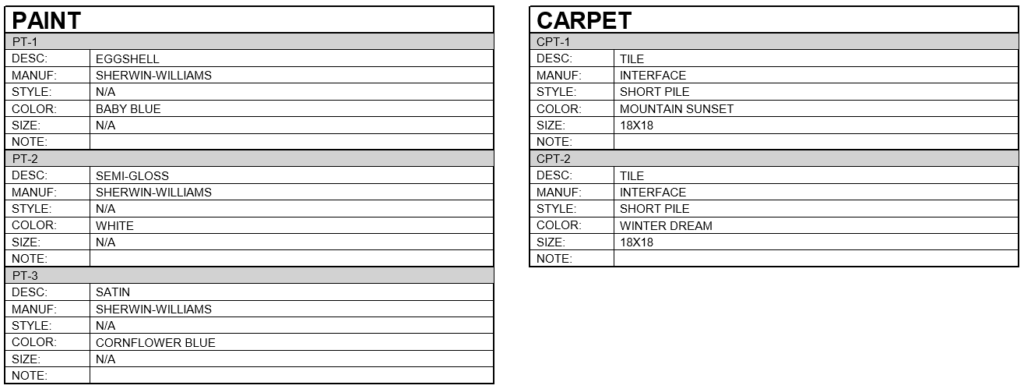
When placed on a sheet, you can put them together like this, creating the illusion of a schedule. The top row visibility is an instance parameter so that each material of the same category can be grouped together easily underneath.
As a schedule, the information appears like this. It can be edited here, which would also update the graphic schedule on the sheet.
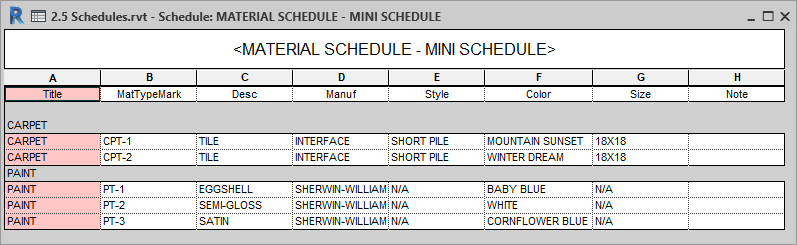
I like this because you can edit it more than one way and if you copy an instance, you can just change the information that’s different and it will add another row in your schedule.
I hope that this opened your eyes to all the possibilities of note blocks and how you can use them to schedule elements in your model that you aren't actually modeling but would like to populate in an intelligent manner.