If you’ve attended a recent CADD event, there’s a good chance you’ve heard us mention Autodesk 360 at some level. The reason for this is simple; Autodesk 360 combines the power of your personal workstation with that of the cloud for a combined solution that brings a wealth of new opportunities to your business. What’s even more exciting is the way Autodesk has made Autodesk 360 part of your Autodesk Subscription benefits.
Given the rise of model-based design using tools like Autodesk Revit, AutoCAD Civil 3D, and the like, many are already designing in 3D. Despite modeling in 3D, creating 3D visualizations from those models remains a time consuming task many would rather forgo. Realities like this are why Autodesk 360 services like Cloud Rendering are so exciting. With Autodesk 360 Cloud Rendering, you can now harness the 3D models you’ve likely already created to create project-winning 3D visualizations in minutes.
Autodesk 360 Cloud Rendering Integration
Starting with Autodesk Revit 2013 and AutoCAD 2013, Autodesk 360 Cloud Rendering is directly integrated into each products rendering panel. Getting started inside Revit or AutoCAD is very similar to existing rendering workflows…AUTODESK 360 INSIDE AUTOCAD

Navigate to the Render Ribbon tab, Autodesk 360 panel, and finally Render in Cloud button within the default 3D Modeling Workspace.
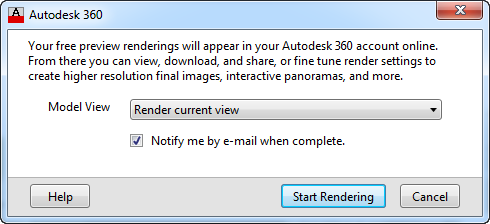
This will open an Autodesk 360 dialog where you can select the view you would like to render. Use the dropdown menu to select the desired view, and click Start Rendering when you’re ready.
AUTODESK 360 AND REVIT
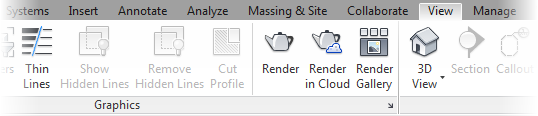
In Autodesk Revit: Navigate to the View Ribbon tab, Graphics panel, and finally Render in Cloud button.
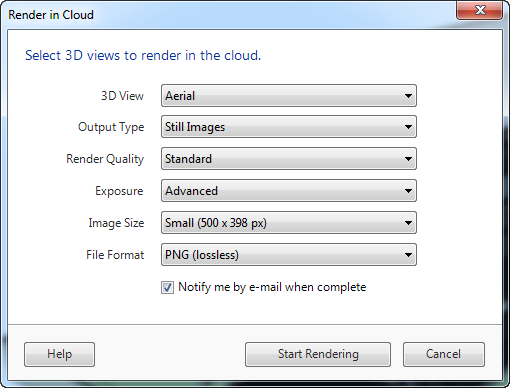
Similar to the AutoCAD workflow, a Render in Cloud dialog opens letting you select the desired 3D view. As you can see, Autodesk has tailored this dialog to align with the way Revit manages views. Still, like the AutoCAD dialog, click Start Rendering when you’re ready and Autodesk 360 will begin your rendering.
Retrieving your Autodesk 360 Rendering
Since Autodesk 360 disperses the task of rendering your model across hundreds of servers, verses a single workstation, you can expect your rendering to finish in a matter of minutes. While the exact time will vary based on the complexity of your scene, resolution, and the like, our tests have found most renderings are available for download within 5-15 minutes. Regardless, Autodesk will send you an email similar to the one below once your rendering is complete so you can log into the Autodesk 360 Rendering site to retrieve it.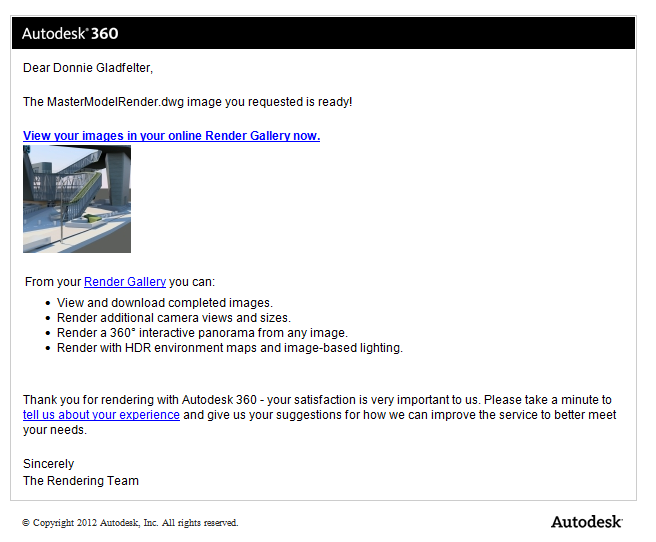
After logging into the Autodesk 360 Rendering site, you’ll see a gallery of your available renderings. Beyond simply providing the opportunity to view renderings, this interface also allows you to download, and even re-render a scene with different settings.
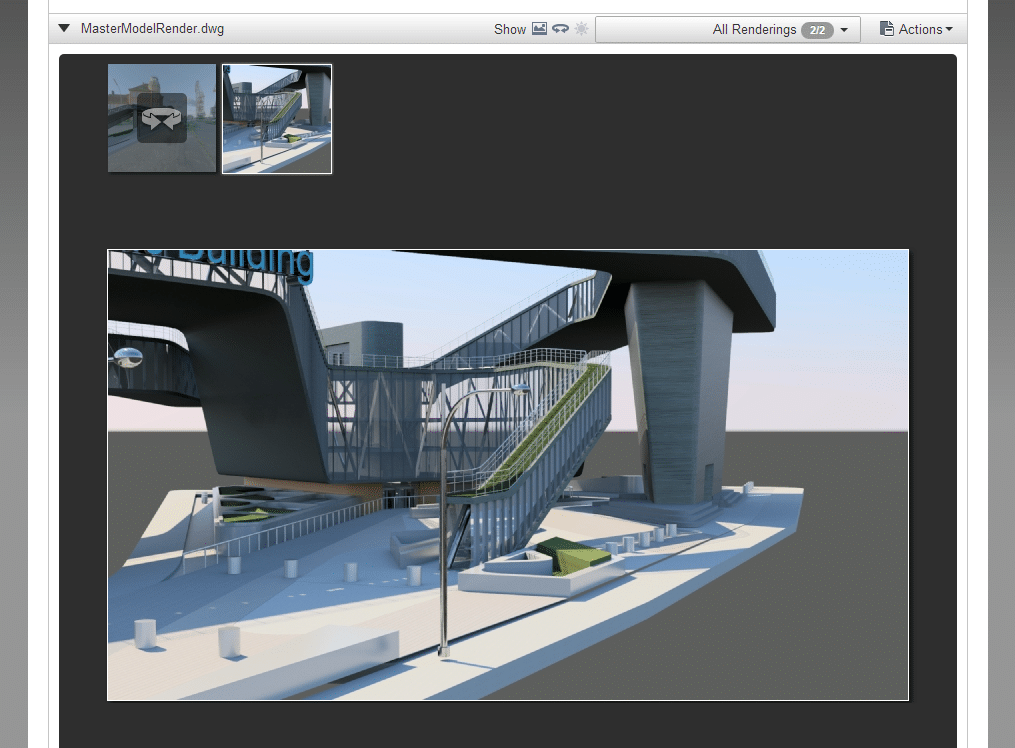
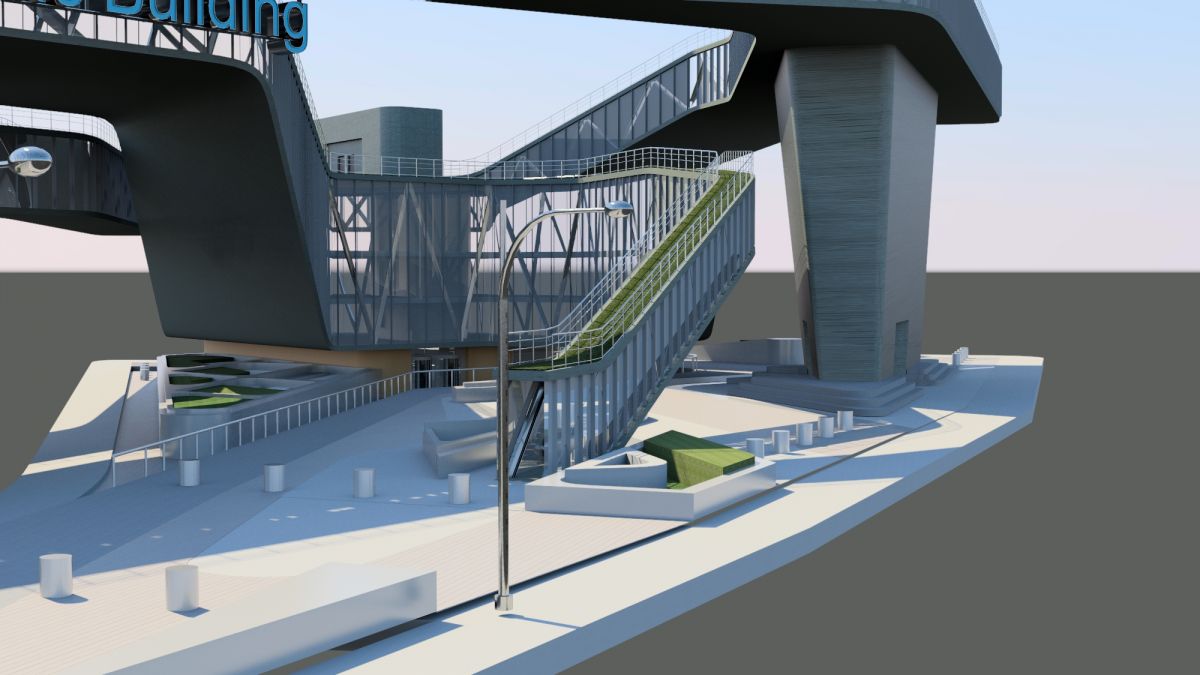
Understanding each scene is unique, different light sources, a varying number of faces, etc.; the following scene took about 10 minutes to render a high-quality JPG at a resolution of 2000 x 1125.