Revit 2019.2 just dropped this past week, and while yes, the zooming in and out of schedules is really really great, I find myself very excited about the additional functionality added for BIM 360 users.
Revit Files InBIM 360- Just Plain Files and Design Collaboration
Previously, you had two ways to put your Revit model into BIM 360 :
- You could just "upload" it like any other file, but that required you to download the file locally if you wanted to do work on it.
- You could use BIM 360 Design (which is a FANTASTIC feature, by the way) and use theBIM 360servers to host your cloud based workshared model, essentially leveragingBIM 360as your file server in the cloud when you needed multiple firms and users in different offices to access it.
New Cloud Models in BIM 360
Revit 2019.2 has added a new way to put your Revit file in the cloud: something they are calling "Cloud Models". Simple, straight to the point.
Basically, a cloud model is a way to leverageBIM 360for a single-user non-workshared Revit file, which is something we see a lot of our clients do for smaller projects, or if they are a team of one.
There used to be no way to useBIM 360like a file server for your Revit model unless you were using a workshared file. This new functionality adds the last piece of flexibility for Revit users needing to work in BIM 360.
How to Save Your Revit Cloud Model - Terribly Easy
To make sure things flowed smoothly, I tried it out. I created a super complex sample model:
[caption id="attachment_31997" align="aligncenter" width="300"] Simple Revit Model[/caption]
Then, I went to File > Save As > Cloud Model (new button!)
[caption id="attachment_31998" align="aligncenter" width="424"]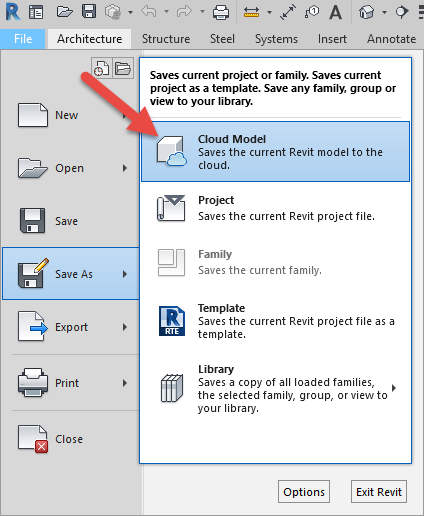 New Save As Cloud Model option on Revit Application Menu[/caption]
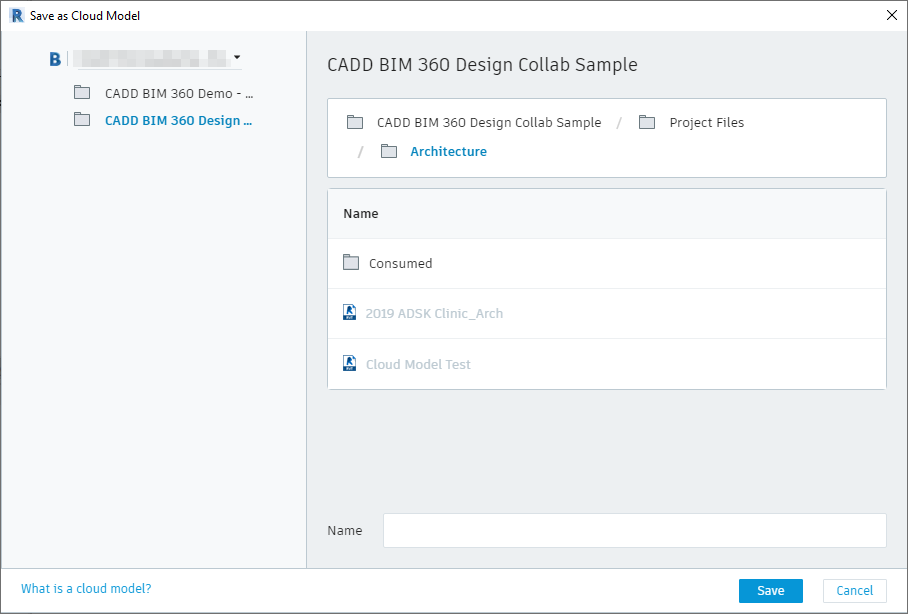
The Save as Cloud Model dialog opened up. This let me navigate to myBIM 360projects. I clicked on some folders, found a nice place for my model, gave it a name and clicked the Save button.
After a series of simple prompts, Revit let me know it was done.
[caption id="attachment_32000" align="aligncenter" width="400"]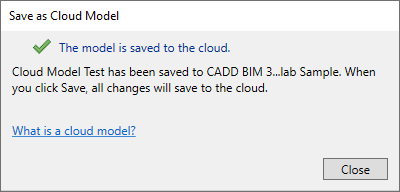 Revit Cloud Model Confirmation[/caption]
That's it. I logged into myBIM 360project via my iPad app to make sure it was there and I saw a happy smiley face design smiling back at me. Overall, a very simple and straightforward process that really required zero new steps on my part. Now that my project is a Cloud Model, I can simply hit Save like normal and my project work is saved up in myBIM 360project.