Glass railings have become somewhat ubiquitous in today's design world, but Revit doesn't seem to have caught up with doing them easily. You can create a panel family, but the width is set. So when you get to the ends of your railing, you have to do math and figure out what's left and make a panel to fit. Then, for every run of railing with different end panel widths, you have to make new railing types. This is not efficient or desired.
I have a better way! Use a "railing" for your glass panel!
What do I mean? Create a profile that is a long, thin rectangle, and make it a "rail" object. Rails automatically go from one end of the railing sketch path to the other, continuously. This solution eliminates the need to make separate panel types for the ends for each run of railing.
The downside to this method is that you can't show a gap between vertical posts and the edges of your panel, but most of the time that can be shown in a detail and you don't want to model it anyway (overmodeling).
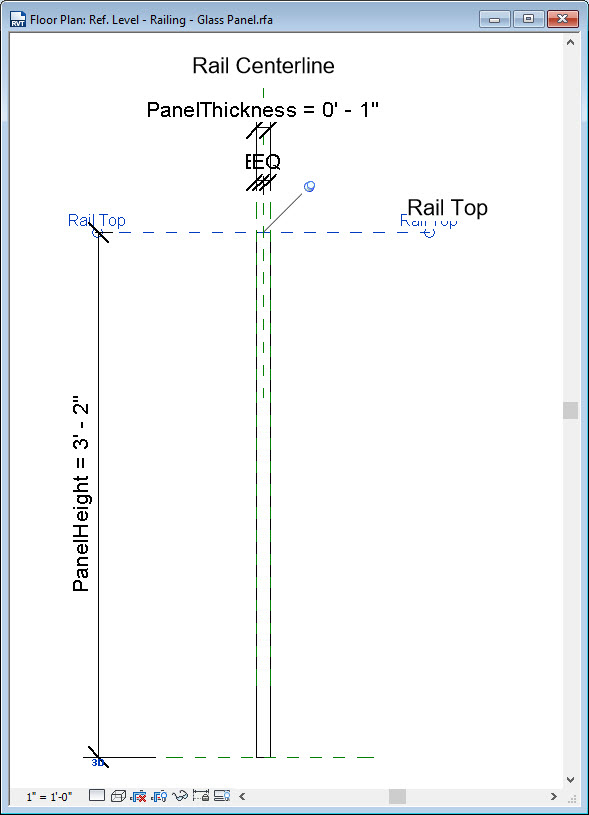
Here's the railing we're going to make.

First, create a "Rail" Profile that is the glass panel. I recommend making it parametric so that you can make different heights and thicknesses from within your project.
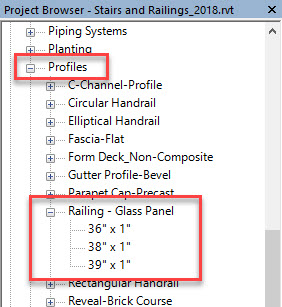
I have three different heights loaded into my project, but it's very easy to duplicate and change dimensions within your project. One thing to note with profiles is that it doesn't matter if the parameters are type or instance because they are nested into system families, so they will always behave as type parameters.
Here's where the fun begins. Choose a railing type to duplicate and match these settings.
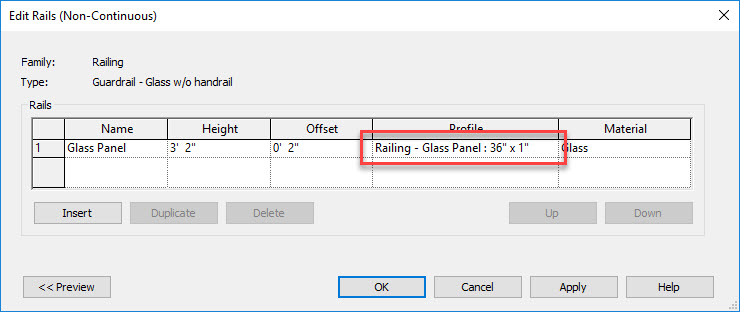
For the "Rail Structure" (Non-Continuous), give it a name, choose the height at the top, offset, and pick your profile from above. You can also make it a material so that it renders properly.
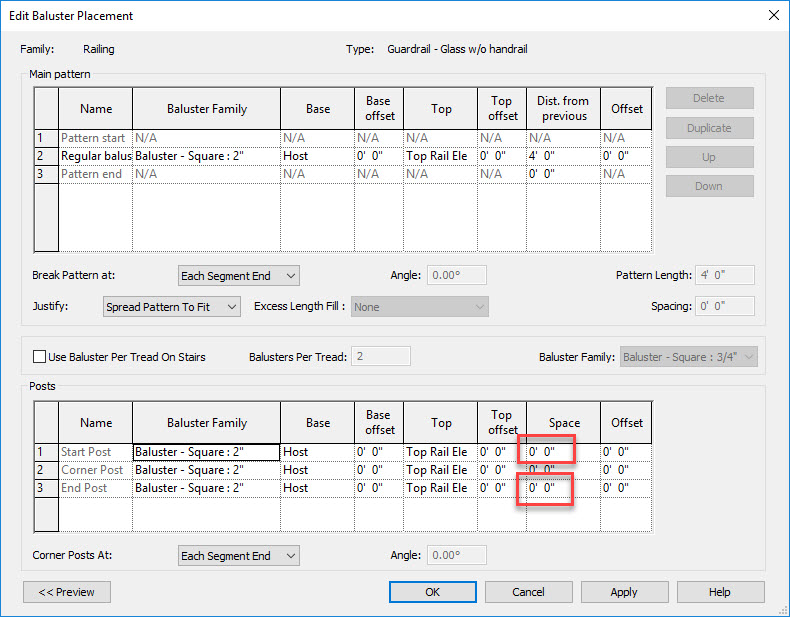
Now set up your balusters. The most important thing is to set the start and end post "Space" values to "0" so that you can get the edge to line up properly with the top rail (keep reading for those settings).
Now set up your Top Rail (go back one level of dialog boxes)

Click on the field under "Type" (outlined in red above) and this will open up a nested system family. Make sure that if something is already chosen, that you duplicate it first, otherwise it will change this system family everywhere it's used.
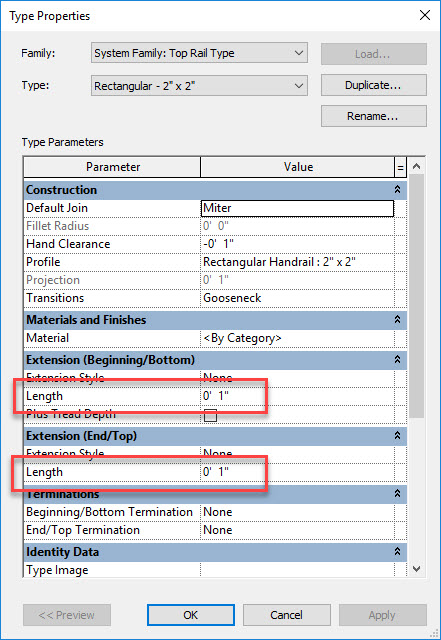
Set the Extension lengths to half of the width of your balusters. This will cause a flush condition at the intersection of the top rail and the start/end posts. If you don't do this, then the top rail will stop in the middle of the start/end posts.
Now you have a glass panel railing that is the right family category. You don't have to fake it with a curtain wall, in-place family, or some other thing that doesn't work quite correctly.
If you don't want balusters in the middle of your railing runs, you can add a surface pattern to the glass material for your glass rail, but even if it's a model pattern, you can't align it manually so it comes in looking funny.
A caveat to this is that you will have to create a different railing family if you want to use it on a stair/ramp because the top rail would have to be a different system family with extensions at the top and bottom.
There's a lot more to explore with this topic, but I'm going to leave that to another post.
Happy Reviteering!