There is a known issue between Revit and the "Microsoft Print to PDF" printer in Windows 10. If this printer is set as the default printer in Windows 10, the "Setup..." button, shown below, will become non-responsive.
[caption id="attachment_28654" align="aligncenter" width="300"]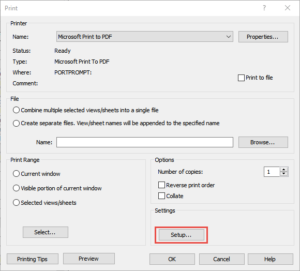 Revit Print Dialog[/caption]
In order to resolve this issue, you have to change your Windows default printer to a different printer. Changing the printer in the Print Dialog window will not resolve this issue. However, Revit does not need to be closed, only the print dialog window. We recommend changing your default printer to another PDF printer.
Changing Default Printer
In order to change your default printer, you need to go to Settings by clicking the windows start icon, and then the gear icon (as shown below).[caption id="attachment_28657" align="aligncenter" width="150"]![]() Settings Icon[/caption]
Settings Icon[/caption]
This will open the settings dialog, where you will need to click "Devices." This will take you to the screen shown below. Click "Devices and Printers" under "Related settings."
[caption id="attachment_28659" align="aligncenter" width="500"]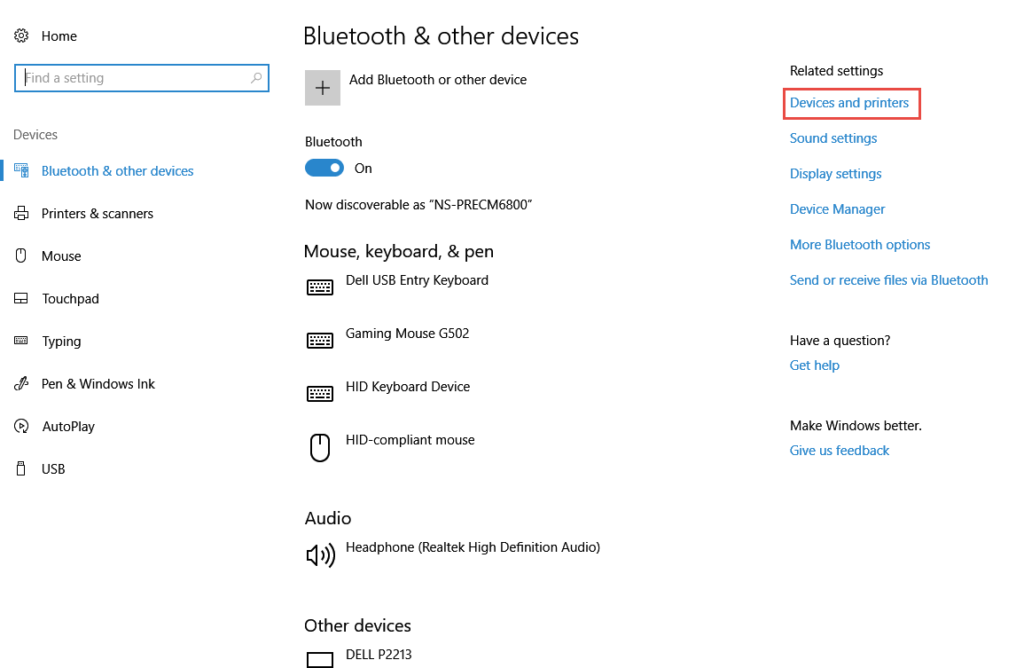 Windows 10 - Devices[/caption]
This will show you a window with a list of available printers, which should look similar to the window below. Right click on the printer you want to set as your default printer and click "Set as Default Printer." In Revit you will be able to relaunch the Print dialog window and click "Setup..."
[caption id="attachment_28658" align="aligncenter" width="500"]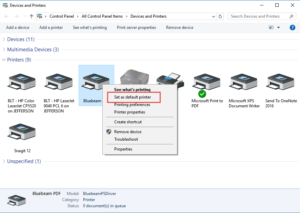 Set as Default[/caption]