Welcome to Part 2 of our Schedule Series! I’m going to start with how the schedule looks because I often use graphics to help me with a variety of things. I utilize shading to differentiate different types of parameters.
Shading
Color is a powerful tool within schedules. It can be used to differentiate between different groups of parameters, help quickly identify working schedules, and help you identify which parameters are used for sorting/grouping/calculating and shouldn’t appear on your drawing sheet. Simply highlight a column or the schedule title cell and then choose the Shading tool from the ribbon.

Text & Borders
I’m not going to lie, the features available to make your text look good in a Revit schedule are very limited. You can choose 3 different text styles for the three different parts (Header text, Title text, Body text) and that’s about it. You can’t intuitively make certain elements bold or apply a shade to every other row to make it more readable. You can add some borders but it can be finicky. I’m going to teach you a couple of tricks that I’ve learned over the years to get over a few of these limitations.
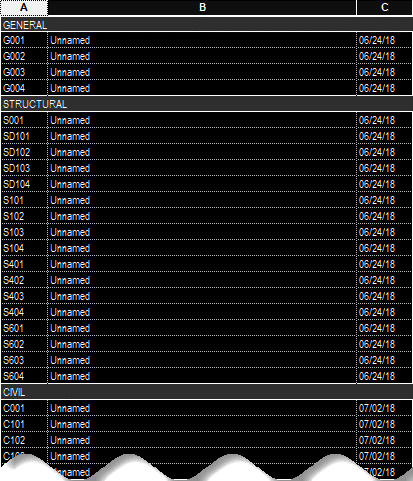
Bold Headers & Custom Cell Borders
There is a trick to make the sorting/grouping headers between different rows a different text style than the rest of your schedule, but it’s something that is done manually to the schedule. I will walk through the steps to make your schedule appear as it does in the image below.
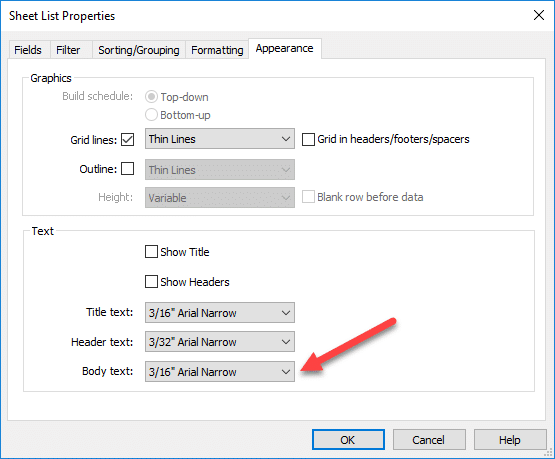
Custom Text Settings
- In the Appearance tab, uncheck the boxes for “Show Header” and “Show Titles.” The Text styles that you pick for these don’t matter because you won’t see them.
- In the “Body Text” style, choose the style that you want your sorting/grouping headers to be.
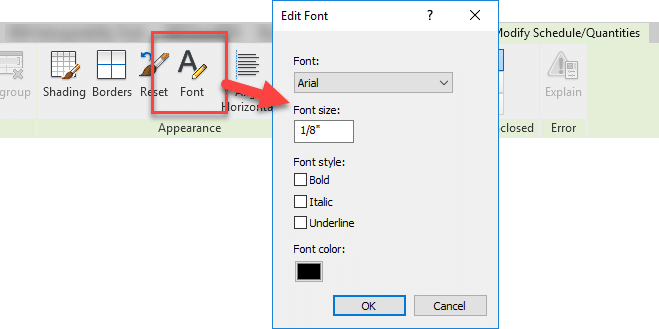
- Go back to your schedule and select all of the columns by clicking and dragging across the letter header.
- Click the Font tool in the ribbon.
- Choose the font and other styles that you want. Changing it here will change it for all the body text of the schedule, but keep the sorting/grouping headers to whatever was set in the “Body Text” style.
Custom Borders
Making the borders custom is another manual procedure, if you don’t want the borders on all 4 sides of every cell, then you can’t just use the settings in the Appearance tab.
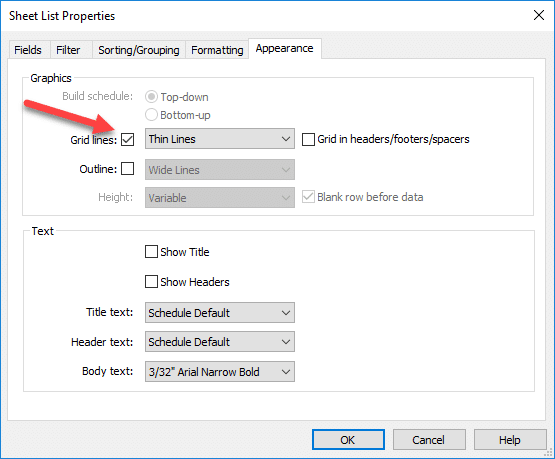
- In the Appearance tab of the schedule properties, make sure that the box is checked next to the grids that you want to see. If you don’t have “Grid Lines” checked then the grids won’t show at all.
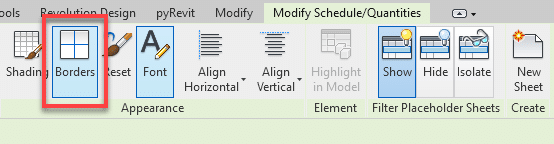
- Now go back to your schedule and select all the columns, the same way you did to change the font.
- Click on the Borders tool in the ribbon.
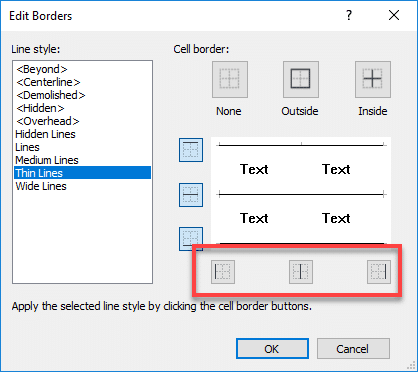
- Using the buttons around the sample, click on the blue box where you want to remove the border.
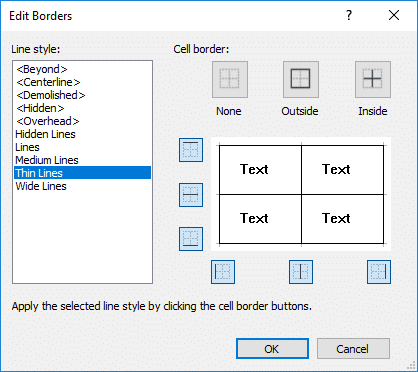
- Notice that if you take the border off, the box changes from blue to grey.
- If you later add additional columns to your schedule, you will have to remove the borders from those new columns using the same method outlined above. New columns default to the settings in the Appearance tab of the properties.
View Templates
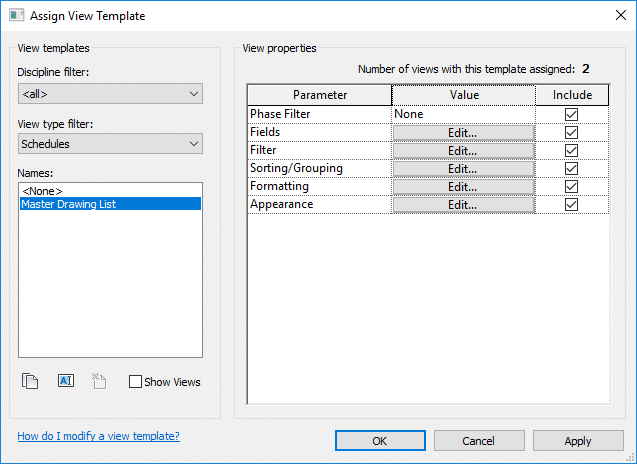
View templates are powerful tools in general in Revit and in the last few versions, they have been made more powerful as they relate to schedules. You can control one or more of the property tabs, similar to how you control which parameters are controlled by any other view template.
Tips & Notes
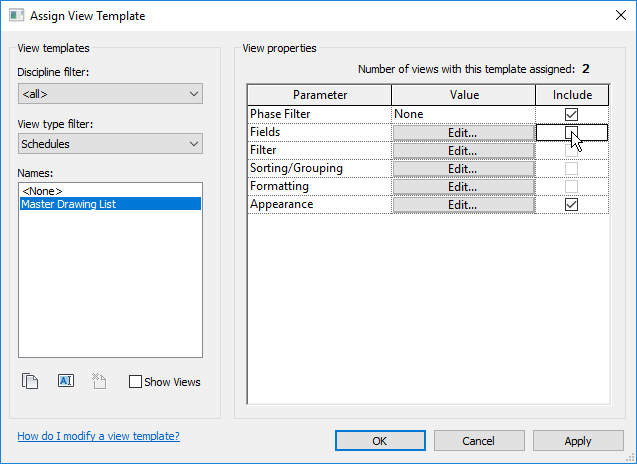
- If you uncheck the box for Fields then it automatically also unchecks the box next to Filter, Sorting/Grouping, and Formatting because all of those are connected.
- If you have customized your borders and headers (from the previous section) and create a view template from this when it is applied, those settings will also be applied (pretty cool!) BUT, if you change anything in the view template, these customizations will get reset, so be careful. If you want to update/change these manual graphic customizations, you will have to remove the view template from the view, change them, and then create a new view template that you can then apply to other views.
- They work best between schedules of the same type and element and are not so great across different types of schedules.
- Schedule view templates are great when you need to split up a schedule onto multiple sheets. You can just uncheck the box next to Filter and then leave the rest checked.
- They are a great way to apply customization to different schedules of the same type and category.
Combine Parameters
If you have parameters that you would like to see together in the same column, you can use a feature inside the Fields tab to combine them into a single column.
- Open the Fields tab of the schedule properties and click on the Combine Parameters tool.
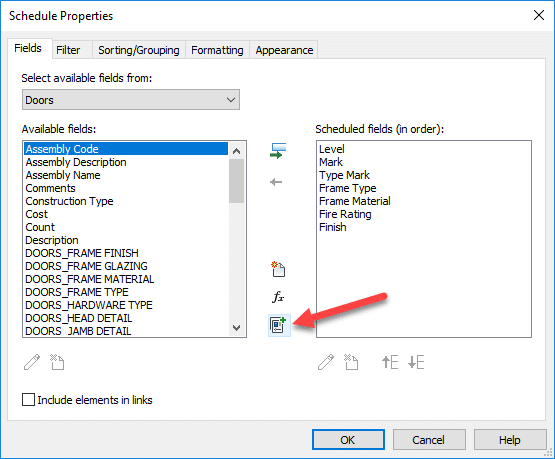
- Choose the parameters from the left that you want to include. Either double click on them or use the add parameter button.
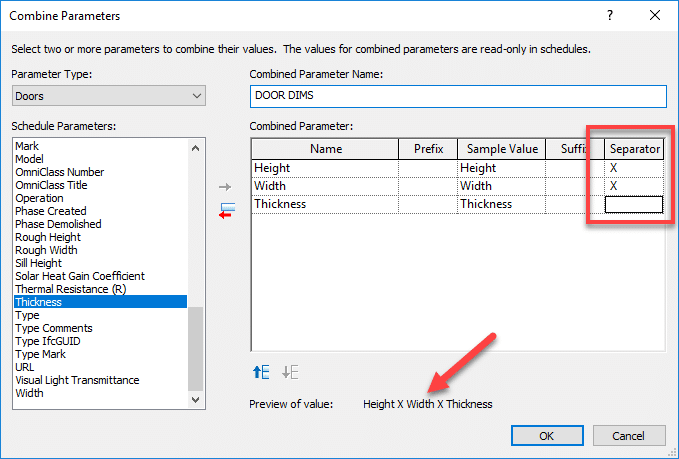
- Use the arrows at the bottom to change the order, if desired.
- At the left, in the Separator column, choose what you want between each value. At the bottom of the dialog box, you will see a preview of what the combined parameters will look like (arrow in the image above).
- Note: If you want spaces on either side of the separator, add these spaces in the Separator column.
- Give your combined parameter a name and click the OK button.
- Move the parameter to where you want it to appear in your schedule.

- Click OK to view your new combined parameter column in your schedule. Note that if you have curtain wall panel doors, that the thickness will not appear (arrow in the image below).
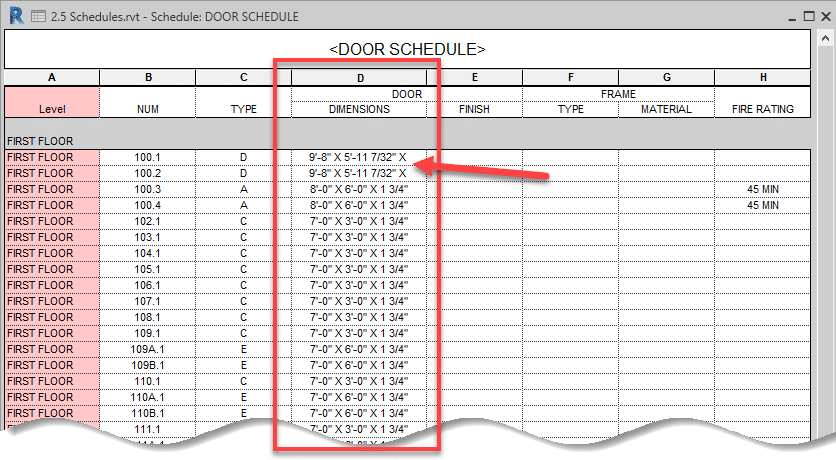
Side note: One of the many reasons I don’t like curtain panel doors is outlined in the image above. Just replace the panel with a regular wall type and then you can use a regular door in it.
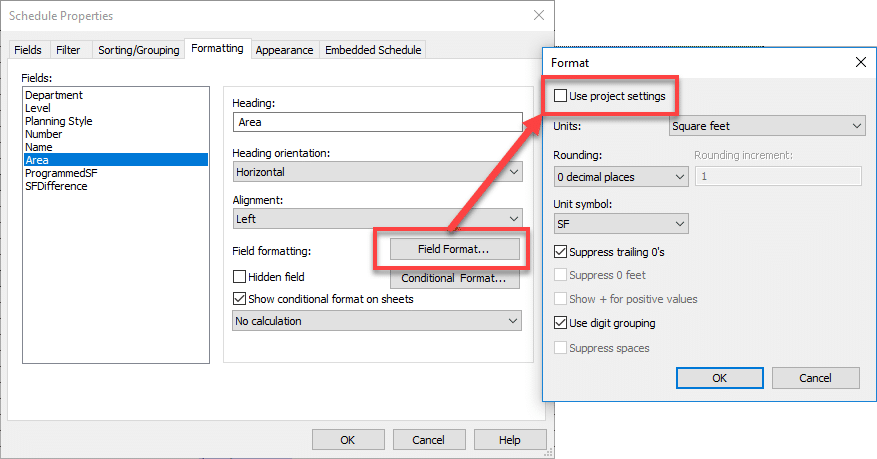
Editing Units
For any parameters that have units, you can individually specify to what accuracy this information is displayed. Under the Formatting tab in your schedule properties, select the parameter from the left that you want to edit, click the Field Format button, uncheck the box for “Use project settings” and change whatever you would like. If you want to change this information globally, then change it in the project settings itself – go to the Manage tab > Setting panel > Project Units.
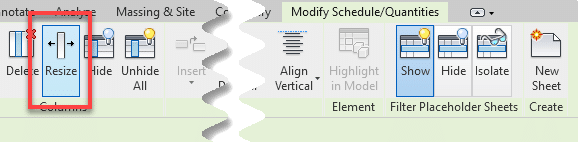
Column Widths
You can set the widths of your columns to be actual dimensions and to be all the same, if you so choose. If you select a single column, the value you enter will be for just that column. If you select multiple columns, the value will be divided evenly amongst all highlighted columns.
- Highlight the column/columns that you wish to set a custom width.
- Click on the Resize tool.
- Enter the desired value in the Size: box.
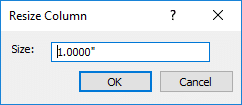
- The column will now be resized and if you selected multiple columns, they will all be the same size, evenly divided among the value entered.