All drawing sets have a sheet list somewhere that is an index of the sheets in the drawing set. Along with having that schedule, a working sheet list schedule is invaluable in aiding with sorting and grouping the sheet properly, showing revisions, and providing a template for consultants to use so that you can link sheets from a linked model into the main architectural model.
Master Drawing List
This is the sheet list that goes on your cover sheet or at the beginning of your drawing set and acts as the master list of the set. It has columns that are visible and some that are hidden but must be included in order to sort and group the sheet properly.
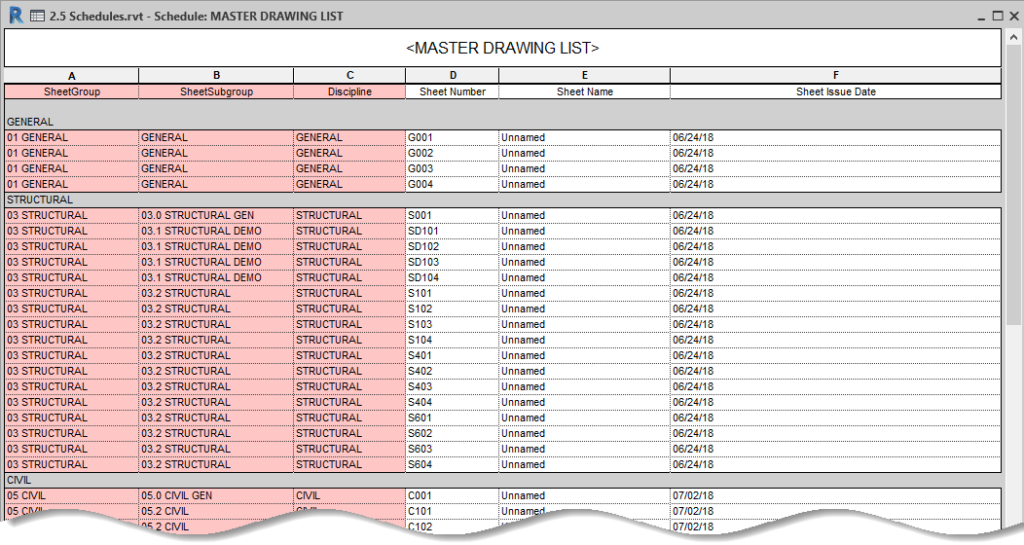
The three columns shaded in pink are used for sorting and grouping, but will ultimately be hidden for printing the schedule.
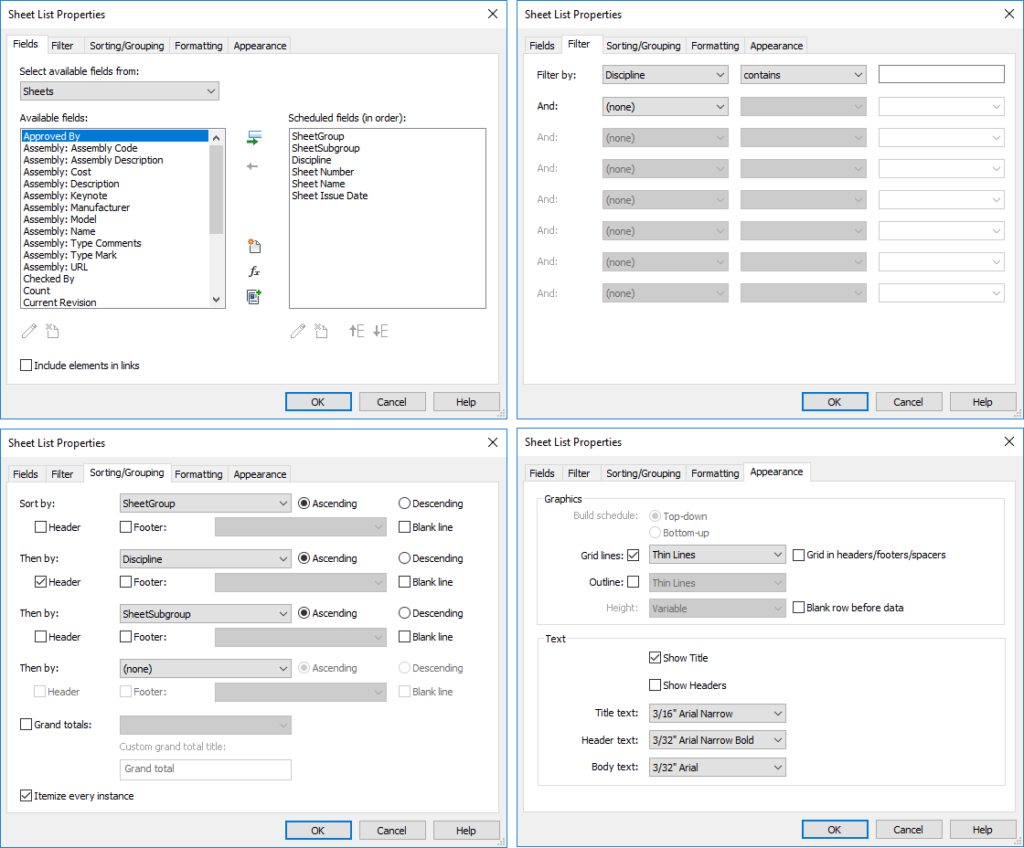
To achieve a schedule that sorts and groups this way, use the following settings:
Master Sheet List – Working
This sheet list is for sheet management. If you have this type of working view in your Revit file, you can leave the columns hidden in the printing version and just update here and it will update there, too.
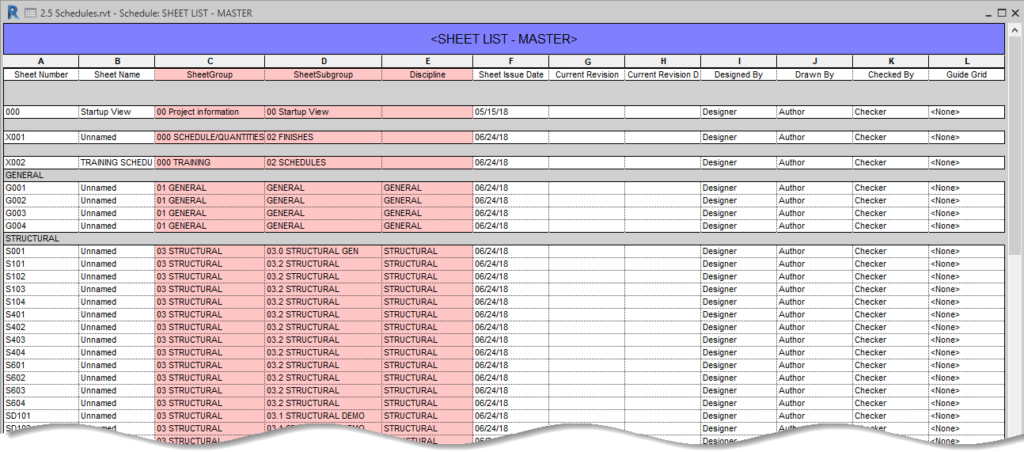
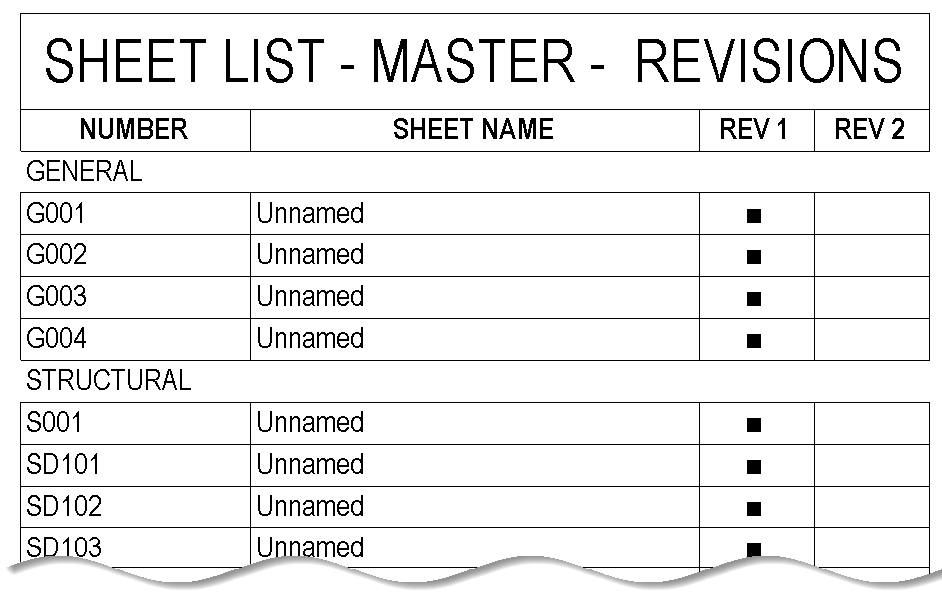
This sheet list has additional columns showing revisions, who worked on the sheet and guide grid information. This can be used to check that this information is correct across similar sheets. A working sheet list can also be used to assign sheets to specific people and have a record of who is working on what. Some firms find it useful to place a sheet list like this on their “splash page” – the page that the project file always opens to and that contains vital project-related information.
Using Yes/No Parameter for Included Sheet
Often you will want to include a column with a symbol that indicates that sheet is included in a particular submission. Yes/No parameters appear as the words “Yes” or “No” when you put the schedule on a sheet, which is not how anyone ever wants to see it. Instead, you typically want a dot or something similar. This is achieved through a calculated value.
- Create a Yes/No parameter field for each revision.
- Create a calculated value field for each revision. Use this for the settings, replacing the parameter name for each revision.
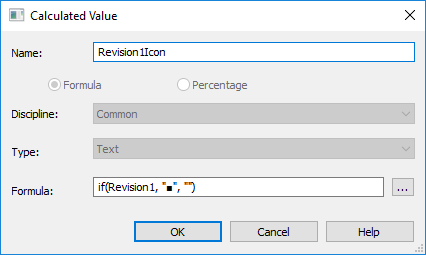
- The value in the Formula is “if(Revision1, “■”, “”)
- You can use any symbol you want. This one was copy/pasted from the Character Map.
- You must create this calculated value parameter first and then duplicate the schedule to create the sheet view, otherwise, you will have to add the calculated value parameter to each schedule individually.
- If you check the box in the Yes/No parameter, then the little box will appear in the calculated value parameter cell, which will look like this on your sheet.
For more information on how to use a sheet list that can be shared with consultants (so that you can use the sheets directly from their models and not have to create placeholder sheets in yours) refer to this blogpost. If you are interested in using Dynamo to tackle some of these same issues, check out this blogpost from my colleague.