In this post, I'm going to cover using Images in schedules, incorporating Design Options into your schedules, and using schedules with Phasing.
Images in Schedules
You can include images of your elements in your schedules. There are two ways to achieve this.
Method #1 – Embed the image in the family
This is my preferred method because it doesn’t result in a bunch of image files in your project that you need to manage separately. They come and go with their associated family. It does increase the file size of each family, though, so keep that in consideration, especially if you need a different image for each type.
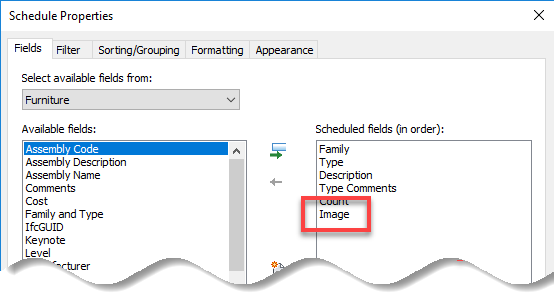
When you add it to the schedule, make sure to choose the “type image” parameter, not the “image” parameter.
- Open the family and Family Types dialog box.
- Click on the cell next to Type Image and the box with the ellipses will appear.
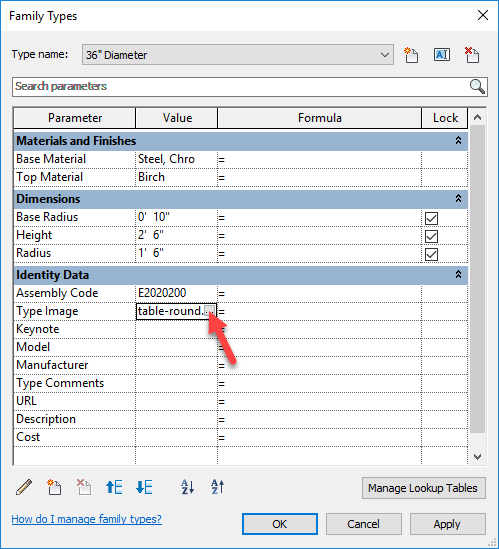
- Click on that box to open the Manage Images dialog box.
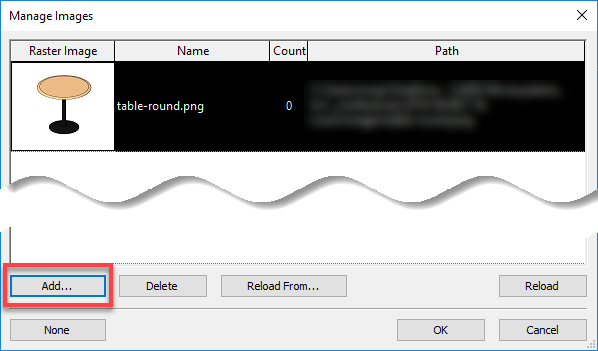
- Click the Add… button, browse to where the image lives, select it, and click Open.
- Click the OK button.
- Repeat for each type in the family, since this s a type parameter and the image will have to be defined for each type.
- Save and load the family into your project.
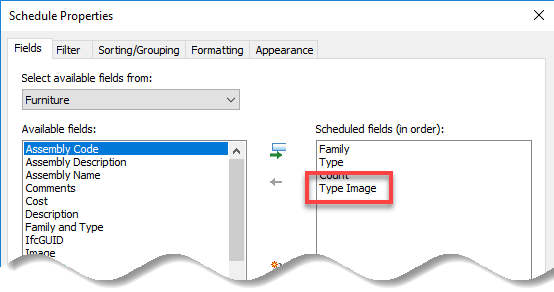
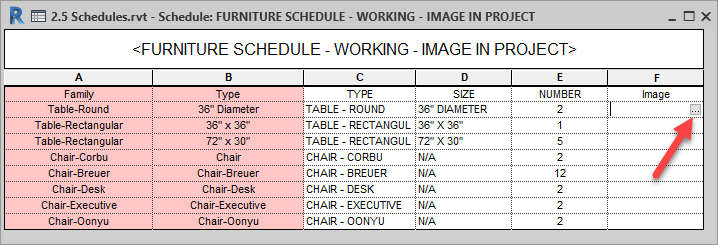
- Open the schedule in your project and add the Type Image parameter. In this example I am using a furniture schedule.
- In your schedule, that image file name will appear automatically. Below are the two versions of the schedule, working and printing.
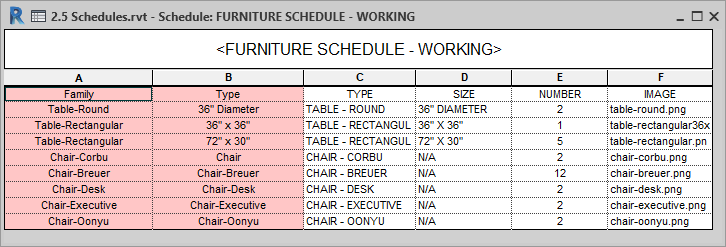

- On the sheet, in that column, you will see the actual image.
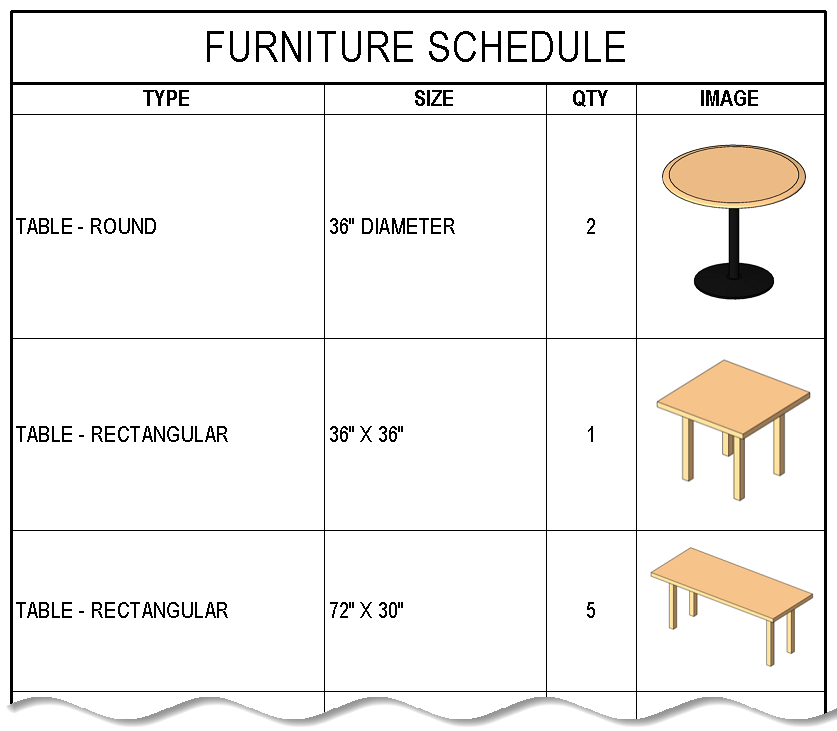
- I used the OOTB Description and Type Comments parameters for the TYPE and SIZE columns.
Method #2 – Add the images to your project file
You can also add the images directly in your project and then select them to display aside a particular row in your schedule. This has to all be done manually and the images now live directly in your project file, so you have to manage them directly here, instead of them being tied to the family itself.
- Open your schedule and add the Image parameter.
- In the schedule view, click on the cell and the box with the ellipses will appear. Click on that to open the Manage Images dialog box.
- Add the image the same way and method #1 above.
- The image now lives inside of your project, not inside of the associated family.
Design Options
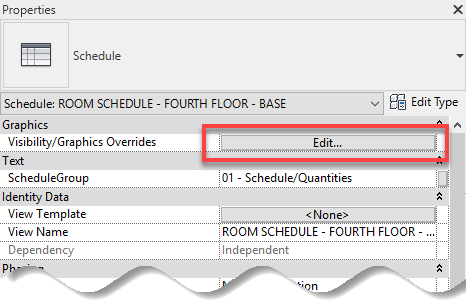
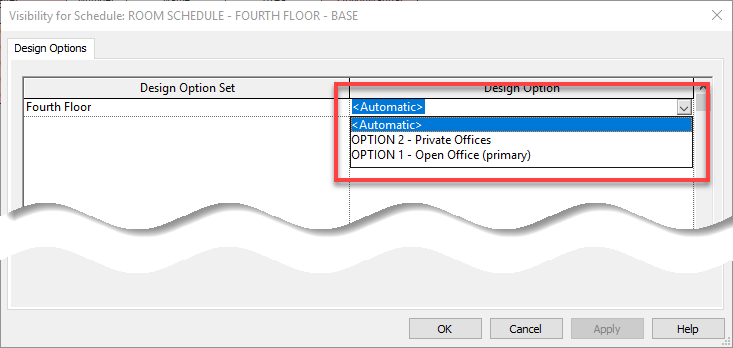
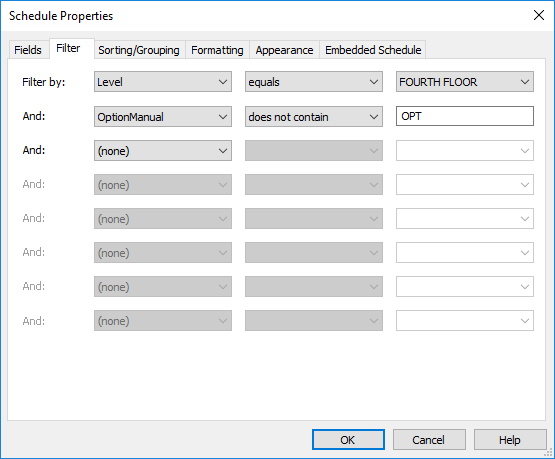
When you have design options in your project, a button for visibility/graphics will appear in your schedule properties. When you choose a design option, the schedule will display everything in the main model plus any elements of that category that are in the design option. If you only want to see the elements in the option without those in the base building, create a custom project parameter to sort by.
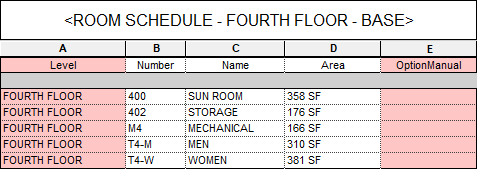
Example: Room Schedule
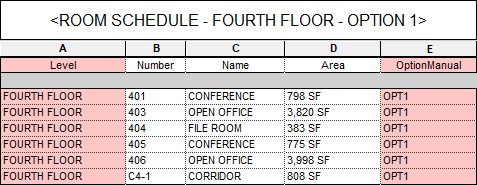
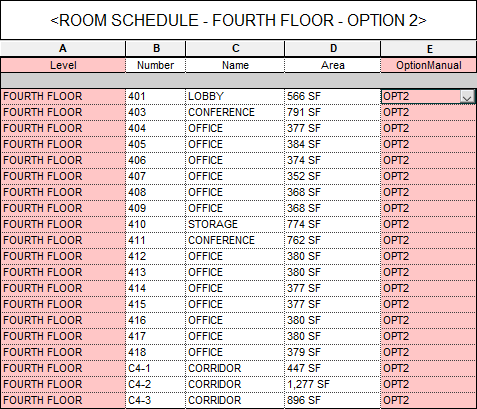
I have created two options plus a base on the fourth floor of my building. I created a custom Project Parameter called “OptionManual” to use to filter. I applied this parameter to any category that I might want to schedule and filter (rooms, doors, furniture, etc.). You can always go back and add more family categories as needed later, so don’t worry if you don’t get them all right now.
- From a plan view, activate Option 1, select all the rooms and filter, then input the value “OPT1” in the OptionsManual parameter field.
- Repeat for Option 2.
- Create 3 copies of the room schedule, one each for Option 1, Option 2, and Base.
- Set the Option in the Visibility/Graphics for Option 1 and Option 2 to the appropriate one for those schedules. In the base building one, it doesn’t matter which option you set it to because the rooms aren’t in an option. You can just leave that one as <Automatic>.
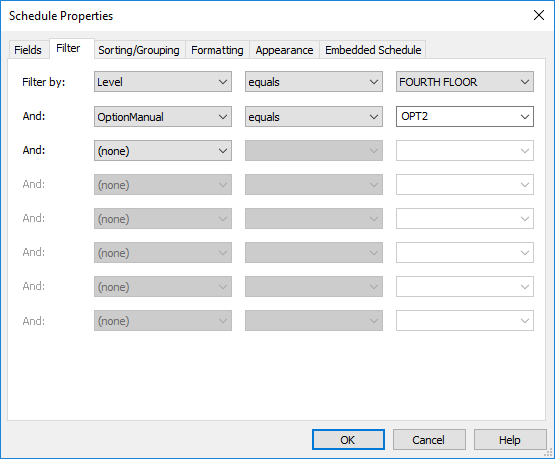
- Set the appropriate filtering values for each schedule.
- Option 1 Schedule & Filter Settings

- Option 2 Schedule & Filter Settings
- Base Building Schedule & Filter Settings
- Option 1 Schedule & Filter Settings
Phasing
Just like model views (plans, sections, elevations), schedules have phase settings. For elements that can exist across phases (doors, walls, windows, furniture, etc.), you can set both the Phase Filter and the Phase of the schedule. For elements like rooms that do not exist across phases, you can set the Phase.
This is great for creating Demolition schedules or for creating schedules for multiple phases of construction.