It's sad but true; every once in a while you have to take your brilliant Revit model and export flat old-fashioned DWG files. There are any number of reasons you might have to crank your Revit file through a time machine such as owner requirements, consultants still working in AutoCAD, etc., and there might be some very specific requirements and settings needed for that export.
Speaking of time machines, a fantastic feature in Revit is the ability to organize your project and the elements in that project by phases. I won't go into how to do that (or how cool it is) in this article, but I do want to point out a feature of the Revit to DWG export process that can be tricky to see immediately and also seems to be poorly documented.
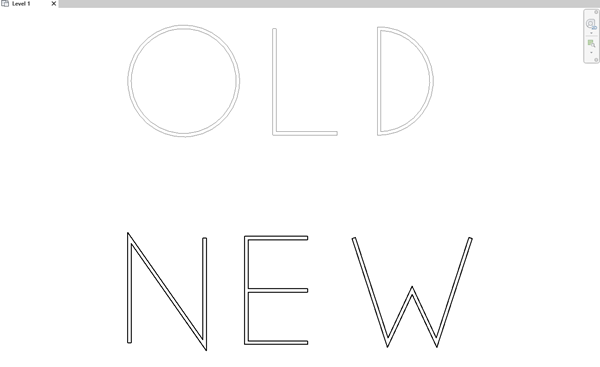
Let's take this amazing piece of architecture below. There are a series of walls in different phases. I wager you can guess which walls are in which phase...
One of my requirements for the export is appending text based on the phase status, so "-EXIST," "-NEW," "-DEMO," and "-TEMP." Revit has its own default export settings, but you can hop in there and make some tweaks.
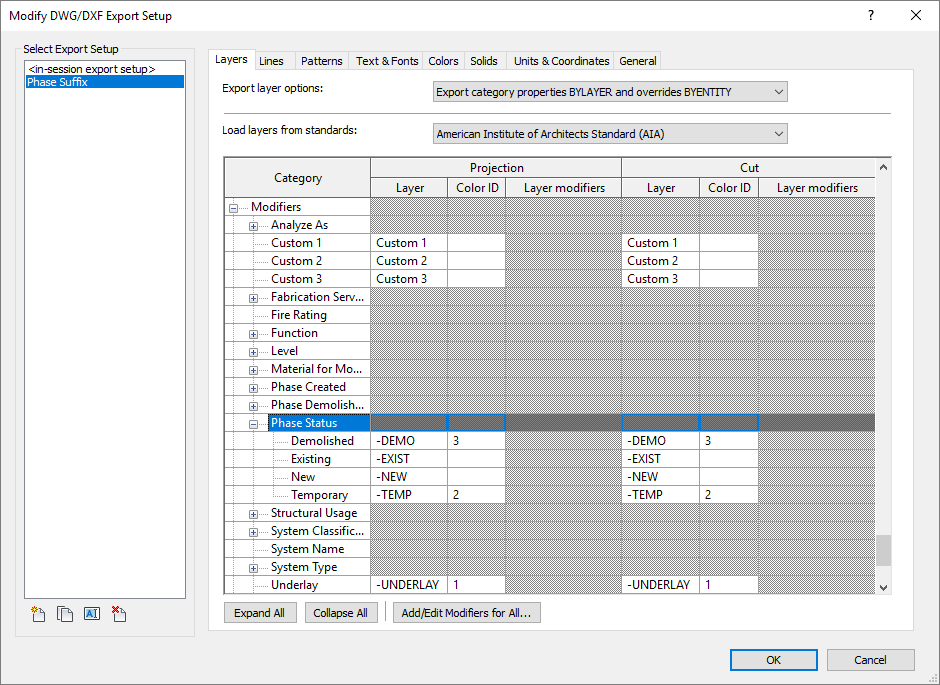
Under File > Export > Options, click on Export Setups DWG/DXF to bring up the Modify DWG/DXF Export Setup settings. This is where Revit goes to look to figure out how to draw your amazingly modeled elements into silly flat linework on layers. So the first place I need to check is what exactly my Phase Modifiers are set to.
Well, back up. The first thing I actually like to do is click Duplicate Export Settings and make a copy of my current settings to mess around with. I called this one "Phase Suffix."
Then I track down my Phase Modifiers. Within the export settings, Revit typically will take one of your elements linework, look at the category, and then draw that line on a layer that relates to that category. So, my Revit walls go on A-WALL. That's pretty straightforward for simple models and element categories. But what about parameters and settings for those elements that are not category specific like Level or Workset or Phase information? That's where the modifiers come in. You can add a modifier to any category in your DWG export settings, and Revit will change the layer that element's linework gets drawn on based on the modifier. So you might end up with A-WALL-LEVEL1 and A-WALL-LEVEL2. With that understanding, I find the Phase modifier, expand it, and update the default to my required settings.
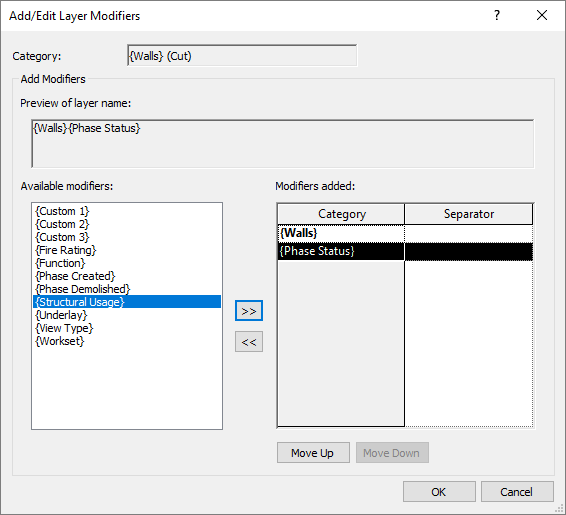
After I modify the settings, then I go up to my walls category and add the modifier to the Projection and Cut Layer settings.
All looks good. I click OK, go back to my plan view, and export my DWG. Everything should be great, right? Not that I don't trust how these things usually turn out, but, well, I don't. So I crack open the new DWG and take a look to make sure things are aligned with what the DWG requirements are.
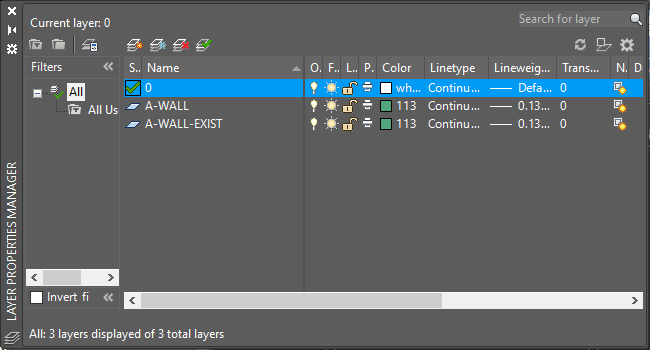
Hold up. Where is "A-WALL-NEW"?
I won't keep you in suspense. This is a Revit blog post, not a mystery novel.
It has to do with my Phase Filters. It turns out if there is no phase based graphics override on my elements, then according to the export, there is no Phase Status. Which I kind of get... but it does make me now have to set up a Phase Filter with Overrides for "new" elements, which is a little odd.
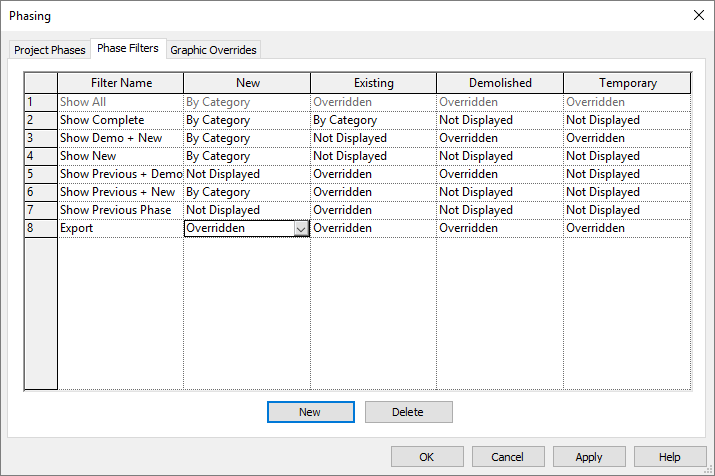
Now that I have an Overridden New element in a Phase Filter, I assign that filter to the view I want to export, churn out a DWG, and take another look at the layers in that DWG...

And my layer list looks good! I have some graphics cleanup to do, now that I am overriding what the new walls look like, but that can be pretty straightforward and not nearly as head-scratching as getting your phase status overrides may be.
Check out the Revit help on exporting DWGs here for more information and a broader look at the settings you can find when you need to generate a DWG file.