Common scenario - you are the prime on a project and your major consultants are all working in Revit. Each of these consultants is creating sheets in their own models, models that they are sending to you regularly. Wouldn't it be great if you could just tap into their sheets from those linked models and have them show up, in the master sheet list, in the correct order? This can be done with just a few easy steps.
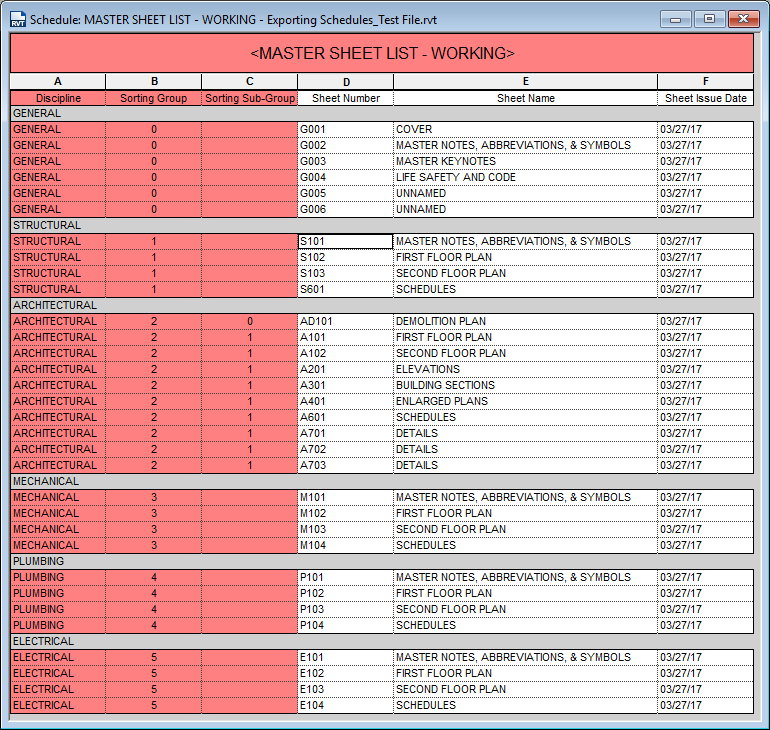
The first step is to configure the main drawing list the way that you want. I typically do this with a working sheet list schedule, so that I can have a version where I can see all of the columns. The three columns that are shaded are custom project parameters that I have added to my project to help me sort the sheets in the order that I want. You can name them whatever you like, what I have below are just suggestions.
To help me differentiate between the working and the print, I change the shading of the header and the "hidden" columns (columns that I use for sorting/grouping but don't want to see on my sheet). Here is what my working schedules typically look like.
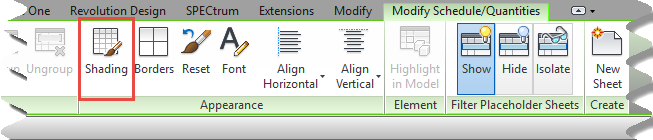
To change the color of a column or the header, select it and choose "shading" in the ribbon.
To sort the way I have above, set your sorting/grouping to look like this.

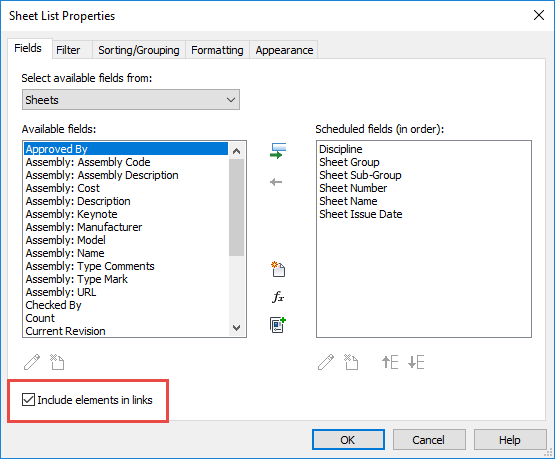
And the last step is to click the "include elements in links" box to allow all the consultant files show up.
Once your schedule is formatted, you are ready to save it out of Revit and send it to your consultants. They can then bring that schedule into their project, and it will automatically create and add the project parameters that you created for this schedule. This is key, so that each consultant can then input the appropriate values into the fields so that the linked model sheets will show up in the correct order in the master sheet list in the architectural model.
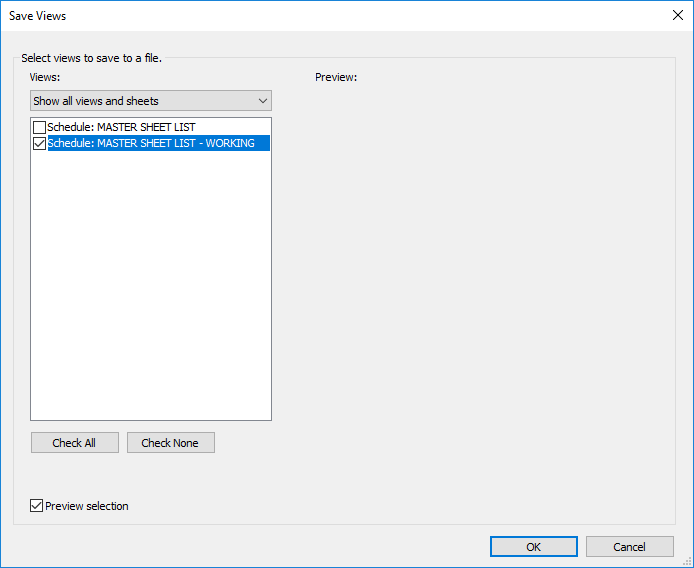
To save your schedule as a library file, go to Application Menu > Save As > Library > View
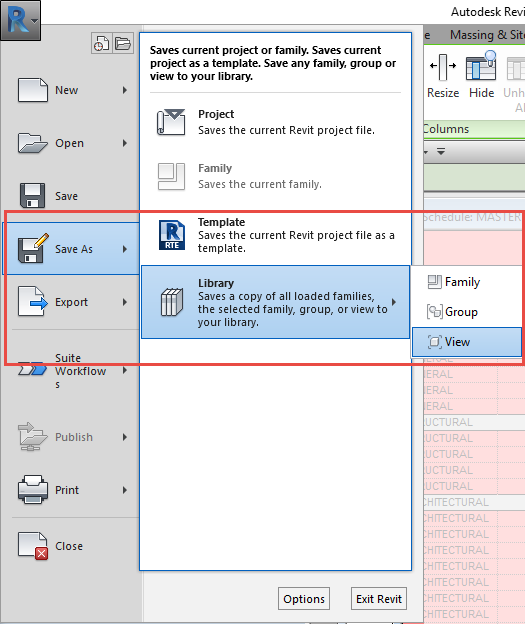
This window will pop up. Select the views that you want to save. You can choose any view that does not contain actual 3D elements - drafting views, legends that are just text and detail items, and schedules. If you choose multiple views, then they will all be saved in the same file.
Once you've saved this, you can send it to your consultants along with instructions on what values they should input in the first three columns.
In case you don't know how to bring a view into a file, go to the Insert Tab > Insert From File (you can't have a schedule as your active view or the button will be grayed out) > Insert Views from File, and browse to the file that you saved. It will be a ".rvt" file and you can open it by itself if you'd like.
You will get a window that looks almost the same as the image above, except it will say "Insert Views" at the top instead of "Save Views." Click on the view(s) that you want and they will be imported into your project and will auto-populate with the information in your current model.
Hopefully this will help you coordinate better with your consultants and greatly reduce the amount of time that you have to spend updating "dummy" sheets in your model so that they show up in the master sheet list.
Here is what the sheet list looks like on a sheet and in the schedule view.

This technique can be used to transfer any schedule format from one project to another, or even to create a library of saved views that can then be brought into projects as needed. You can save various formats of different types of schedules that are used for different project types and then only import in the ones that you need. This can help to keep your template file size down, especially when you work on building types that require different formatting for the same types of schedules.
Happy Reviting!!