Revit 2024 has been released-- and with it, some great updates for our MEP engineers out there. Many features and enhancements focus on documentation management, tying yourBIM 360coordination models to your Revit model, as well as a large update to the user interface and experience. Below are my top 5 features of Revit 2024 for MEP users.
1. Project Browser Search Feature
A long requested feature for Revit, the search feature for the Project Browser allows a user to search for a particular view, sheet, legend, schedule, family... well the entirety of the Project Browser! No need to enable it. It will appear at the top of the Project Browser ready to be used once you install and open Revit 2024.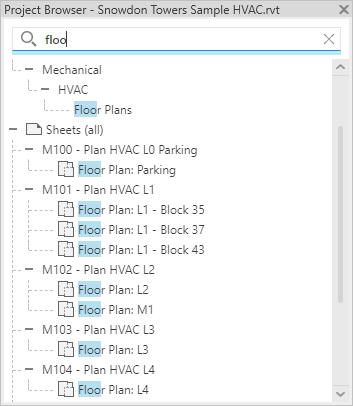
Of course, keep in mind as you type in the search field it will show every line item that contains a part of that field. However, utilizing this to find your families, sheets, or that one view you swore you made earlier can save you a lot of time and headache!
2. Schedule Revision Clouds
New to schedules is the ability to schedule your Revision Clouds. Any Revision cloud made in the project can be scheduled, sorted, grouped, and filtered using schedules inside Revit!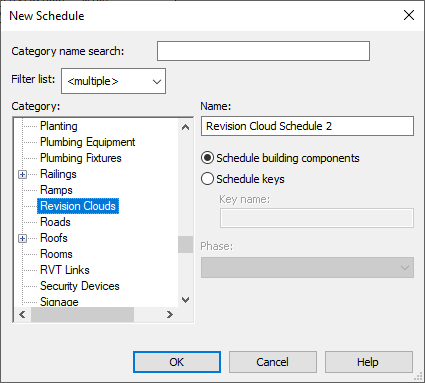
Remember that when creating schedules, you can choose what field from which category you want to add. For Revision Clouds, you can include field from Revision Clouds, Revision, Views, Sheets, and Project Information. This is useful because we can then include not only the information found within the Revision Cloud and Revision itself, but also what sheet and view the Revision was placed!
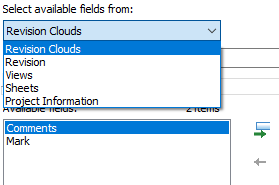
Big tip: when trying to track where the Revision is placed, you must understand this rule; if you require your Revision Schedule to tell you where the Revision is placed, then you must ensure that the proper field from the proper category is part of the schedule. For example, if I place a Revision on the sheet within Revit, then I just need to add the Sheets: Sheet Name and Sheets: Sheet Number fields from the Sheets category within the schedule. However, if I place a Revision within the viewport and/or view which is applied to the sheet, then I must include Views: Sheet Name and Views: Sheet Number from the Views category within the schedule.
But here is another tip: combine those parameters! You can combine Views: Sheet Name with Sheets: Sheet Name and Views: Sheet Number with Sheets: Sheet Number to report out the proper information regardless if the Revision is on the sheet or within the viewport and/or view. Below is a screen shot showing the combined parameter fields, labeled Sheet Name and Sheet Number, along with the separate fields for both categories. Remember to hide those other fields if you do not wish to see them in the schedule but use them as combined fields.

3. Linking and Working with Coordination Models from Docs
If you are utilizingBIM 360Docs for your project, you can now link Coordination Models from Docs right into your project. Go to Insert -> Coordination Model -> Autodesk Docs and browse to the appropriate file! This can include Revit files, Navisworks files, and others. For more information, visit Autodesk's help page.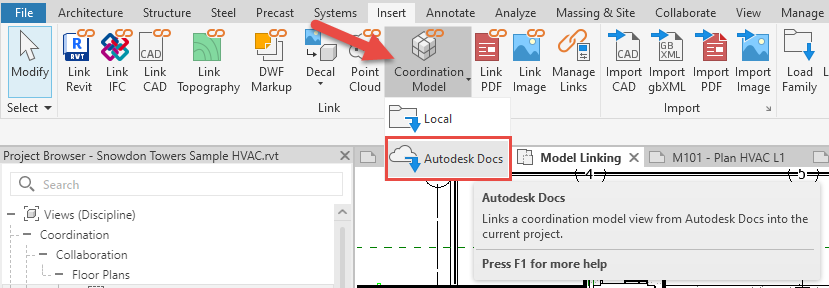
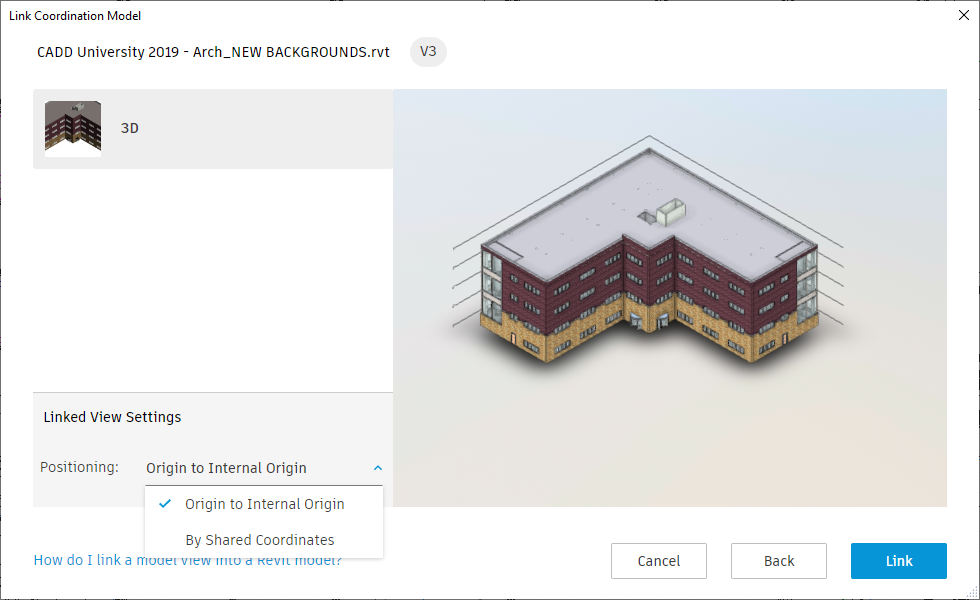
Keep in mind, just like another model, you must decide to link by Origin to Internal or Shared Coordinates. Helpful tip: ensure all project stakeholders who are using and developing a Revit model talk about positioning early on in the BIM coordination phase for your project!
Not only that, you can access Coordination model properties in your linked Coordination model! More can be found here. Since it is a linked model, you can also utilize snaps and snapping points on the models for better design coordination within Revit.
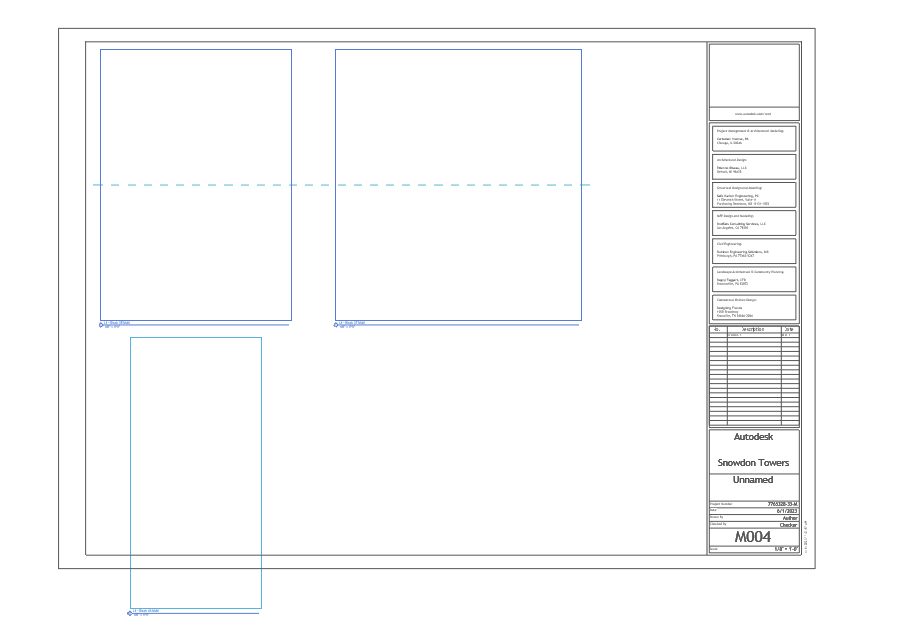
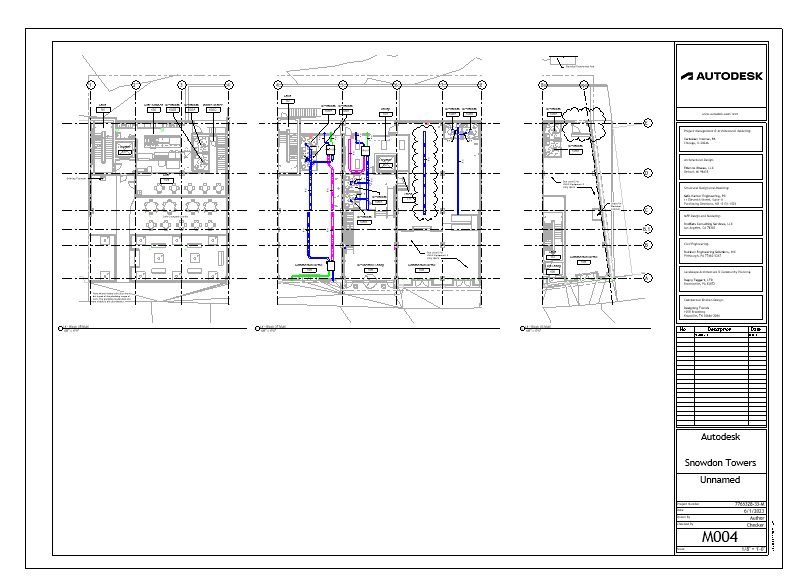
4. Place Multiple Views on Sheets
Save time by selecting multiple views to drag+drop to a sheet or go to View -> Place View in the Sheet Composition panel to add more than a single view at a time. Keep in mind that this does not mean you can place the same view on multiple sheets, just providing you the ability to choose multiple views to add to a single sheet.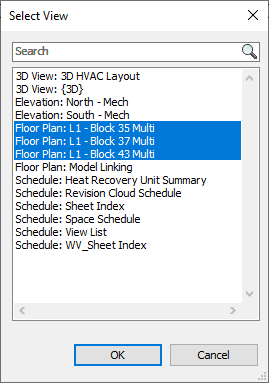
Once selected, just like before the outlines of the viewports will show as will the view titles associated. Keep in mind, the views may be larger than your titleblock so you can place the views but you may need to move things around to fit within the titleblock.
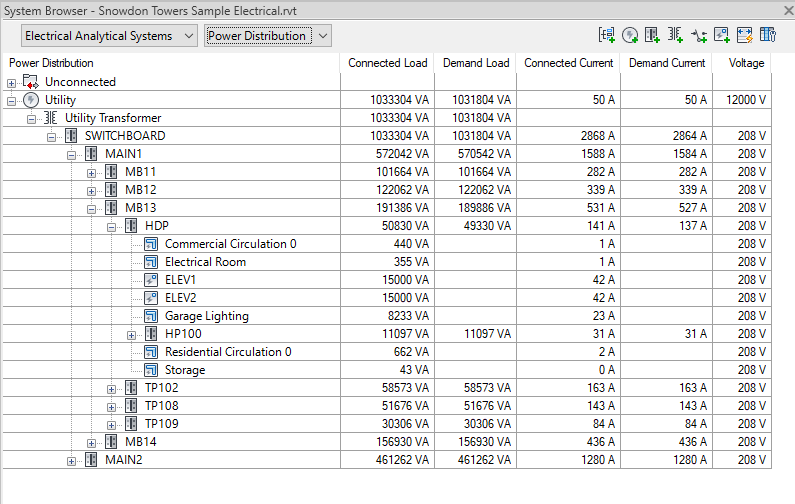
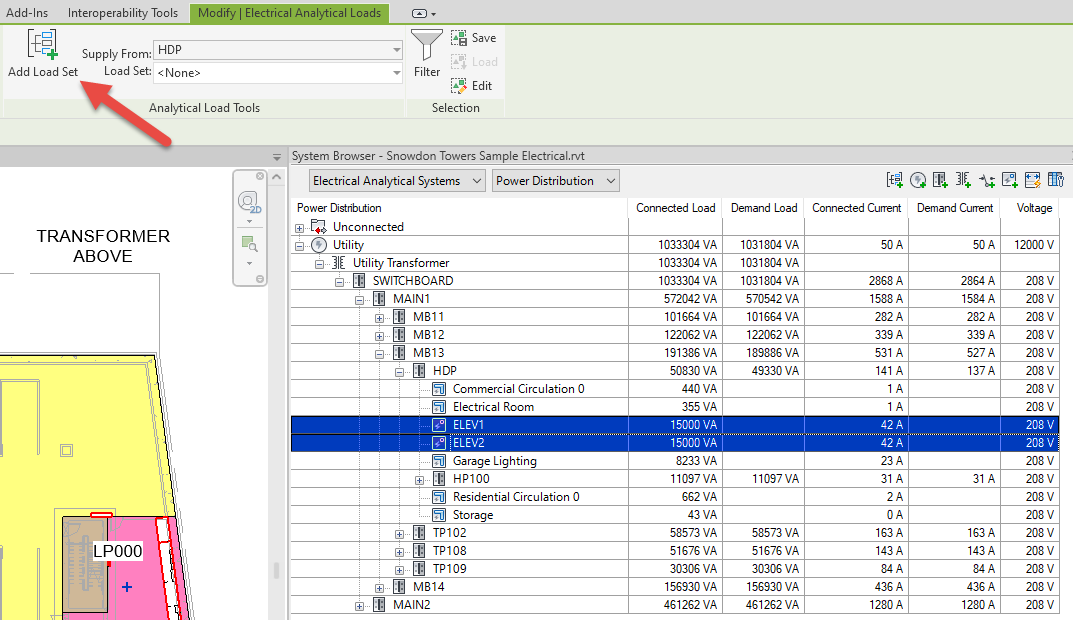
5. Electrical Analytical Updates & Loads Sets
Revit has been updating its analytical systems for MEP for the last few releases. This time, they focused on adding more Electrical Analytical tools and features as well as new Loads Sets.Electrical Analytical Systems is within your grasp for Revit 2024! Simply go to View -> User Interface -> Systems Browser. In the dropdown menu at the top, select the appropriate systems you want to create.
Here, you can add equipment such as switchboards, switches, transformers, and existing loads or other analytical equipment you'd like for Revit to utilize. As described in the screen shot below, you can view items like connected load, demand factor, connected and demand currents, voltage, and other critical data associated with your analytical equipment.
When adding analytical electrical equipment, you can assign that equipment a Loads Set. That loads set can then define the group of those loads rather than defining single loads and then creating a new load to represent that group.
Those are my big 5 improvements and reasons to pick up the upgrade to 2024 for MEP. It should also be noted that Autodesk added a lot of new user interface and experience updates include some new icons for buttons, adding the export PDF button to the Quick Access Toolbar, and adding a "Dark Mode" feature found in Options under the main Revit menu.
What are your top five? Did I miss a new feature you’ve been enjoying lately? I’d love to hear from you!