Now that we've talked about how to make our schedules look pretty, I want to dig deeper into the real meat of schedules, the information in them, and what you can do with it.
Calculated Values
You can create custom parameters within your schedules to calculate values based on other parameters in your schedule. This is called a calculated value. This can either be displayed as a “value” or a “percentage” of the total. I will walk you through both types.
“Value” Calculated Value
- Add the parameters to your schedule that you want to use in a formula. For this example, we will do a simple subtraction of actual SF from design SF.
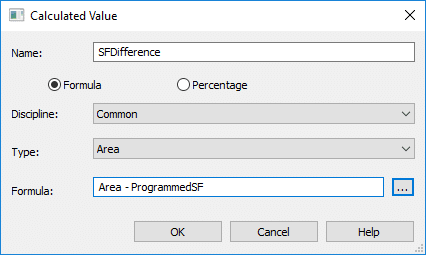
- Give your parameter a name.
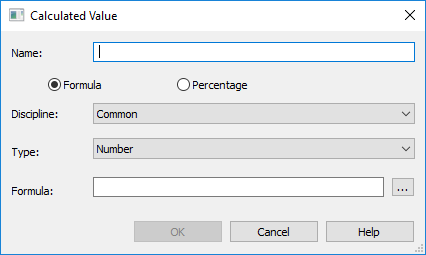
- Choose the Formula radio button.
- If you are architectural, leave the Discipline as Common.
- Choose the Type of value. Remember your units and make sure that you choose the right one, otherwise you will get an error.
- Type in your formula. Remember that you must type the parameter name correctly including capitalization and spaces. Use standard mathematics symbols in your formula. You can use the button at the right of the Formula field to choose from a list if you prefer.
- Note that you CANNOT use the OOTB “Count” parameter in a calculated value. This is a limitation of the software.
- Note that you CANNOT use the OOTB “Count” parameter in a calculated value. This is a limitation of the software.
- Click ok and move your parameter to the desired location in your schedule. Click OK again to finish.
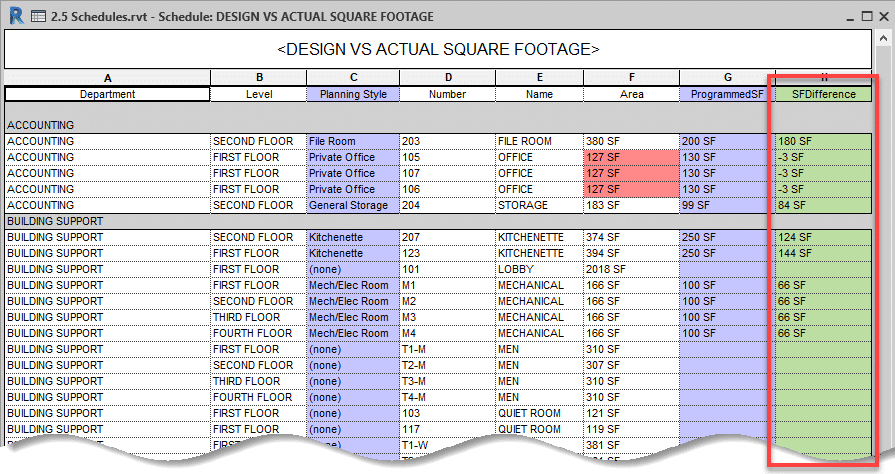
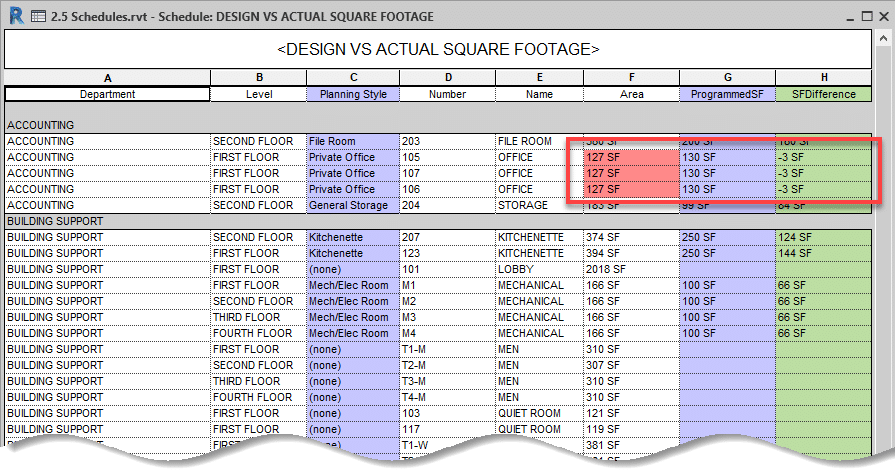
Use color in your schedules to differentiate between different types of parameters (sorting, calculated values, key schedule values, etc.). In the schedule above, the blue shading denotes values controlled by a key schedule, and the green is a calculated value.
“Percentage” Calculated Value
The second way to use a calculated value is to determine the percentage of the whole. This is limited to things like area values, but it can still be useful. It’s great for calculating what percentage of the total building SF is each unit type (1 bedroom, 2 bedroom, etc.) or what percentage of a building is being used by each department or use. In the example below, I will use it to show the percentage of the total SF for each department in the building.
Remember that these values are using rooms in my examples, so the SF is being taken to the location you set in the Room and Areas settings. This is most likely a net SF number.
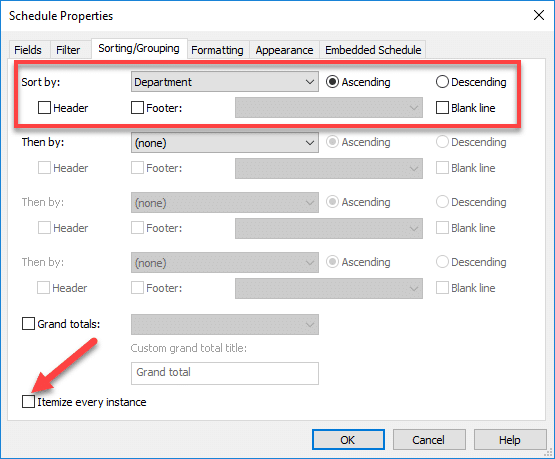
- Change the sorting/grouping of your schedule to sort by department and uncheck the box for “itemize every instance.”
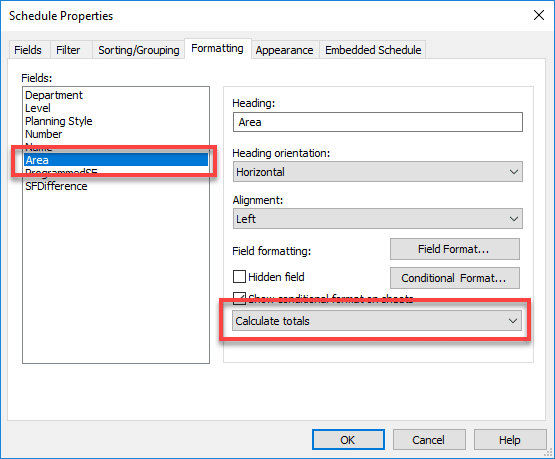
- In the Formatting tab, make sure that for the area parameter you are calculating totals.
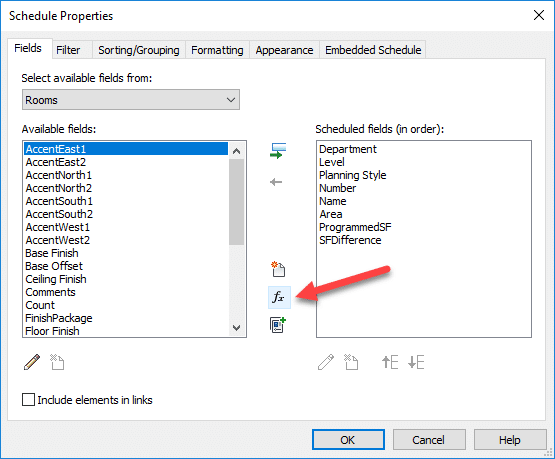
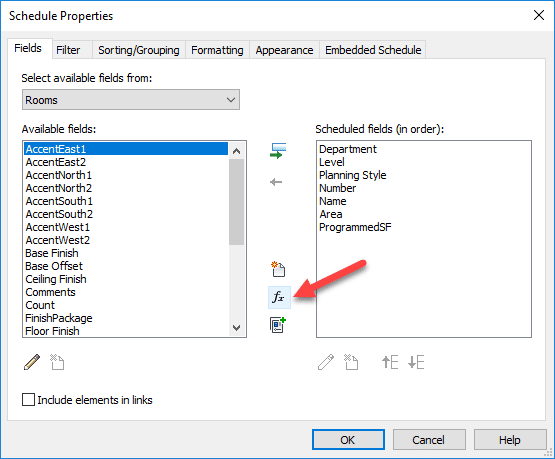
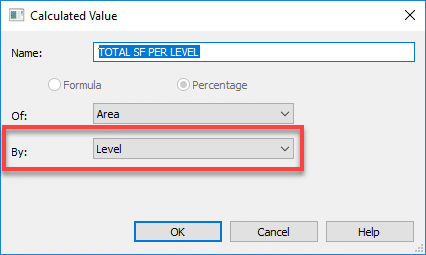
- Create your calculated value parameter by clicking the Calculated Value icon in the Fields tab.
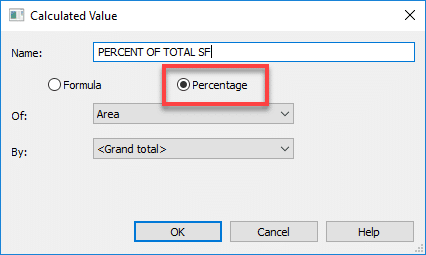
- Click the button for Percentage, give the parameter a name, and check that the other values are what you want.
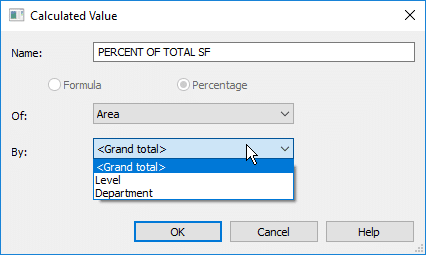
- In the dropdown list of “By” you can choose if you want the percentage to be by the grand total, level, or department.
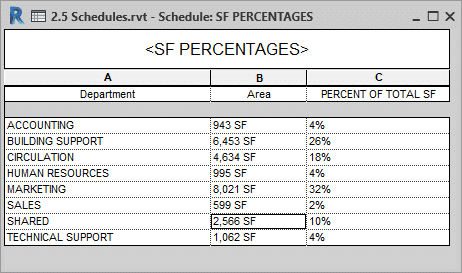
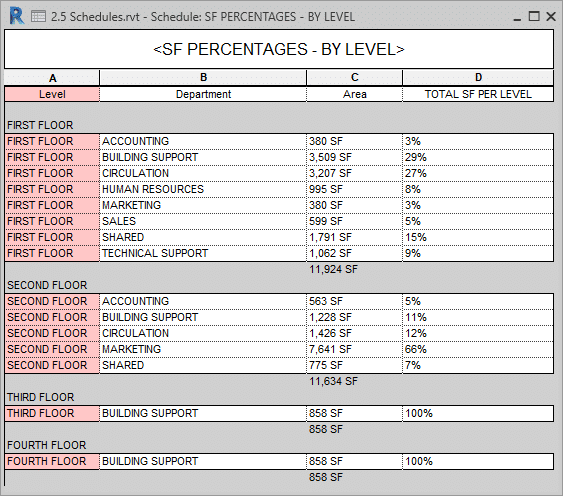
- Your schedule is now sorting by department and displaying the percentage of the total room SF that is attributed to each.
- You could add the level into the mix to see how much of each floor is part of each department. Add the Level parameter and sort by it first.
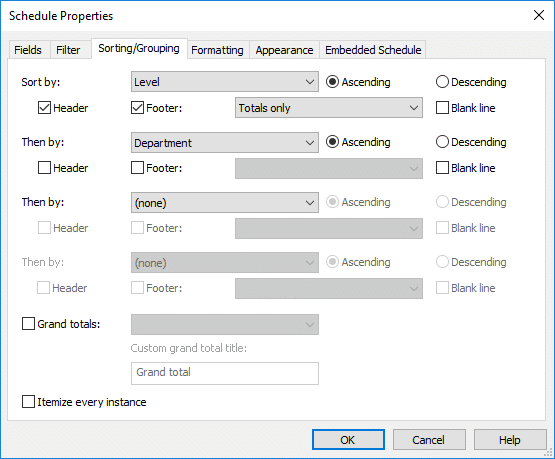
- Edit the calculated value parameter or create a new one and set the percentage as By Level.
- You schedule is now divided by level then department and it shows the percentage of the room SF on each level that is part of each department.
Conditional Formatting
You can make cells in your schedule automatically a color based on their value relative to another parameter value. That’s called conditional formatting. This is often used to quickly confirm if certain values are achieved.
Conditional formatting will not work properly if you are “calculating totals” for that cell. The conditional formatting reads the individual values, not the calculated total.
- In the Formatting tab, highlight at the left the field you want to apply the formatting to.
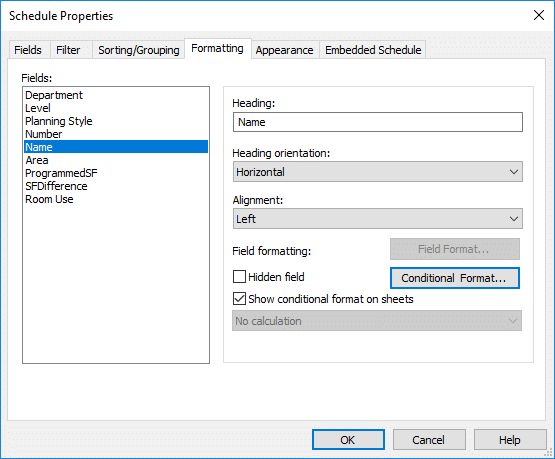
- Click the Conditional Format… button.
- In the dialog box that appears, choose the field that you want to use to control the formatting. In this case, I have a calculated value field that I will be using.
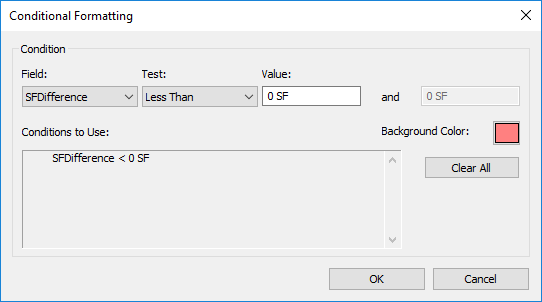
- Choose the Test field (equal, greater than, less than, etc.) and then the value.
- Lastly, choose the background color to apply if the condition is met and click ok twice to get all the way out of the properties. Notice below the three cells that have turned red. This is because the value in the “SFDifference” column is less than zero.
If you only want the conditional formatting color change to appear in the working view of the schedule but not once you put it on the sheet, in the Formatting tab, uncheck the box next to “Show conditional format on sheets.”
Key Schedules
Key schedules are a subset of Schedule/Quantity schedules and are used to quickly fill out information that is the same across different elements. Below are some examples of ways that you can use key schedules, but really the possibilities are endless.
"The main limitation with key schedules is that you cannot use them to control custom shared parameter values. You can use what I call “system” shared parameters, which are the ones hard-coded into Revit that can appear in both tags and schedules, i.e. room finishes such as Base Finish, Wall Finish, Floor Finish, etc."
Rooms
- Finish types for rooms that have the same exact finishes
- Design SF based on the room use/type
Doors
- Detail references for head/sill/jamb details
- Hardware types and finishes
Embedded Schedules
When you create schedules for certain types of things (rooms, spaces, duct systems, piping systems, and electrical circuits) you can embed another schedule with them, to show information about components that are part of these systems/volumes.
- Schedule elements by room, under the room
- Signage
- Furniture
- Equipment
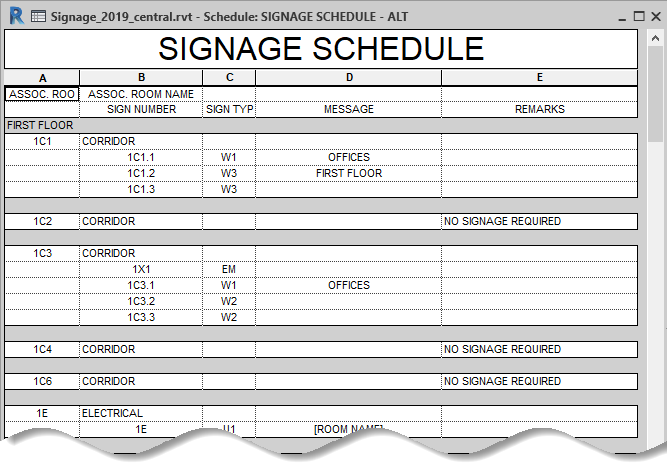
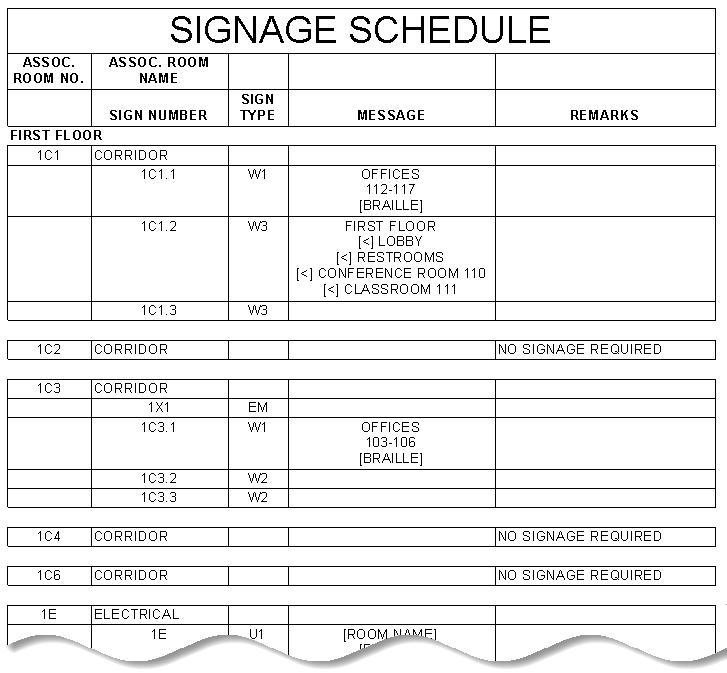
Using this feature is great when you need to list all of the rooms and then all of another category that’s within that room. I use this for signage schedules, to make sure that I don’t miss any rooms.
The signage schedule is a room schedule, with the settings below.
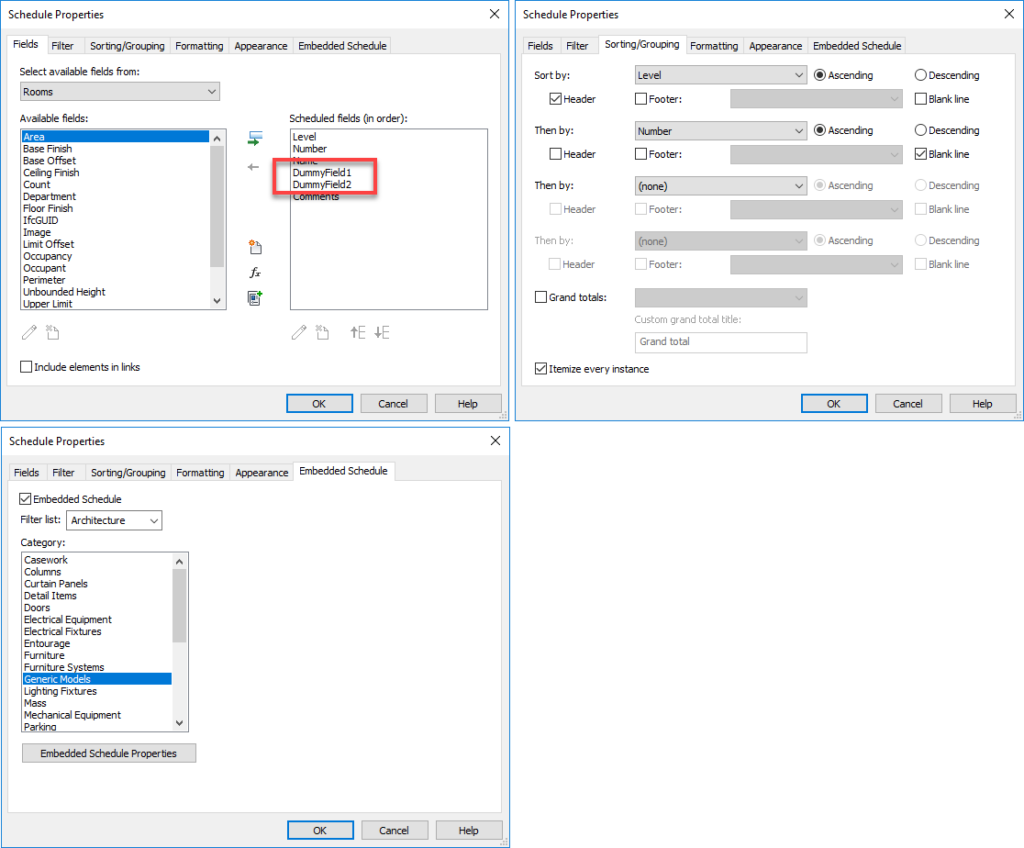
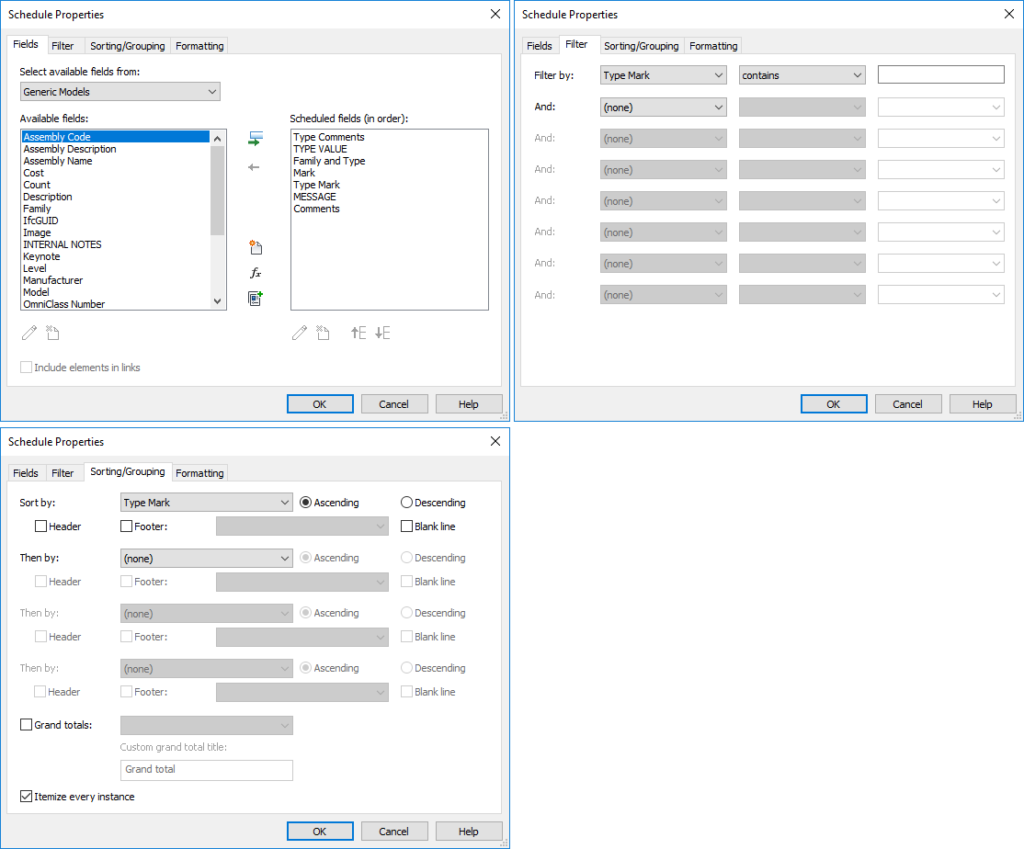
The Embedded Schedule has the following properties.
This is what the final product looks like. The main schedule has a couple of dummy fields so that the fields in the embedded schedule align with the desired fields in the main schedule.