Keeping ahold of what is going on across projects can be challenging. When problems arise, the need to identify, define, manage, and resolve them is imperative. Typically, we go for that pad of paper, butBIM 360has a really neat feature called, funny enough, Issues. And Issues does a great job of everything we would ideally look for when wanting to communicate and manage issue resolution.
Let's take a quick look at one of the ways to create an Issue in BIM 360 , by placing an Issue Push Pin on a document.
First, Navigate in Document Management to where you have a drawing open. Once there look on the left-hand side for a Triangle symbol with an exclamation mark in it. Click it.
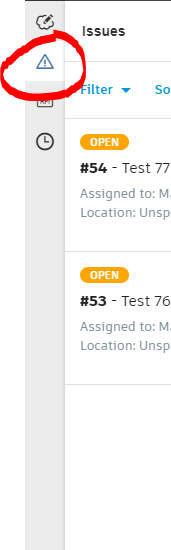
Then select the large blue “Create Issue” button at the bottom of the pane.
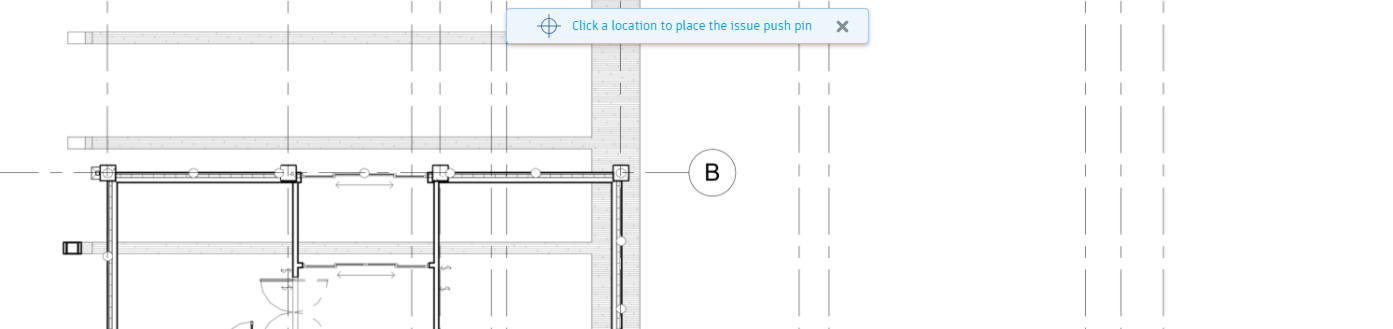
You will notice at this point thatBIM 360has prompted you to select where the Issue Pin will be placed. Simply use your mouse to select the location you would like to place the pin and left-click.
Once placed, the Pin will appear as a yellow button. In the below screen we can see it allows us to not just identify but fully define the issue so we can communicate it to those that are necessary to get it resolved.
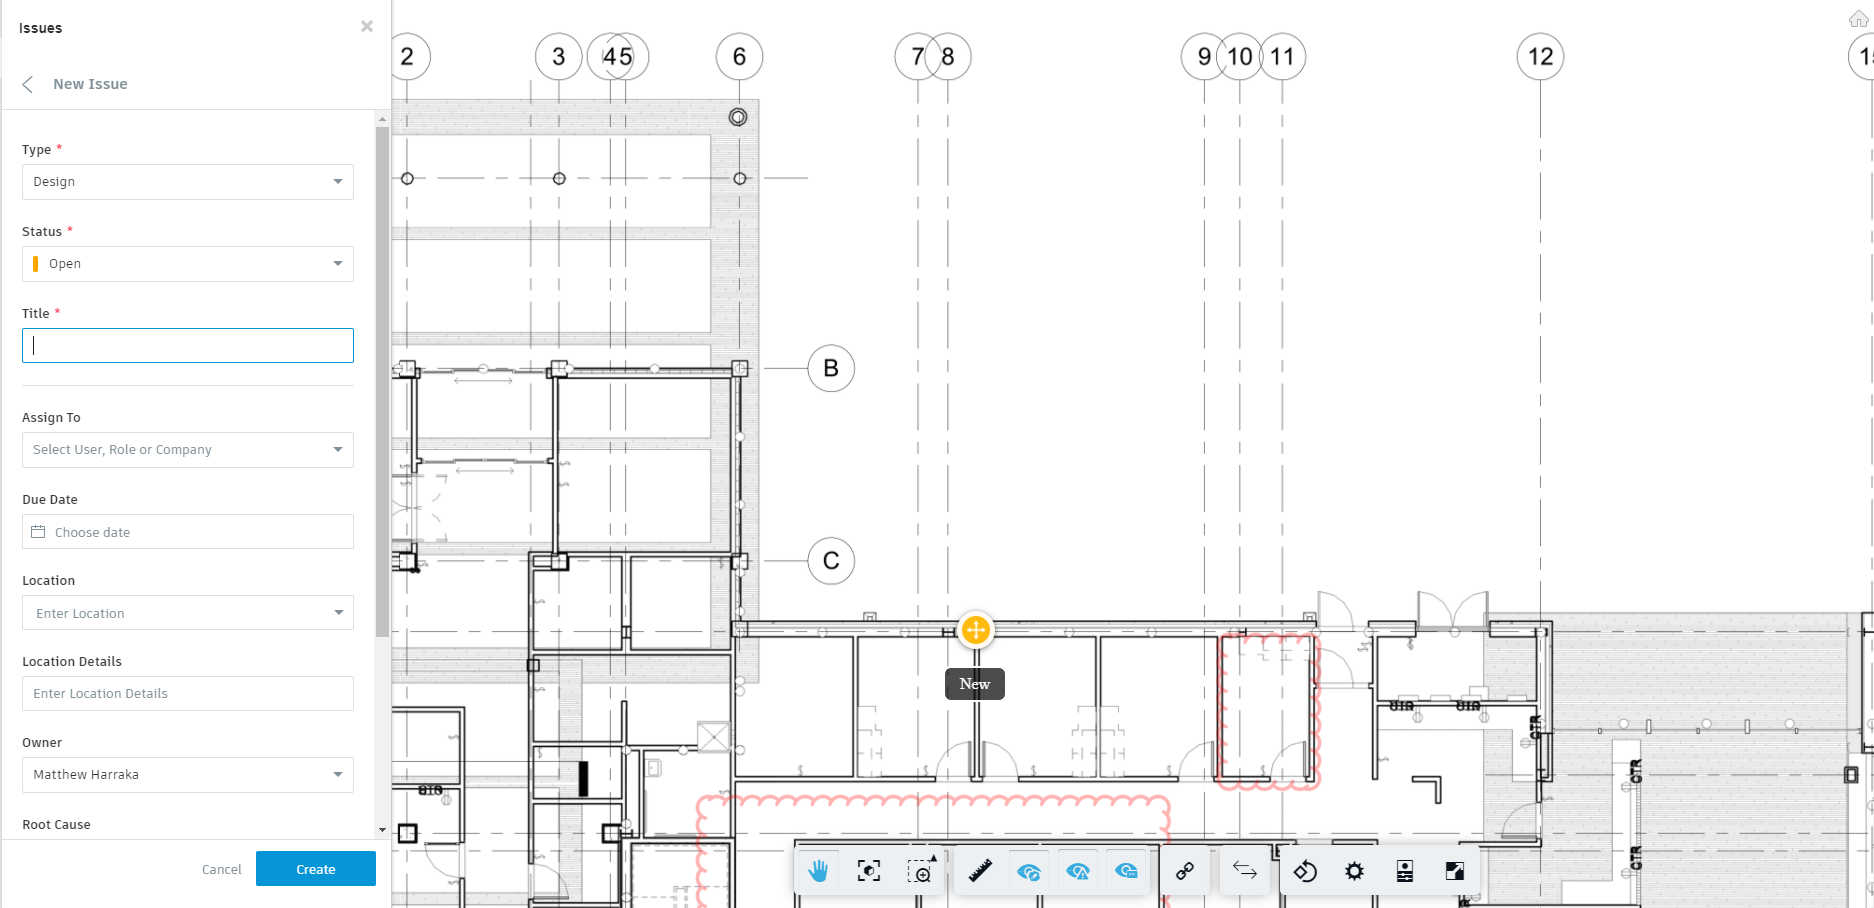
Once finished, we click “Create” and the issue is finalized. Those that were assigned the issue or have ownership are notified, and the Issue is added to the Project Issues Log.
Issues are now available to be viewed and updated directly by your designers in Revit 2020 & 2021 using the Issues Add-in!