Hopefully, you all understand the great benefit of using view templates to standardize your graphics across similar views within a project and across a firm, while being able to quickly update V/G changes in a single location. But have you used view templates in conjunction with view types?
View types in Revit are generally those found in the View tab > Create panel. Did you know that you can make different view types under each of these? Why would you want to do this? Well, in the properties of a view type, you can assign a view template to be automatically applied and/or assigned to a view made of that type. When you create a new view, it will automatically assign a view template to it.
Why would you want to have lots of different plan types? Well, when you create a new level, you can choose whether or not to create plans along with it, and if you have a different plan type for the major plans that you need in a project, you can create a bunch of views at once!
Let's walk through this.
Creating New View Types
Let's start with plans. Make a floor plan your active view. Click Edit Type in the properties and then duplicate. Give the new view type a name, say "Finish Plan."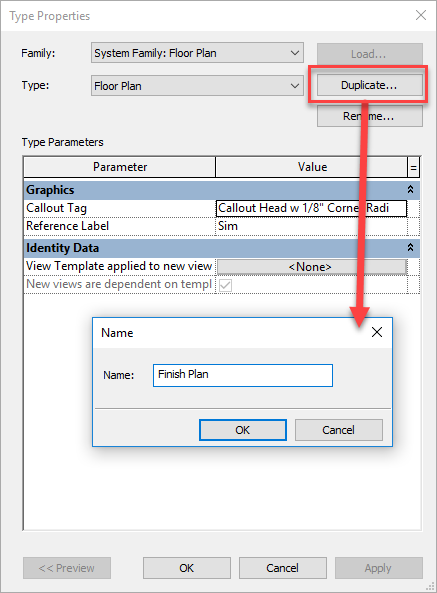
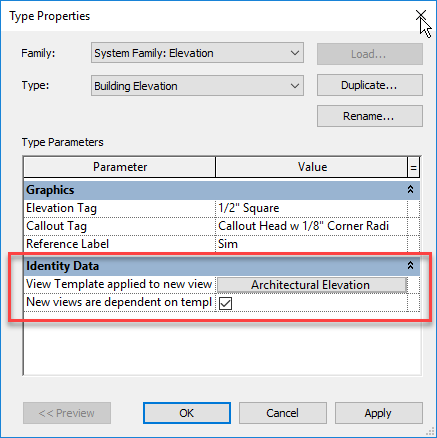
Under the Identity Data section of the properties, you will see two parameters. The first one is the view template to apply when new views are made of this type. The second is whether you want to actually assign this view template to that new view. If you uncheck this box, a new view made of this type will apply the settings of the view template chosen in the first parameter, but that view template WILL NOT be assigned to that view. Why might you want to uncheck this box? It could be used for working views where you want to apply certain settings but don't want the view tied down to a view template.
Creating Views When Creating Levels
Once you have created all the different view types you might need (Floor Plan, Finish Plan, Presentation Plan, Working Plan, Export Plan, etc.), open up an elevation and use the level tool to create a new level. Before you draw the level, make sure that "Make Plan View" is checked in the options bar, and click the button for "Plan View Types..." to select the plan types you want to create when making the level.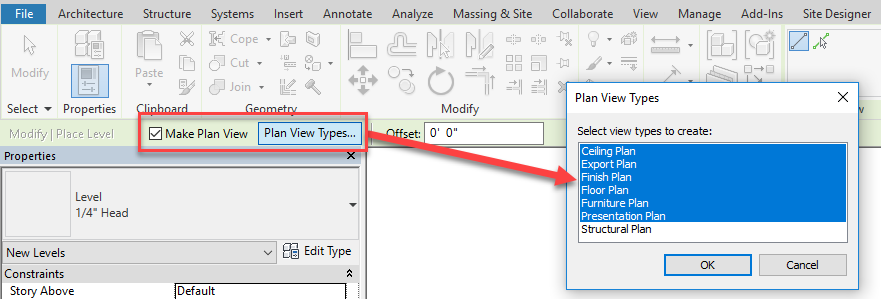
Now draw your level and notice all the views that were created! The downside to this is that it doesn't automatically rename them - you have to either do this manually or you can use Dynamo to create a script to automatically rename them.
Other Uses
View filters
Create different view types for working vs. print sections and use view filters to hide the working ones from your printing views. You can do the same for demo/presentation/export views. Alternatively, you could use the view filters to make the different types different colors, to easily distinguish which is which.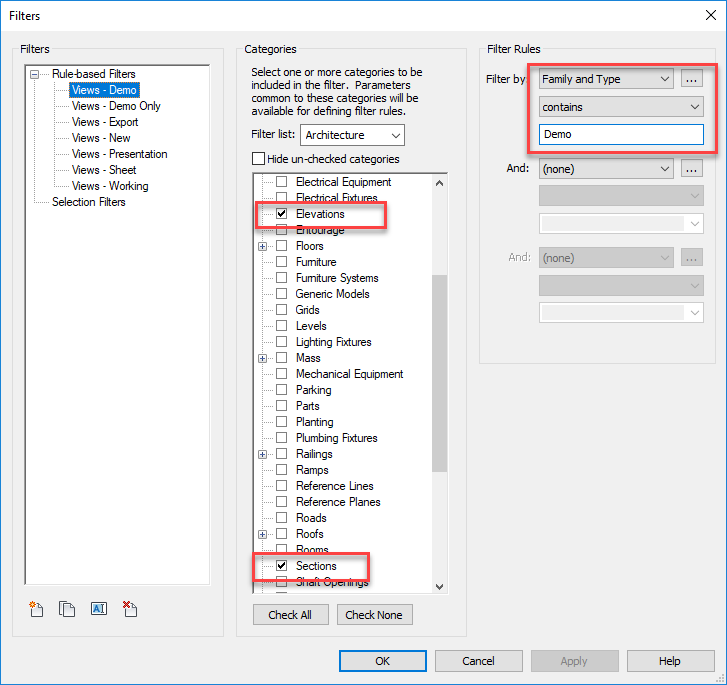

Browser Organization
If you are using a custom browser organization method that uses custom parameters, those values can be assigned via view template. When you create the views with view templates assigned/applied, these values are automatically filled out, which then puts your views in the correct location in your project browser.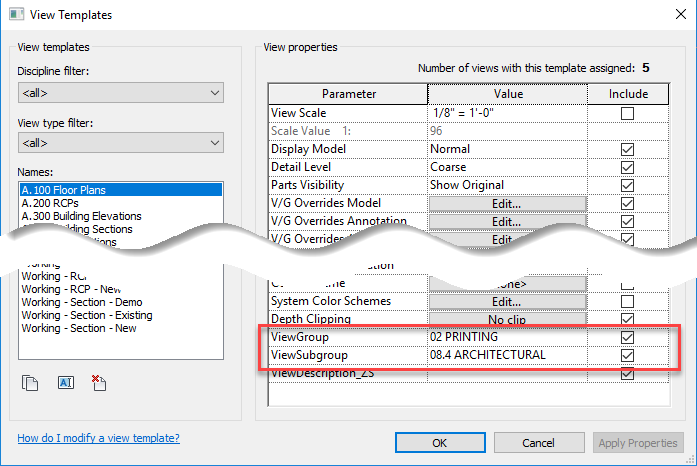
Hope that this is something you can all use that will help you be more efficient.
Happy Reviteering!