As we all know, with an entire project being in one Revit file, the number of views in a project can get out of control. There are different ways to organize views within the project browser, and the one I want to talk about today is creating different types of sections, elevations, and callouts. By doing so you can organize your views, use filters to hide certain view types in other views, and automatically assign view templates based on the use of the view.
Let's first start by creating new view types. I'm going to use sections as the example here, but you can do this with elevations, plans, and callouts, too.
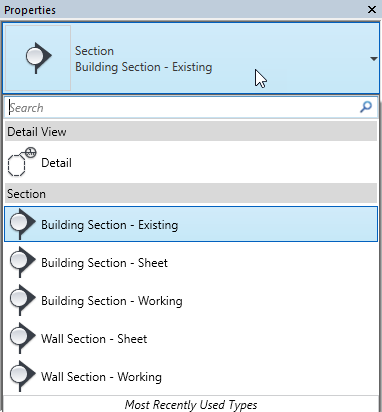
Start the process of drawing a new section, but instead of drawing one, click "edit type." Choose the section type that you'd like to use and create a duplicate copy. Just like with everything in Revit, naming conventions are important. I like to start out my naming with the overall category and then get more specific. Here are some examples:
- Section - Building - Printing
- Section - Building - Working
- Section - Building - Presentation
- Section - Wall - Printing
- Section - Wall - Working
- Section - Wall - Presentation
- Plan - Working
- Plan - Printing
- Plan - Presentation
- Plan - Finish
- Plan - Enlarged - Toilet Room
- Elevation - Interior
- Elevation - Interior - Toilet Rooms
There are a variety of reasons to create different view types for different view uses.
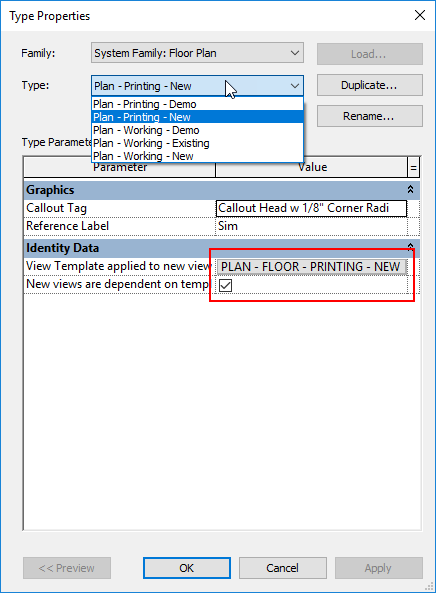
- Automatically assigning view templates or settings from templates
- Browser organization
- View filters
The benefits of this are multi-fold:
- Drawing graphics consistency
- Project browser organization
- Efficiency in graphics
The next one - Browser Organization:
This can go hand-in-hand with the last benefit, it just depends on what you are using to organize your project browser. A lot of this is dependent on what kinds of projects your company does and how people like views to be grouped.
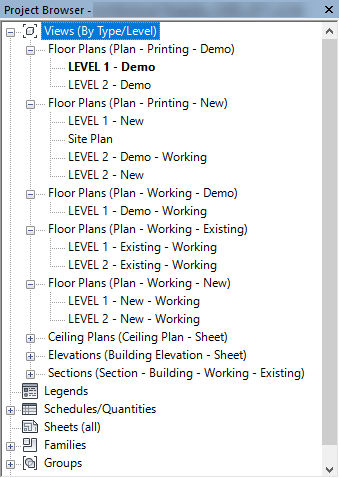
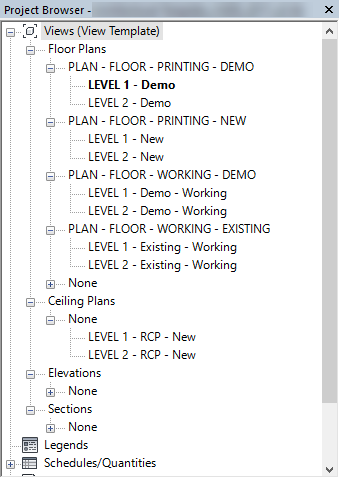
If you group views in your project browser by view type, then you will have a heading for each view type.

You can also use the view template type to organize your browser.
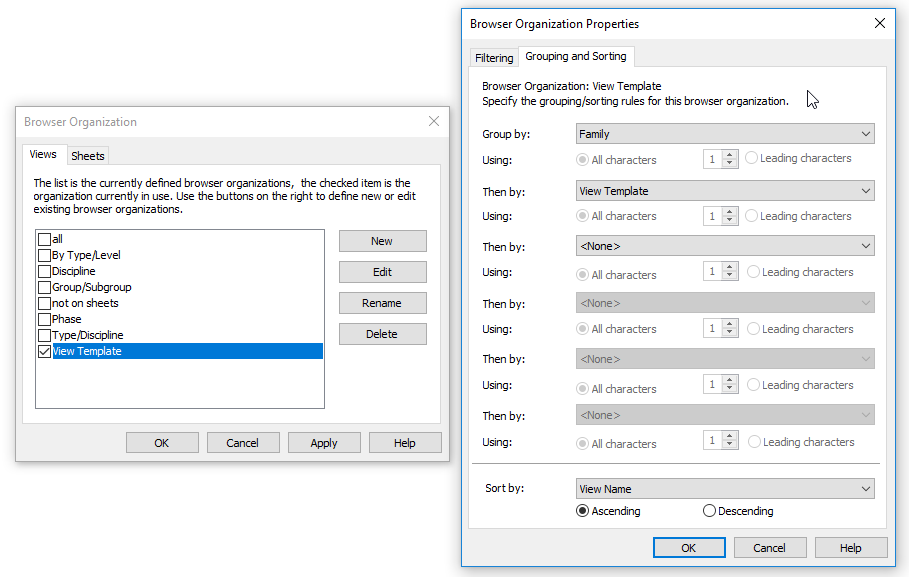
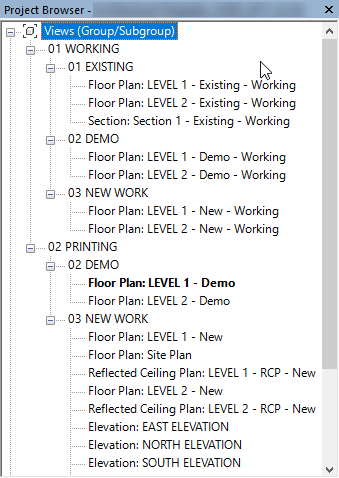
A third option is to use custom parameters. In this case, the parameters are "View Group" and "View Subgroup."
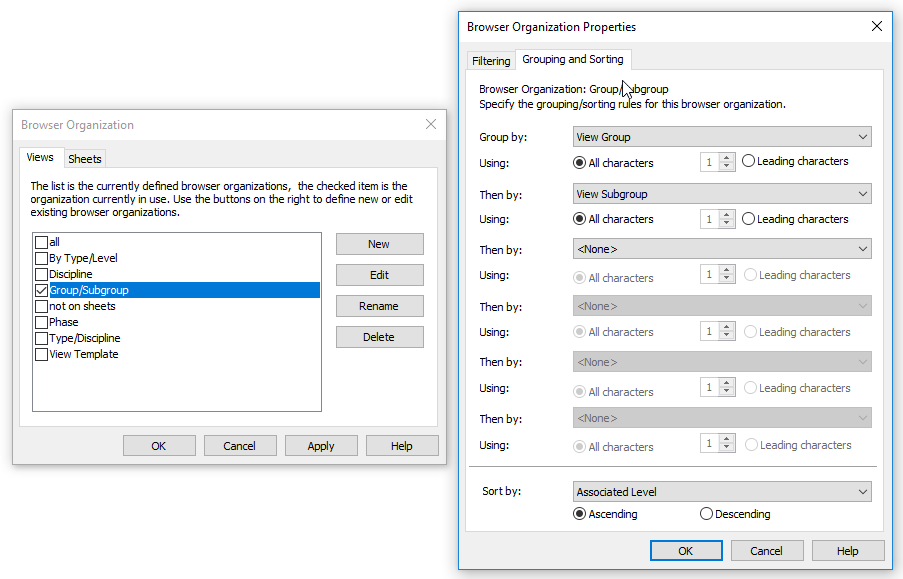
The benefit of all three is that they can automatically be set using custom view types!
And now the last in my list - View Filters:
You can use view filters to change the graphics of subsets of model categories based on custom criteria, or to change the visibility of these subelements.
To create a view filter, go to View > Filters. Create a new filter, give it a name, and chose which family categories you want to apply it to. In this case, I want to include Elevations and Sections where the Family and Type contain the word "WORKING."
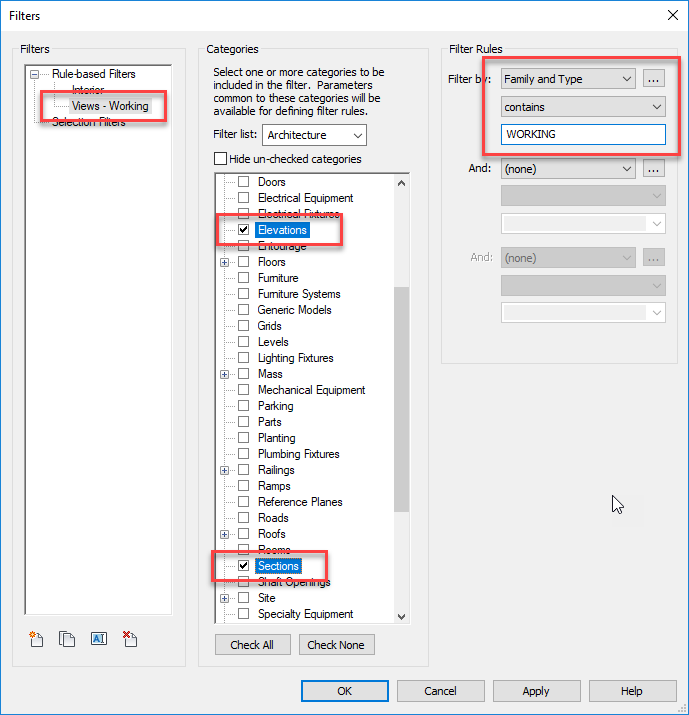
Finish this dialog, go to the view you want to apply the filter, open visibility/graphics, and click on the "filters" tab. Click the Edit/New... button at the bottom. Choose the filter that you want and click "ok."
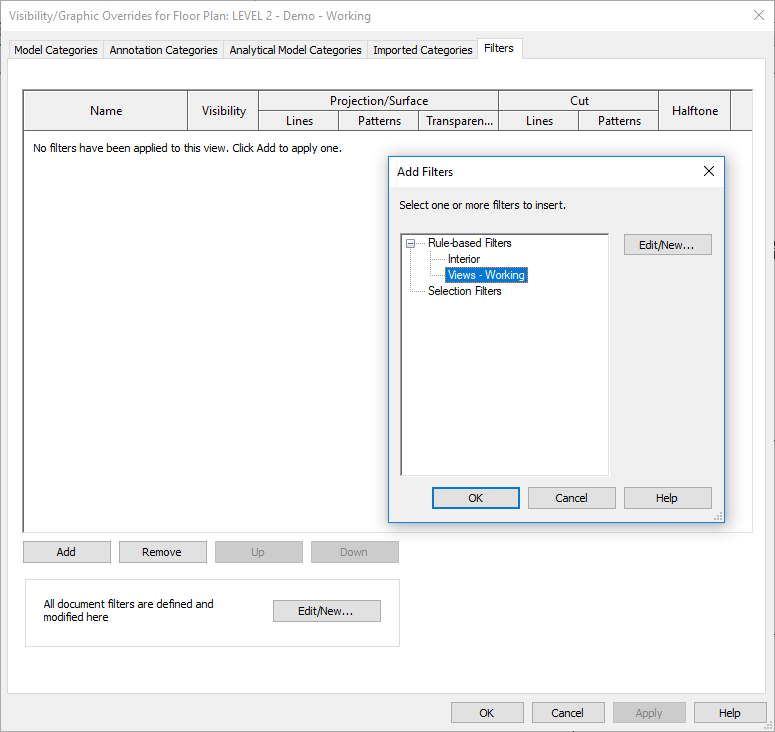
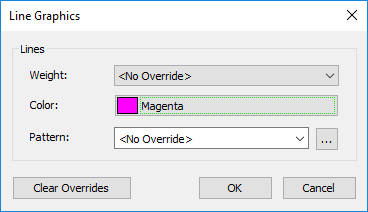
You can change certain aspects of it. In this case, I decided that I wanted all of my working views to have magenta lines.
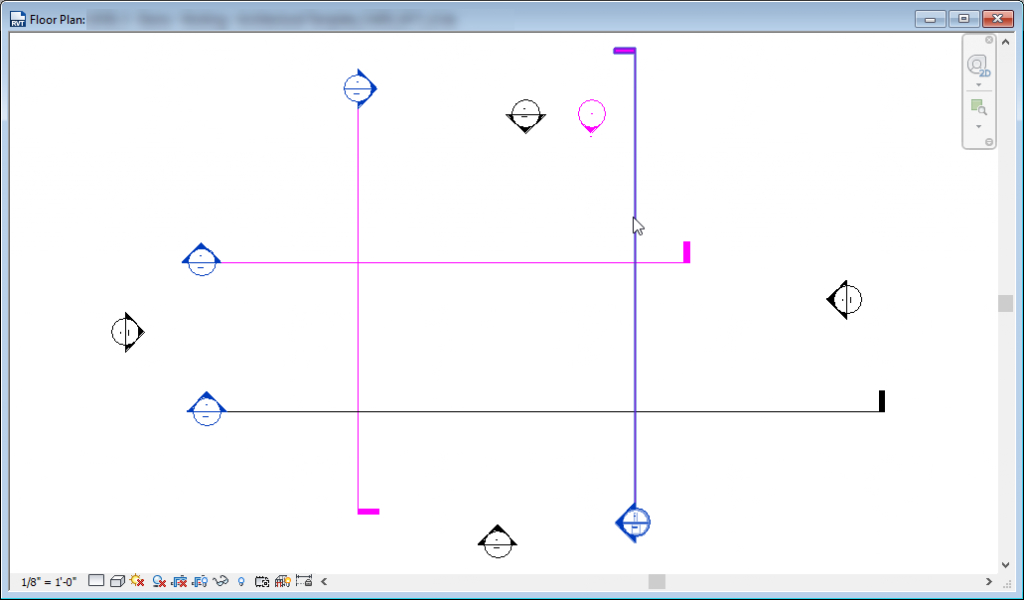
Click ok, and this is what you get!
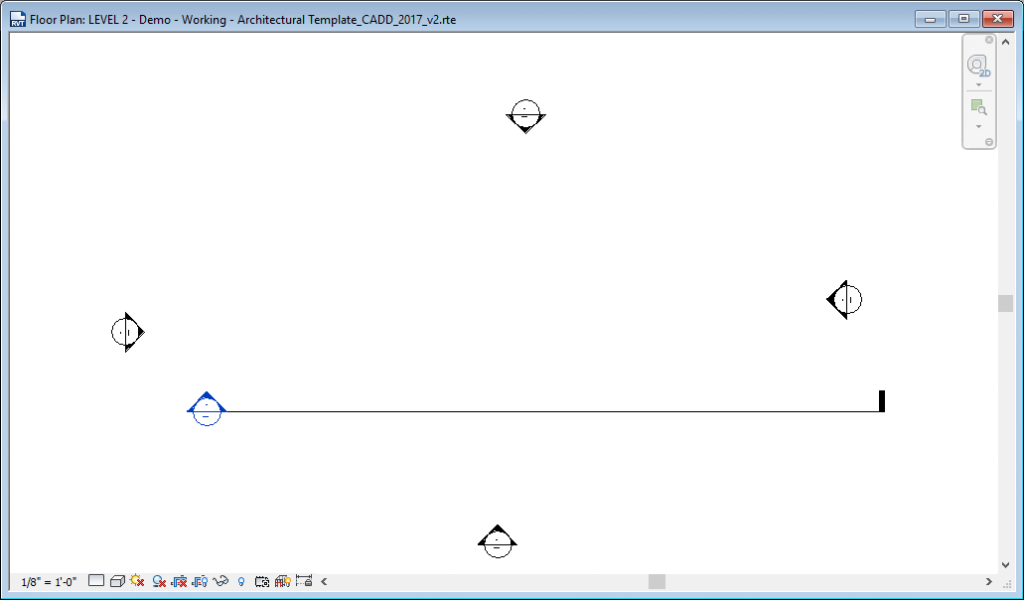
If you wanted to hide all the working view tags, you can go back to the filters and uncheck the box under "Visibility." You will then get this.
I hope this helps you organize and control the graphics of your drawings better! Happy reviting!!