The other day I was teaching one of our Revit for Project Manager classes and had a student ask about using the Walkthrough camera. Honestly, in my 10 years of working in Revit, I don't think I've ever used this tool. However, for some people, this has the potential to be a very easy and quick way to generate a walkthrough of your design. So below are a few steps on how to edit a walkthrough camera and some useful notes about options.
Creating the Walkthrough Camera
The first thing we need to do is create a walkthrough camera. These cameras are special because when placed, the camera places the first instance of the camera and every subsequent mouse click creates a “Key Frame” (this will be important later).A Key Frame is a specific location of the camera and is used by Revit to generate the actual frames of the animation. For those of you that don’t speak animation, a frame is a still image (that when placed in sequence with other frames) creates an animation.
After placing all Key Frame camera locations, click “Finish Walkthrough” on the Ribbon. Note: The Walkthrough will not show up under “3D Views” (like Camera views in the project browser), but rather are treated separately and show up under a new section called “Walkthrough.”

Previewing the Animation in Revit
- Open the Walkthrough camera from the project browser.
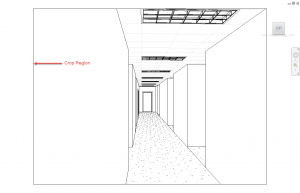
- Click on the Crop Region of the camera. Note: the ribbon will have a green tint after you select the crop region.
- Click “Edit Walkthrough” from the ribbon, see image below.

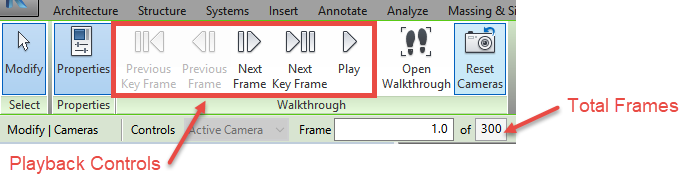
Notice that as the Previous Key Frame is clicked, the Frame box on the option bar changes. This box can be used to jump to a specific frame within your walkthrough.
Editing Walkthrough Settings
If you export your Walkthrough now, you might notice that it is a little choppy between frames. Or maybe it just seems to move too quickly or too slowly. To edit the speed of the walkthrough, go back to the “Edit Walkthrough” contextual Ribbon. Click the gray “Total Frames” box - Yes, I realize this does not look like a box you can click.This will open the dialog box shown below. The “Total Frames” box is the number of frames used in the animation. The “Frames per second” is the number of frames required for a second of animations. Using these two values, Revit calculates the “Total Time” in seconds.

Revit defaults to 15 frames per second. I do not recommend anything less than 24. The more frames per second, the smoother the animation will look when played. Most traditional 2d animations (think Disney’s original Beauty and the Beast) were drawn at 24 frames per second. New computer animations are pushing 30 frames per second.