We’ve all heard the old mantra “sharing is caring,” but what about worksharing?
Worksharing is a process in which we take an existing Revit file and, through a series of simple steps, convert it to be a central model. This effectively allows multiple users to work and collaborate within the same project file – each from a localized version of the same central file. The process of Synchronizing andRelinquishing file elements allows other users working within the project the ability to see any (and all) changes made to the model.
So the question remains, how do we create a new central model?
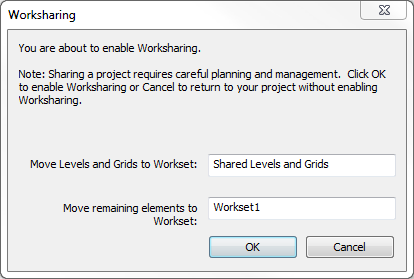
Once a new Revit project has successfully been launched, our first step is to simply navigate to theCollaborate tab and left-click onto the Worksets command to begin the process of enabling worksharing. A prompt will appear showing two default user-created worksets that will be created in our file: Shared Levels and Grids and Workset1.

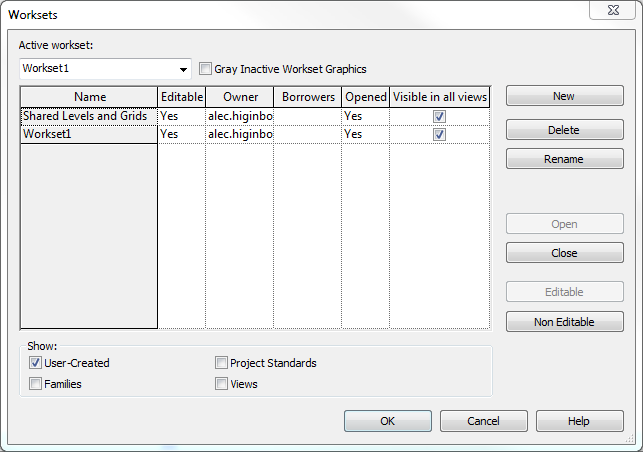
Once we have accepted the default workset creation, we will be launched into the Workset Manager. Here you may choose to create, remove, or rename worksets as deemed appropriate. Note that although the Shared Levels and Grids workset may be deleted, Workset1 may never be deleted. For worksharing to function properly, Revit needs a minimum of one workset and it treats this as the single consistent, immovable workset.

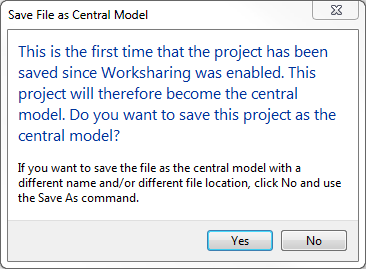
Take note that if the Save icon within the Quick Access Toolbar is greyed out, you are working within the central file – and we NEVER want to work directly within the central file. Before beginning work, create alocal copy of the central file by closing out of the file and opening once more. Revit will automatically create a local copy upon opening of the file.

“Worksharing is Caring” is the first in a series of posts discussing overall collaboration within Revit and the tools available for leveraging this capability. Check back soon for additional information!