On the eighth day of CADD Care, my CADD team gave to me... A way to conduct preliminary cost estimates based on Revit Modeled Data. Doesn't that just roll off your tongue!
Alright all you Revit designers out there, raise your hand if you pay attention to the ASSEMBLY CODE parameter in the type properties of the elements in your model? Anyone's hand go up... yeah that's what I thought. So that mysterious parameter is used to organize modeled elements together. Out of the Box Revit uses a list of old Uniformat values by default. Uniformat is one of several methods of categorizing elements within a building. But this little parameter has the ability to quickly do cost estimates using the cloud-based product, Assemble.
Assemble
For those that do not know, Assemble can be used for cost estimating (among other things), which can directly read and write data to and from a Revit model. It uses a table to associate an Assembly Code to Unit (type of measurement), and a Unit Cost. This table can be edited in Microsoft Excel and then Re-uploaded to Assemble. It is also able to work with any tree number system, so you can utilize whatever codes you are already familiar with. The image shows a data tree after importing it into the project.[caption id="attachment_34631" align="aligncenter" width="646"]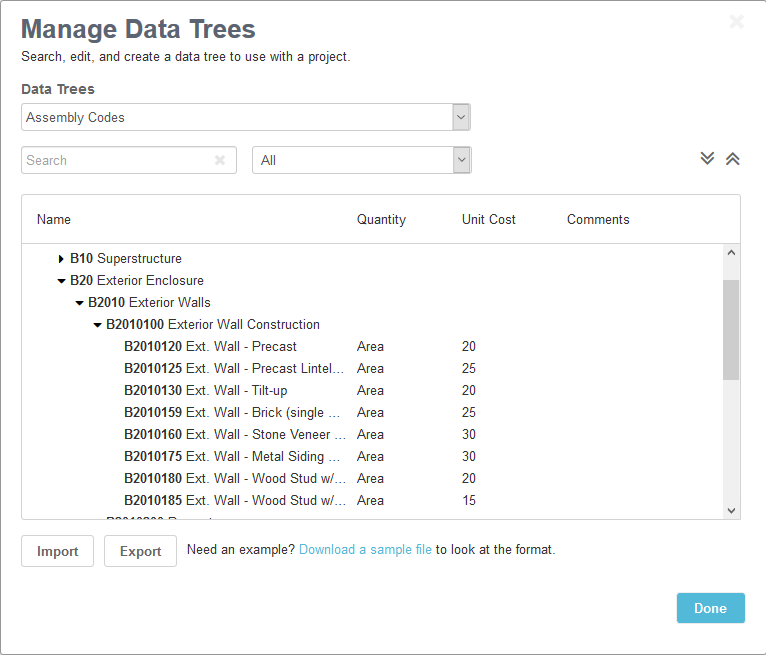 Assemble Data Tree Example[/caption]
After uploading the appropriate cost data tree, Assemble can use the ASSEMBLE CODE parameter value to automatically fill in the Units, Unit Cost, and Total Cost based on the appropriate units taken from model properties. Now here is the really cool part, even though the ASSEMBLE CODE may not have been set (or set correctly) in Revit, you can change it within Assemble and then sync the changes back to Revit. Assemble also gives you the ability to change any Type or Instance property. So if the architect drew the wall to the incorrect height, it can be fixed.
For example, in Revit, you have a Metal Panel Wall Type (metal panel, insulation, studs, etc.) that has an ASSEMBLE CODE value that does not match a code in the cost data tree. In Assemble we can assign it the appropriate value, B2010174 Ext. Wall - Metal Panel, located in the data tree. When we click "Estimate" it will look at the ASSEMBLE CODE value and assign the appropriate Units (SF), Unit Cost (USD) from the data tree and calculate the total cost for that item using the appropriate model data (area, length, etc.). Then sync the model and Revit will show the correct Assemble Code value for future estimating.
[caption id="attachment_34633" align="aligncenter" width="1024"]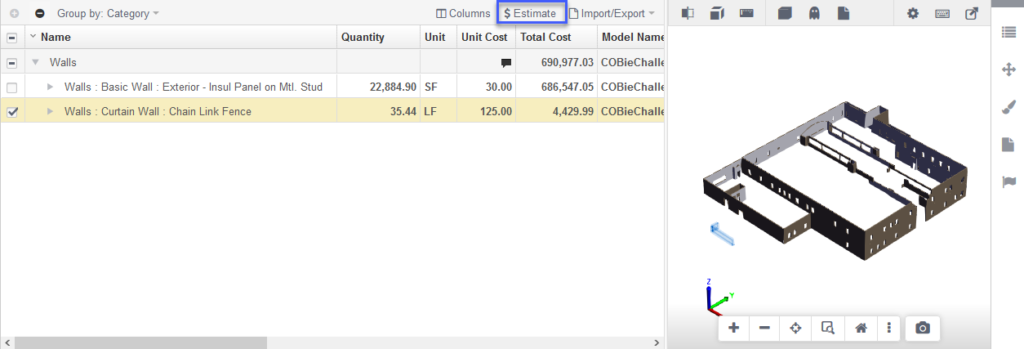 Assemble - Inventory view - Estimate[/caption]
If you have any questions, you can reach out to your Account Manager or contact us here for more information.
View previous posts in the Twelve Days of CADD Care blog series:
(Day One): Revit Tips (Day Two): Named User Management (Day Three): AutoCAD Tricks (Day Four): Bluebeam Tool Chest (Day Five): Autodesk Training (Day Six): Facilities Management (Day Seven): Revit ToolboxCheck back tomorrow and next week to see what the CADD team has in store for all Twelve Days of CADD Care.